Waitlist Administration
The waitlist feature lets you manage a list of clients waiting for a lot to become available. A client can be waiting for one specific lot, or for any lot that matches their stay dates (optionally narrowed to a lot type, e.g. any RV Full Hookup site).
You can add clients to the waitlist manually from the admin panel, or clients can add themselves from the online booking page.
Waitlist Overview
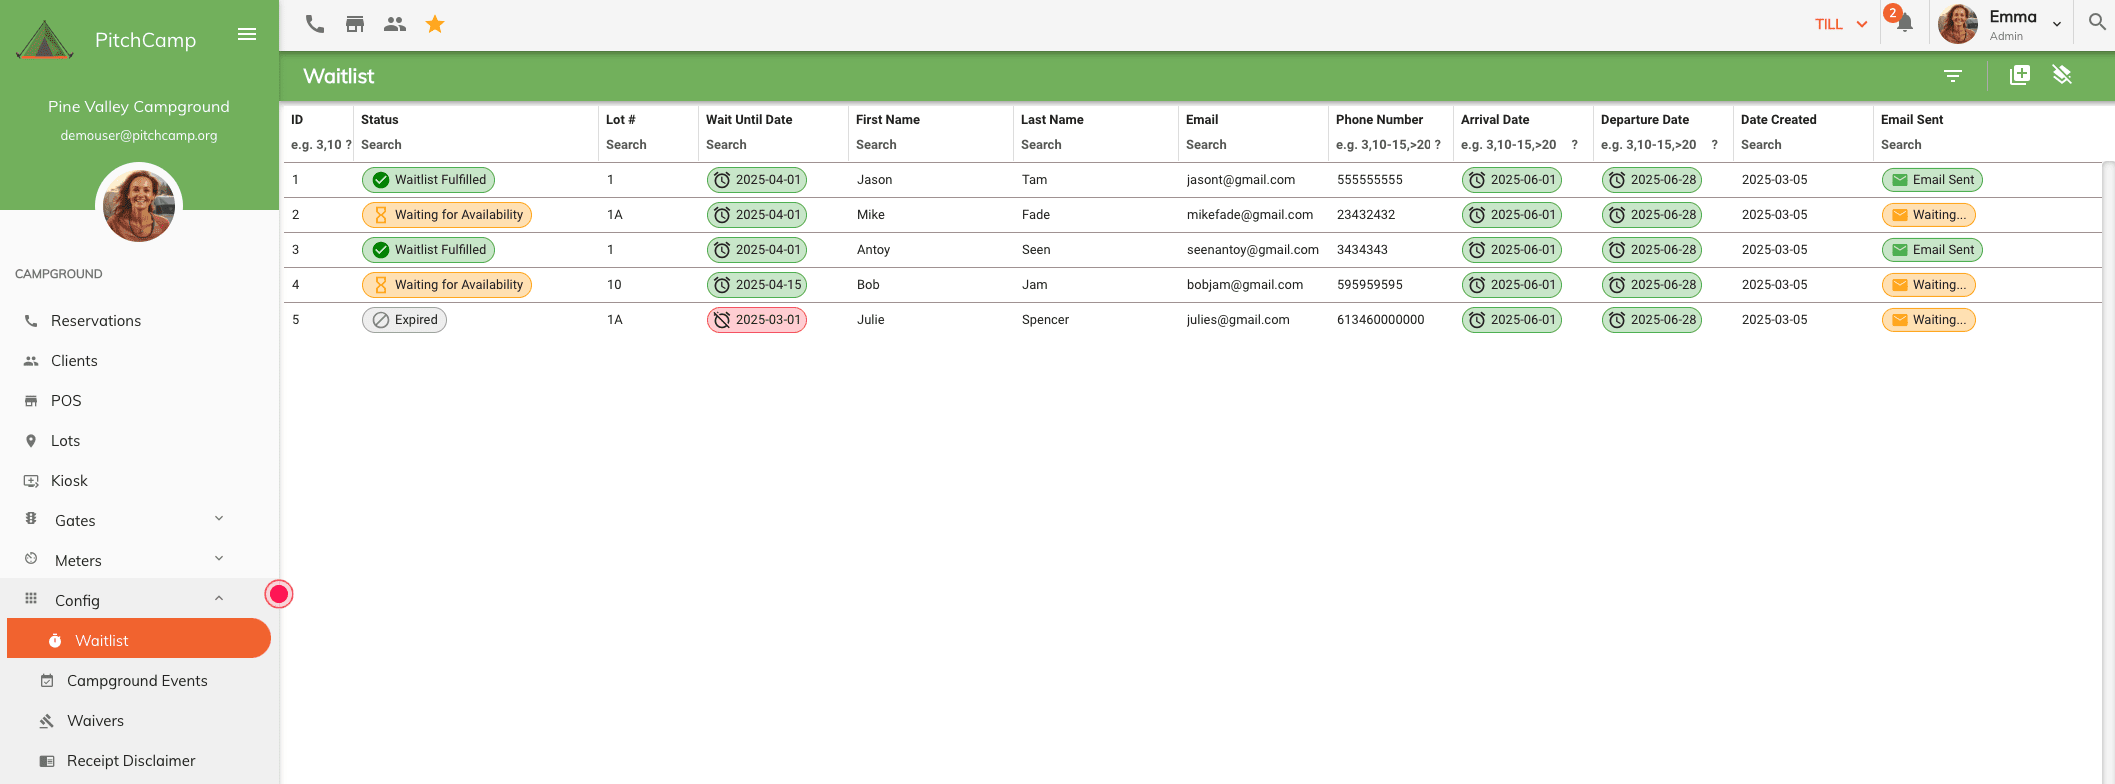
The Waitlist panel, under the Config menu, summarizes and lists every client currently on the waitlist.
- Total Waiting: guests currently on the waitlist.
- Active Requests: requests still waiting for a match.
- Any Lot Requests: requests from flexible guests open to any matching lot.
- Expiring Soon: requests whose Wait Until date is within the next 3 days.
Use the search box to look up a client by name, email, phone, lot, or request number, or narrow the list with the Status and Request Type filters. Each column also has its own search box; Clear resets every filter at once.
The grid lists, for each client: their guest details (name, email, phone), what they're waiting for (a specific lot, or Any Lot with its lot type preference), arrival date, departure date, the Wait Until date (with days remaining), status, and the date the request was created.
Waitlist Status
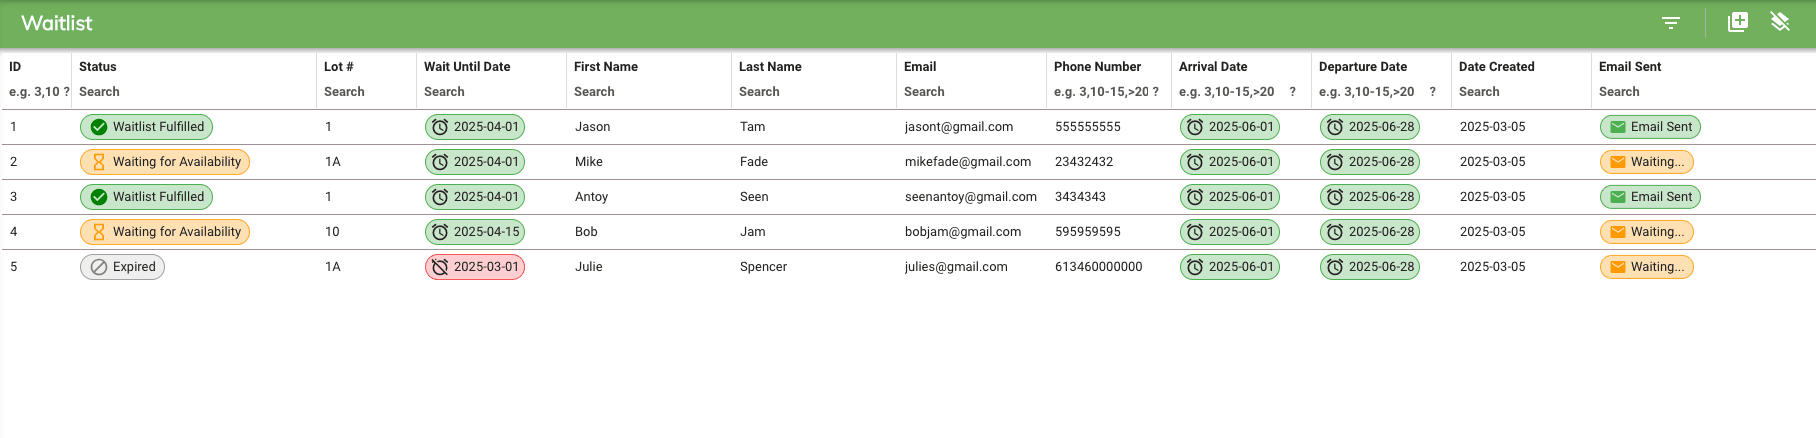
- Waiting for Availability: the request is still active, hasn't been notified, and hasn't expired.
- Waitlist Fulfilled: the client has been notified of a matching opening.
- Expired: the request passed its Wait Until date without being notified.
Adding a Client to the Waitlist
To add a client to the waitlist, follow these steps:
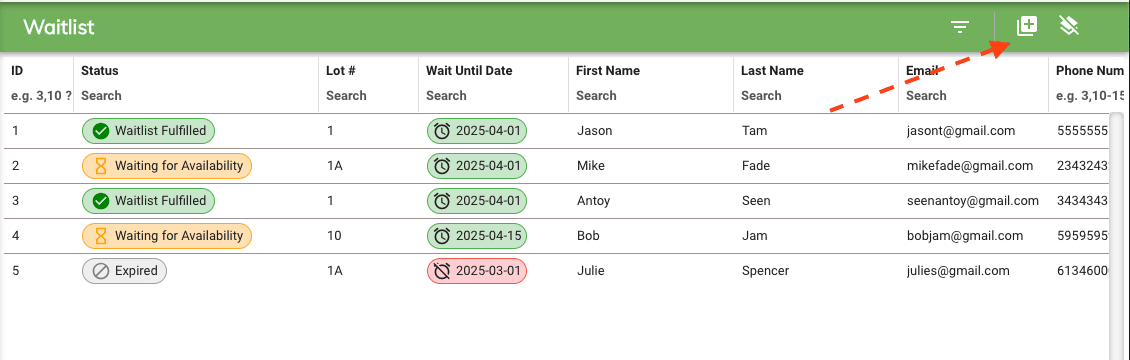
- Go to the Waitlist panel located under the Config menu.
- Click Add to Waitlist.
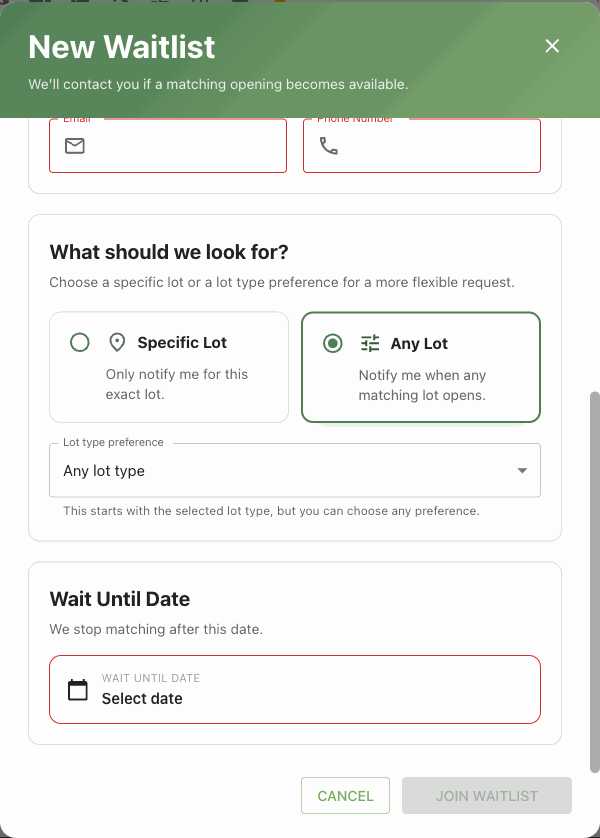
- Under Stay dates, enter the arrival and departure dates.
- Under Guest details, enter the client's first name, last name, email, and phone number.
- Under What should we look for?, choose Specific Lot if the client only wants one exact lot, or Any Lot if any matching opening would work. With Any Lot selected, optionally narrow the request with a Lot type preference, or leave it as Any lot type.
- Under Wait Until Date, choose the date you stop matching this request. After this date the request shows as Expired.
- Click Join Waitlist to add the client to the waitlist.
Editing, Duplicating, or Removing a Client
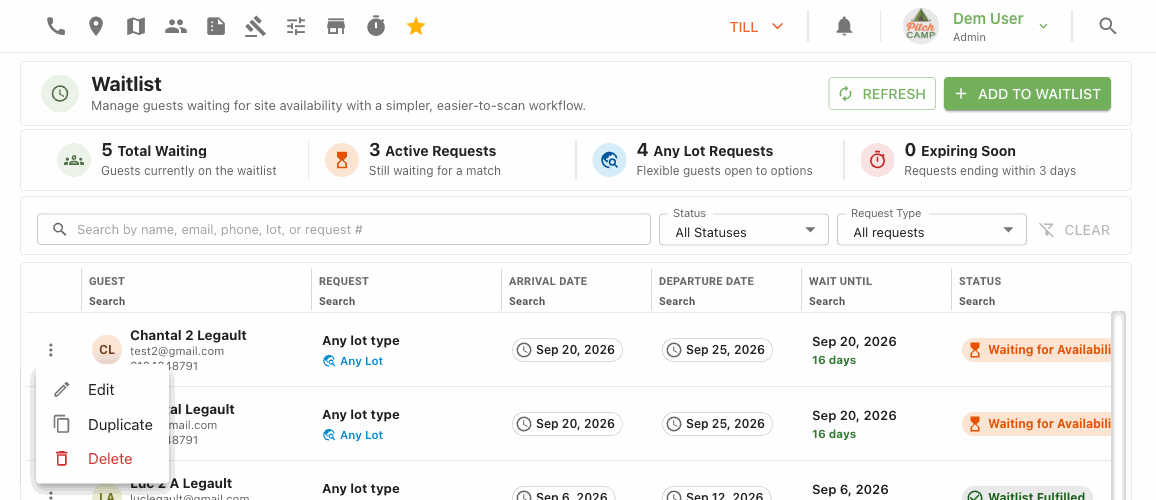
Every row has its own actions menu. Click the ⋮ icon on the left of a row to:
- Edit: open the same dialog used to add a client, pre-filled with this client's information, to make changes.
- Duplicate: open a new, blank waitlist entry pre-filled from this client's details, useful for adding a second request for the same guest (e.g. a different date range) without retyping their contact information.
- Delete: remove the client from the waitlist. This asks for confirmation first.
Waitlist Email Template
The waitlist email template allows you to customize the email that is sent to clients when they are added to the waitlist. You can include placeholders in the email template that will be replaced with the client's information when the email is sent.
To customize the waitlist email template, follow these steps:
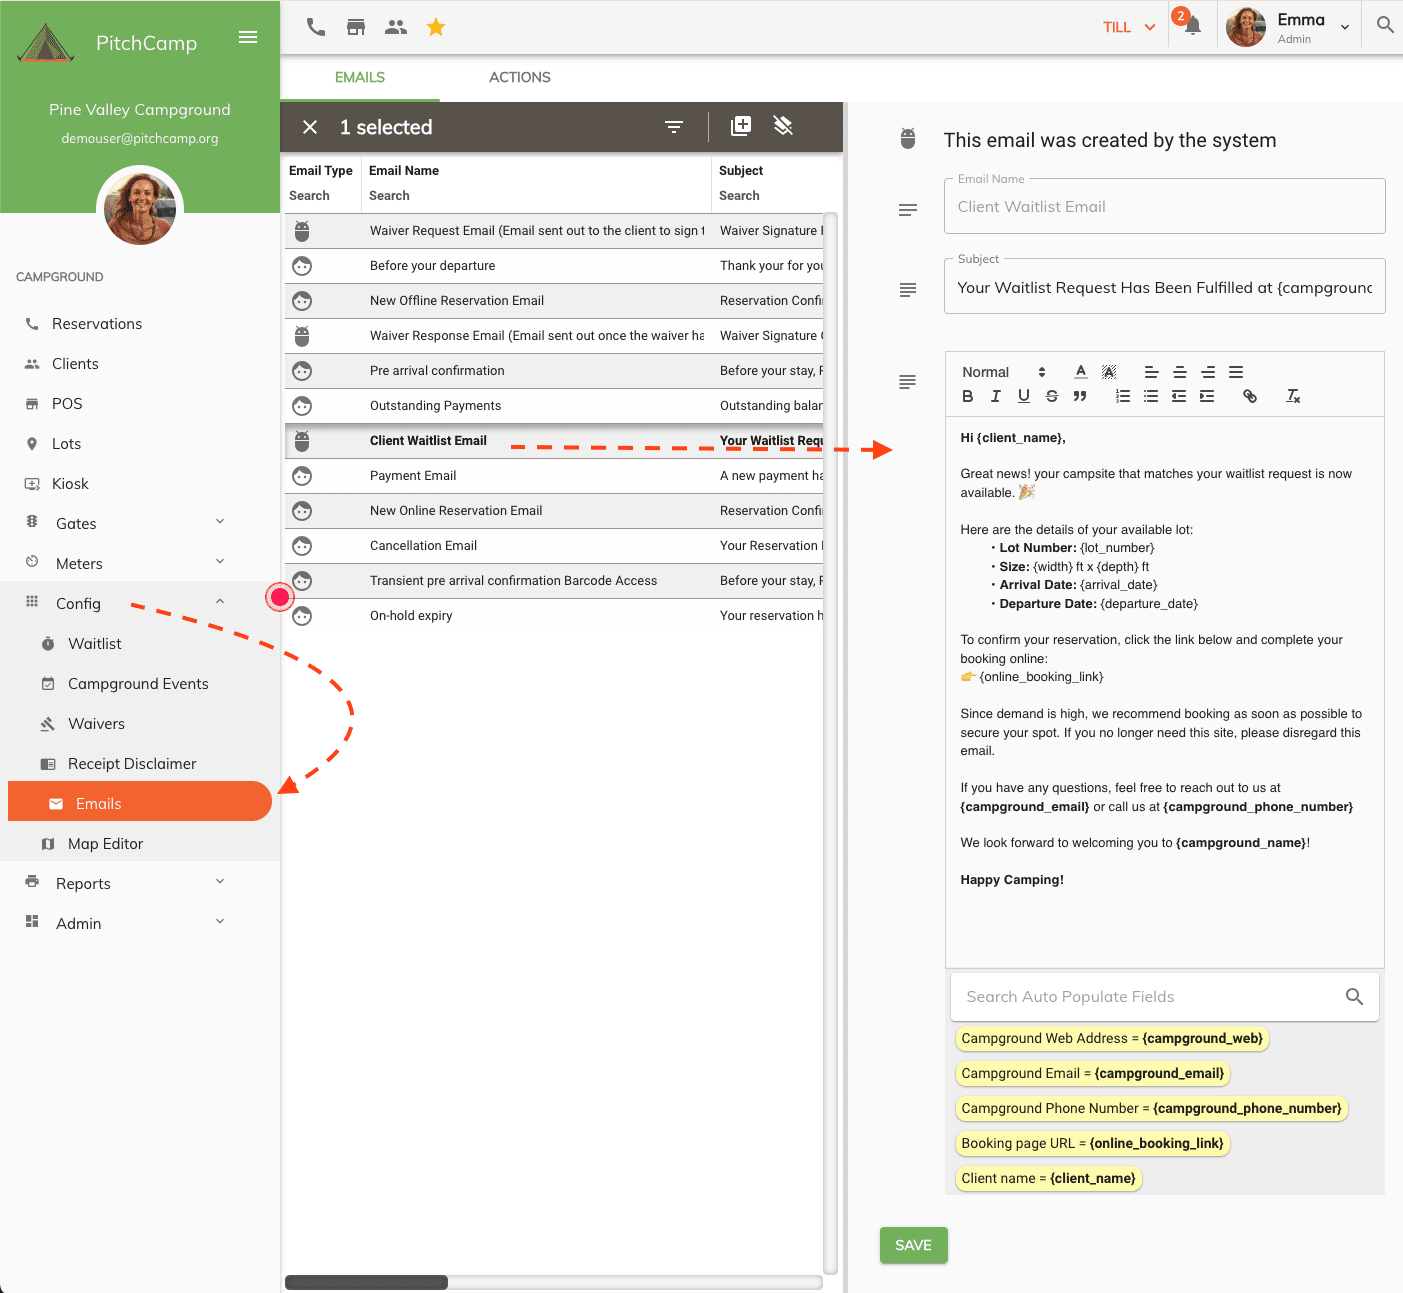
- Go to the Config menu.
- Click on the Email panel.
- Select the Client Waitlist Email template.
- Edit the email template as needed.
-
Click Save to save your changes.
Waitlist Online Booking Link
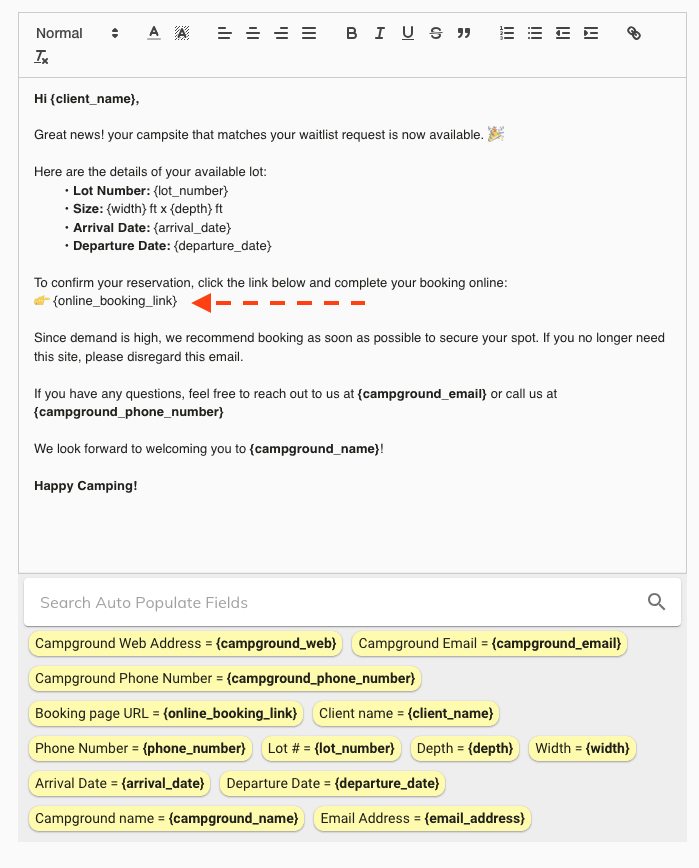
The waitlist online booking link placeholder will create a link in the email that the client can click on to book the lot they are waiting for if the lot is available for online booking.
If the lot is not available for online booking the booking link will be replaced with a message indicating that the lot is not available for online booking and replaced with the campground's phone number.
Controling the Waitlist Feature
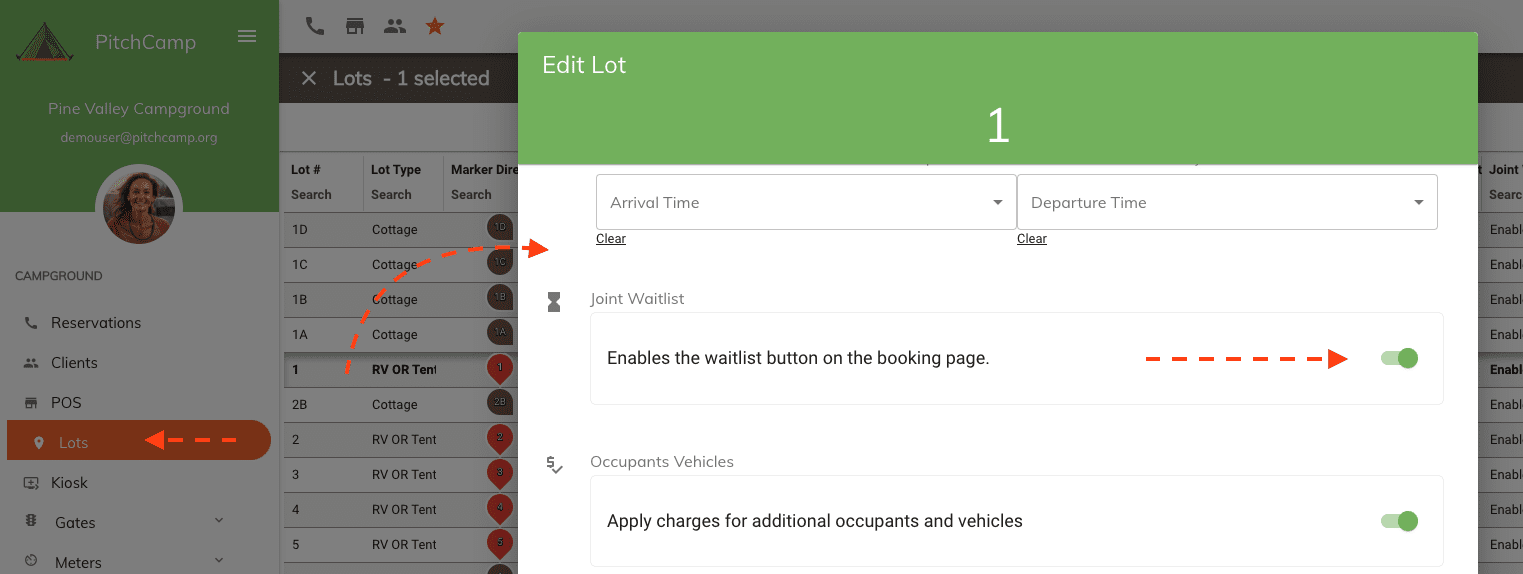
The waitlist feature can be enabled or disabled on a per lot basis. To enable or disable the waitlist feature for a lot, follow these steps:
- Go to the Lots panel.
- Double click on the lot you want to edit.
- Scroll down to the bottom.
- Toggle the Waitlist switch to enable or disable the waitlist feature.
-
Click Save to save your changes.
Bulk Enable/Disable Waitlist
You can bulk enable or disable the waitlist feature for multiple lots at once. To bulk enable or disable the waitlist feature, follow these steps:
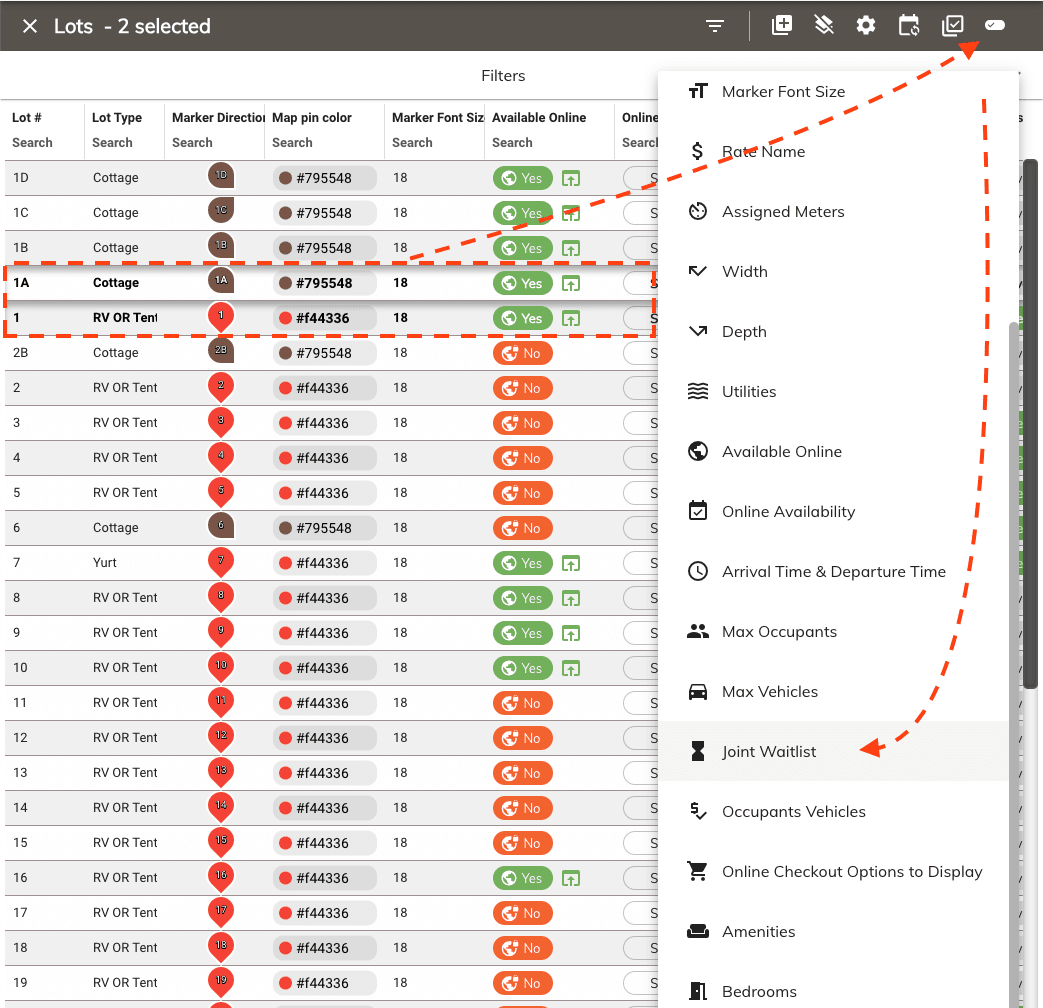
- Go to the Lots panel.
-
Select the lots you want to enable or disable the waitlist feature for by holding down the Ctrl key and clicking on the lots you want to select. or by clicking on the Select All button in the toolbar.
-
Click on the Bulk Edit button.
- Toggle the Waitlist switch to enable or disable the waitlist feature.
-
Click Save to save your changes.