New Reservation
RESERVATIONS
CREATE A NEW RESERVATION
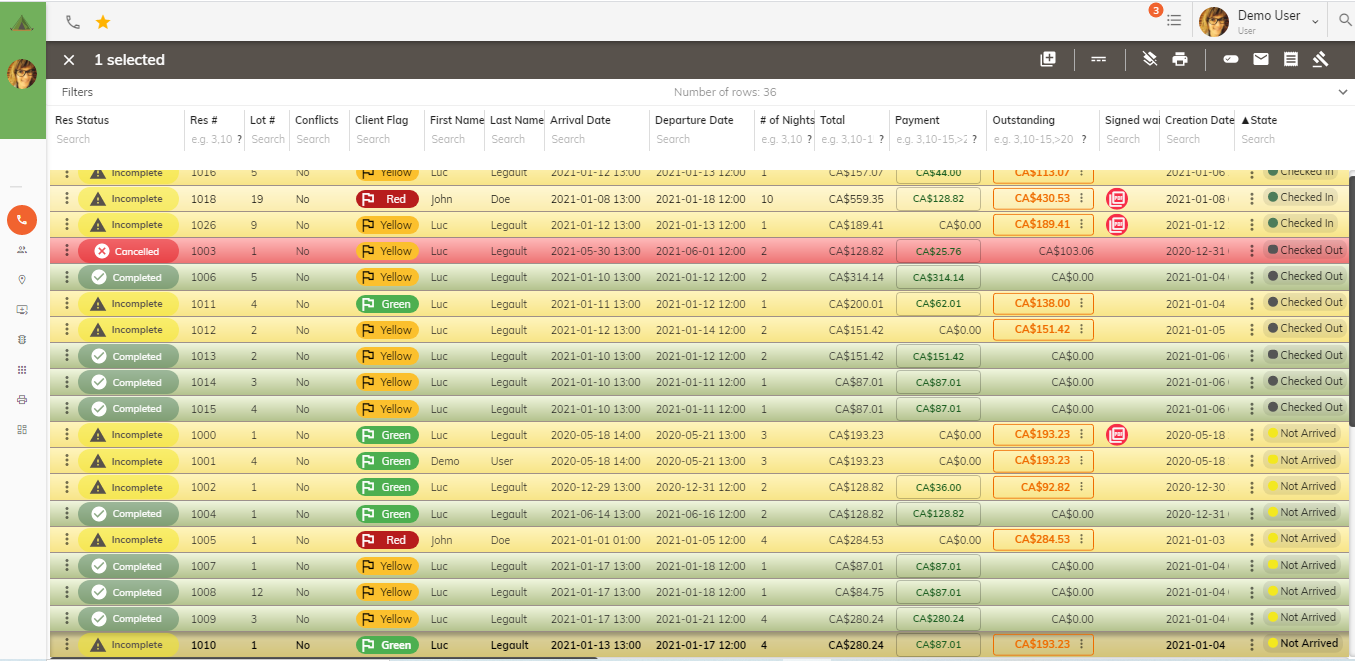
Click on the
 sign at the top of the screen and this opens a new screen with a
calendar to select the reservation dates.
sign at the top of the screen and this opens a new screen with a
calendar to select the reservation dates.
There are 6 steps to creating a new reservation.
Step 1 – Dates Selection
Step 2 – Lot Selection
Step 3 – Client Selection
Step 4 – Occupants
Step 5 – Add-On
Step 6 - Review
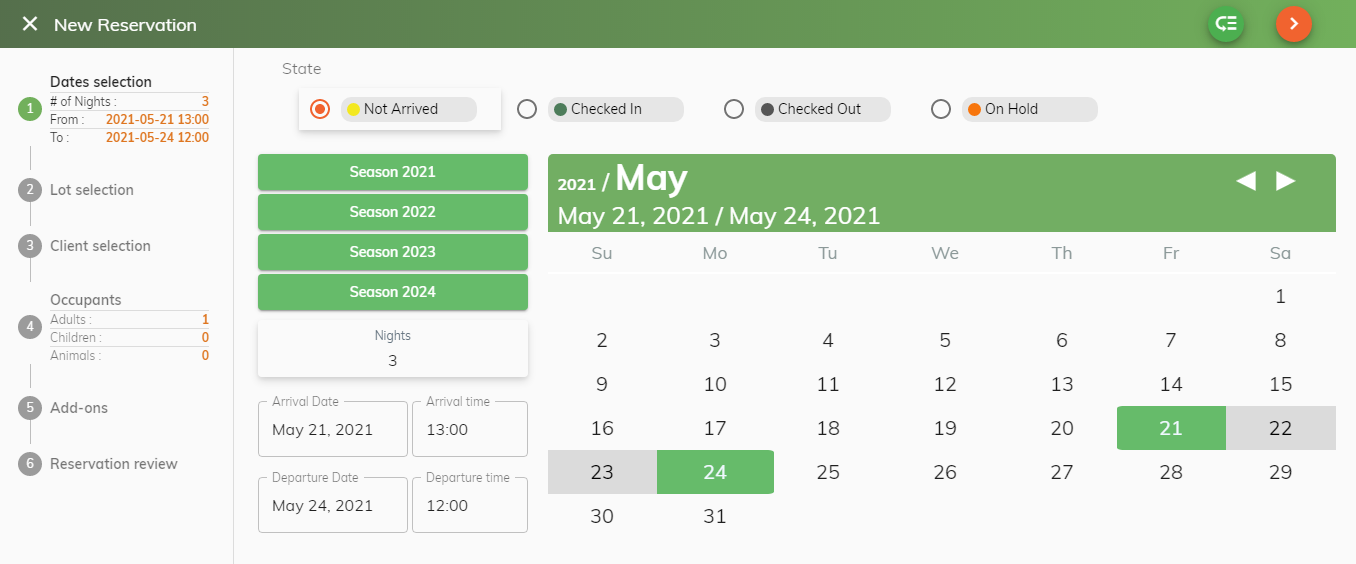
Step 1 – DATES SELECTION
There are 2 types of reservations:
1) Seasonal Site Reservations
2) Weekender Site Reservations
1) Seasonal Site Reservation
Select dates by clicking on the
 . This will highlight the seasonal preset dates in the calendar as well
as give you the total amount of nights in your season.
. This will highlight the seasonal preset dates in the calendar as well
as give you the total amount of nights in your season.

If a new seasonal site reservation is done at any other time of the season, click on the date that the reservation is made and click on the last date of your season. The system will automatically calculate the number of nights for this reservation.
2) Weekender Site Reservation
Select dates by clicking on the first day the customer wants to reserve a site. Click on this day until this is the only date that has been highlighted. Press the CTRL key and click on the last day of the reservation. This will highlight the customer planned stay and will give you the number of nights of the stay.
Step 2 – LOT SELECTION
Click on Step 2 in the left column. This will highlight the step you are doing and open a new dialog box with the map of available lots for the desired dates selected.
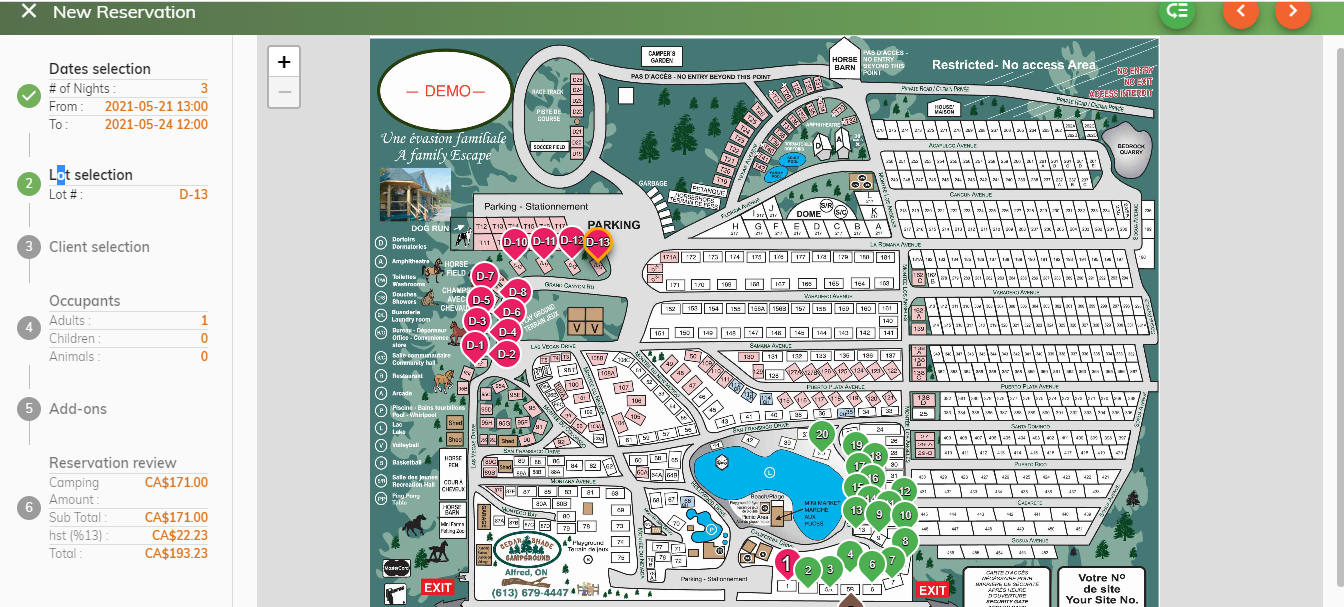
Based on the size of the RV, click on the available lot for this reservation. A new dialog box will open with the lot information.
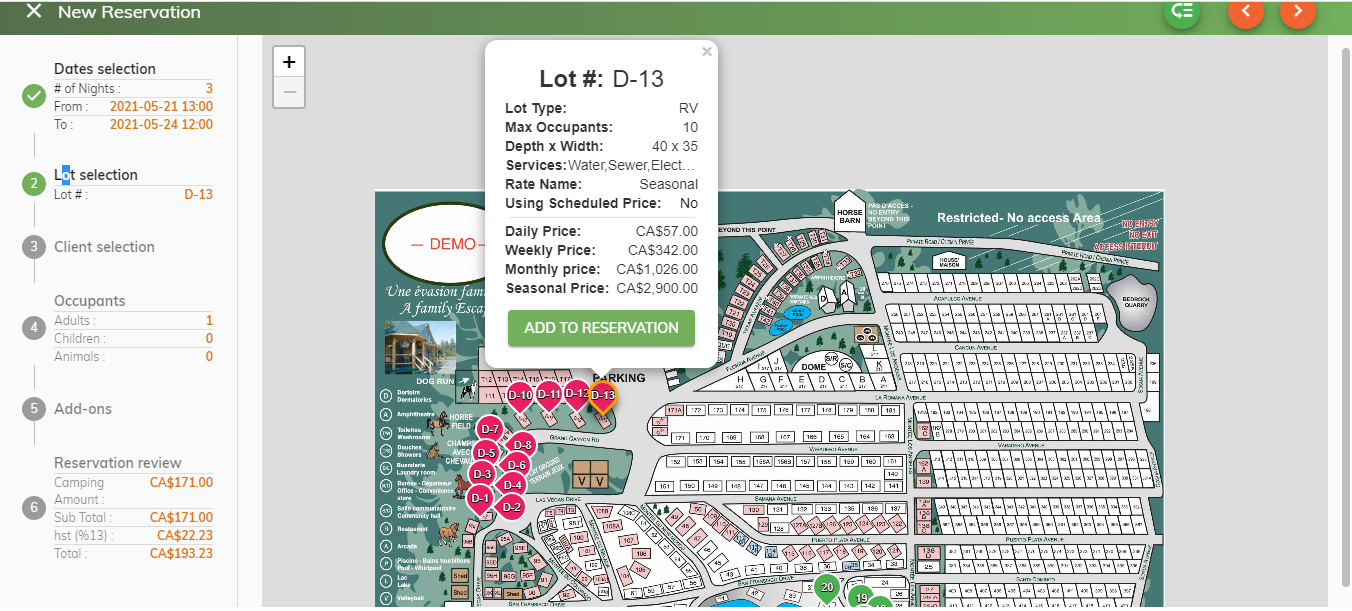
Click Add to Reservation

Step 3 – CLIENT SELECTION
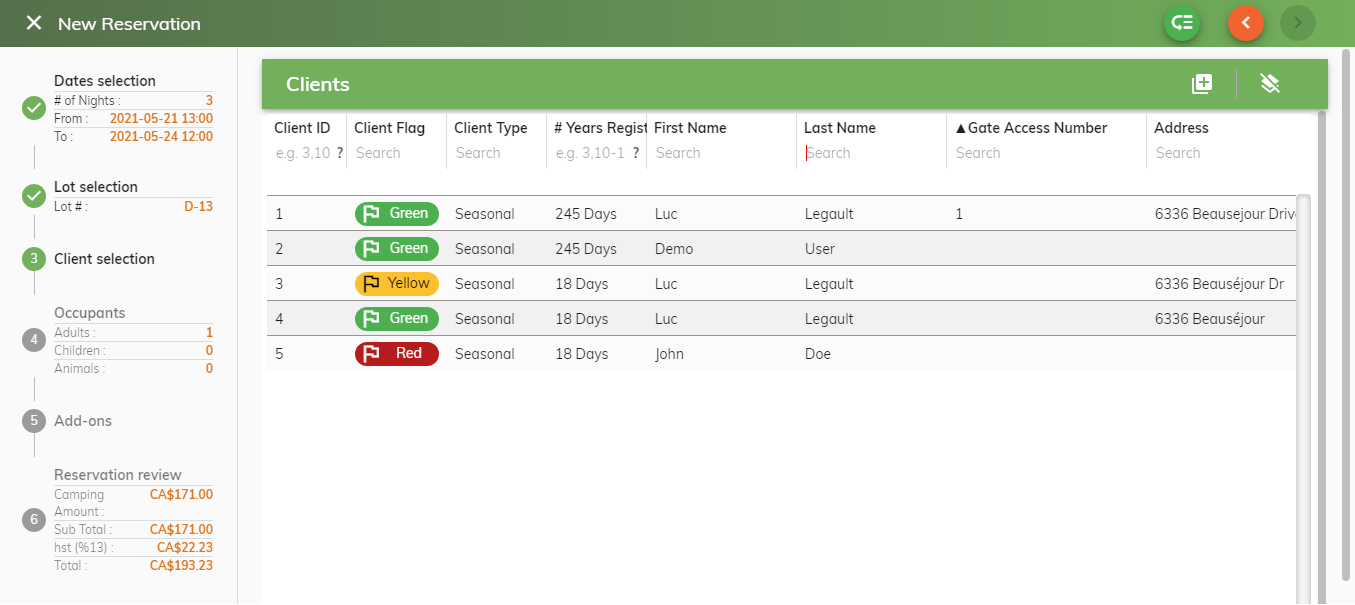
If this is a recurring client, place curser in search field below the last name of your customer.
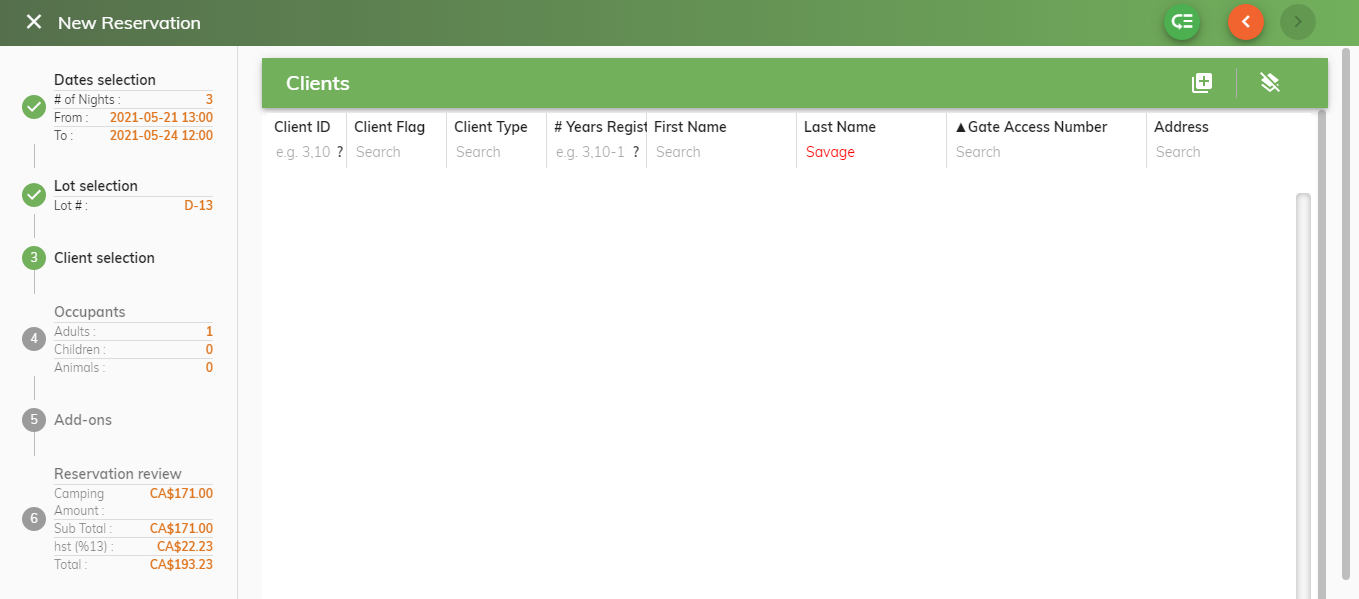
In order to avoid duplication of clients in the system, find out if they have reserved at our campground in the past. If so, search by other last name (spouse) or by phone number.
If this is a new client, click on
the
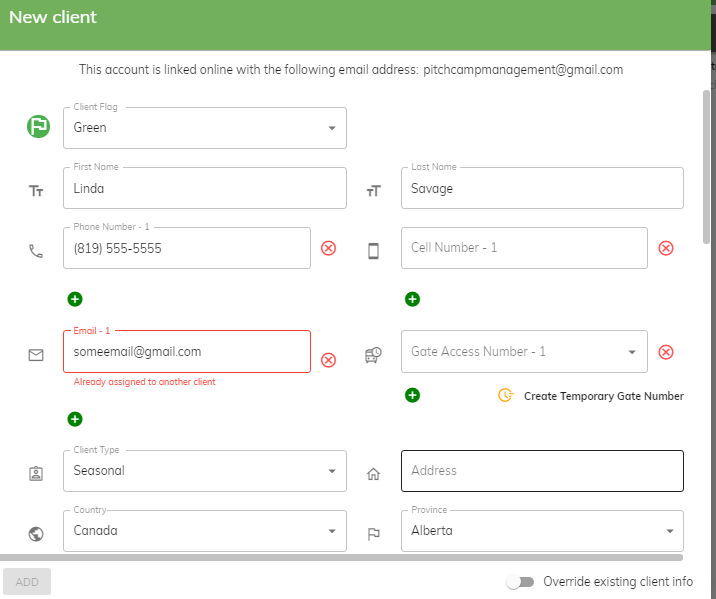
to create a new client. This opens a New Client window.
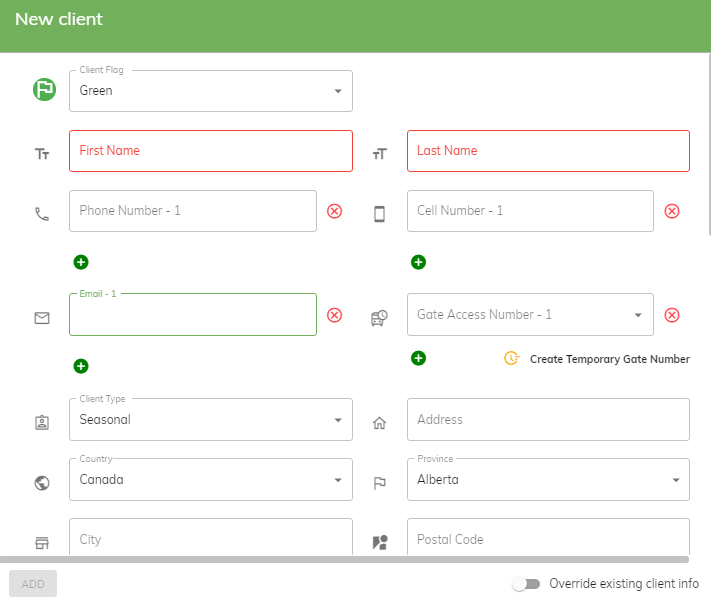
Place curser on the Scroll the bar on the right side of screen downwards to fill-in all fields.
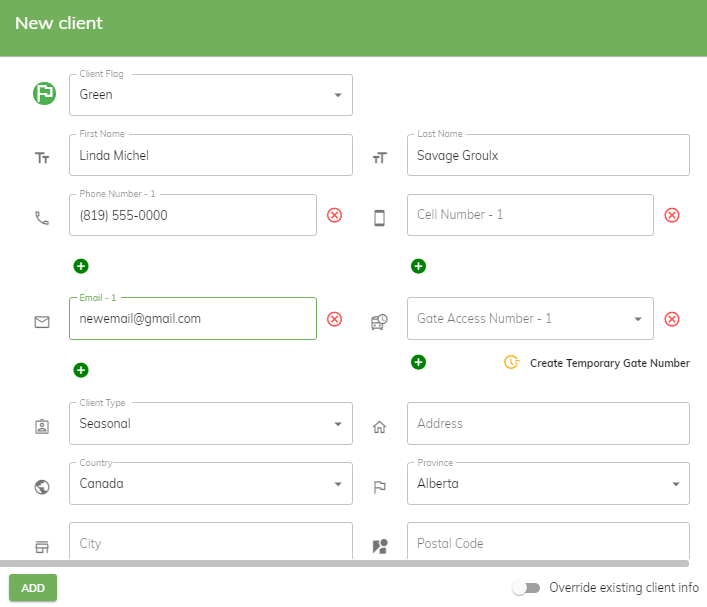
First Name Field – enter the first name of the person making reservation as well as their spouse or significant other. Reminder: the first letter must be in upper case ie: Linda Michel
Last Name Field – enter the last name of the person making reservation as well as their spouse or significant other. Reminder: the first letter must be in upper case ie: Savage Groulx
This is important otherwise when sorting a report, if the name has no upper case, it will not sort properly and the name will go to the bottom of the report.
Phone Number – a must as we need to confirm reservation with client
Email address – a must as we need to send a reservation confirmation and other documents to them.
Should a box be highlighted in red in any of the fields, this means the customer is already in the database. Click anywhere outside this screen to exit or click the escape key. Go back and verify the information prior to creating a new client.
To fill-out all fields, click on Scroll bar at the right of the screen.
Payment:
When doing a manual payment at the office, enter the credit card information in the client notes fields as you will need to enter information in debit/credit card machine at office.
Stripe Payment:
The following fields are applicable when using the Stripe payment system only for online reservations.

Click on the
 sign to add the credit card information.

Enter information in all fields including full credit card number, expiry date and CVC number at back of card. Once all information has been entered, click SAVE.
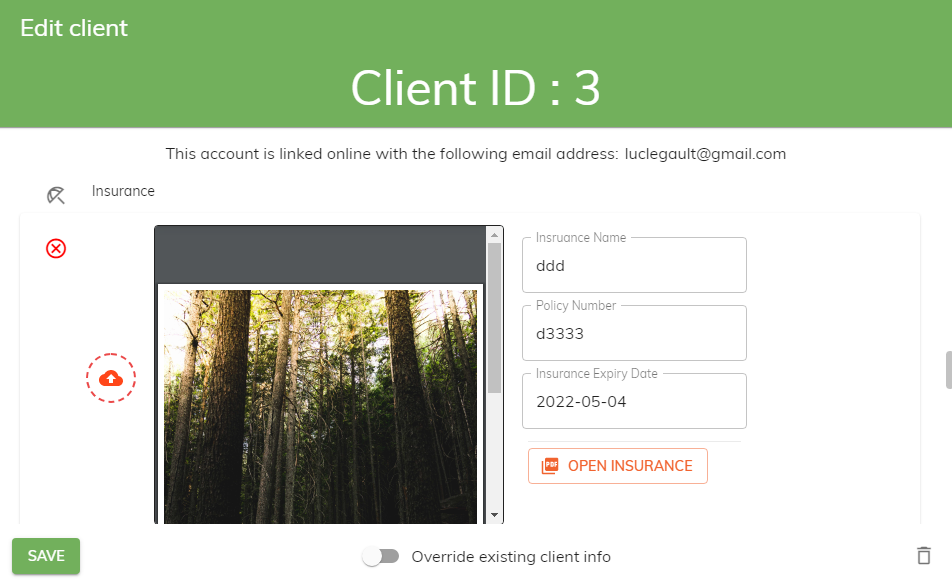
For seasonal customer only, click on the
sign and add the Insurance Information. You can upload a pdf version of
the Insurance Policy or simply enter the Insurance Name, Policy Number
and Expiration Date.
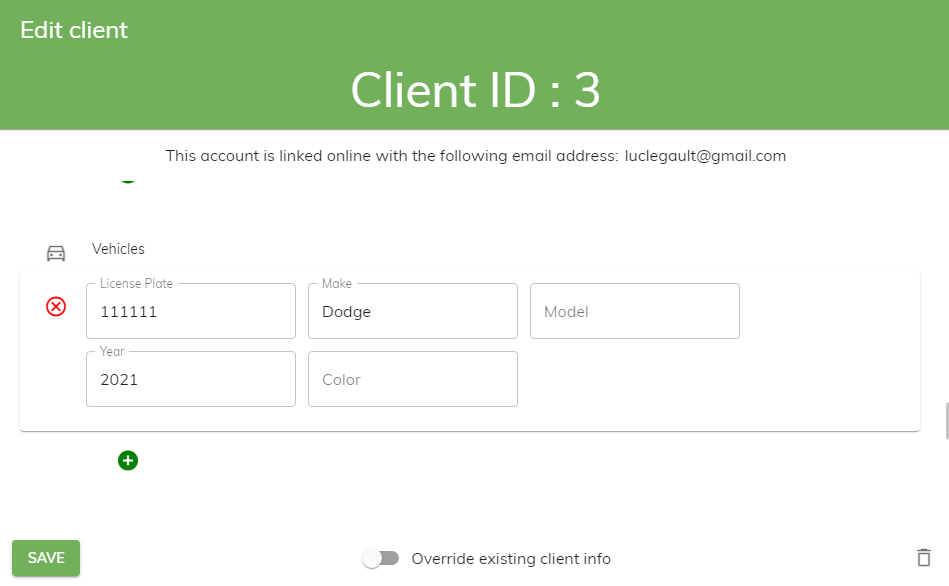
Vehicles – click on the
to add the license plate number of the vehicle that will be on site
during the reservation. If more than one vehicle at one site, click
again on the
for each vehicle.
CLIENT ID ADDITIONAL OCCUPANTS
This is automatically filled-in when the waiver is filled out and returned to the reservation system. It is important that all family members on the reservations have been added complete with their date of birth. This will determine if any extra charges are applicable based on their age.
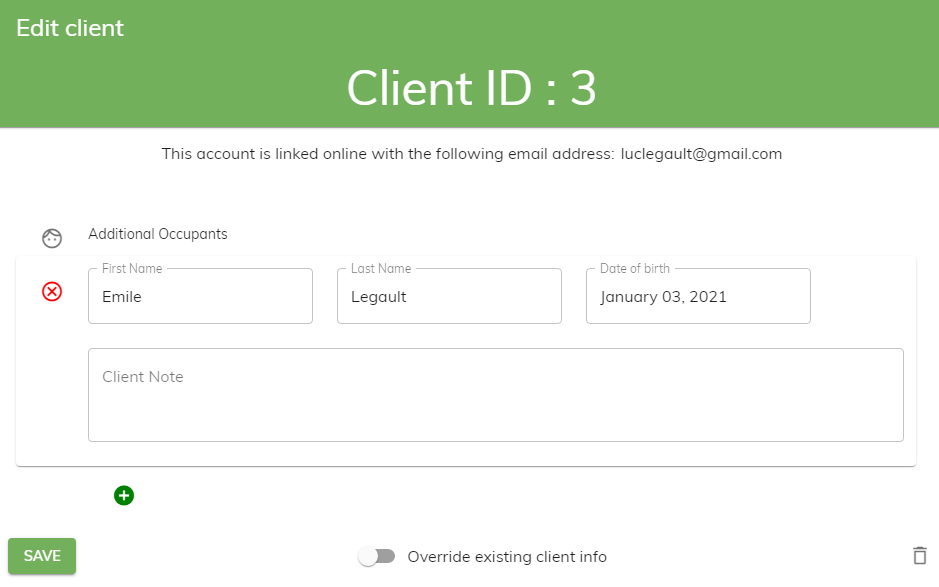
Client Note – this is where you need to add any information regarding the client. For seasonal campers, this is where you would add the Golf Cart First Time Fee payment date or a credit card number for manual payments.

Once all the fields have been filled-out, click the ADD button at the bottom of the screen.
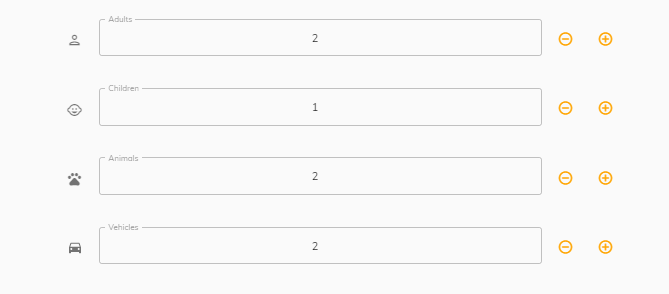
Step 4 – OCCUPANTS
Click on the + sign beside each field to insert the amount of adults, children, animals and vehicles applicable to the reservation. Extra fees are applicable on animals and vehicles.
Step 5 – ADD-ONS
Icons:
 All boxes are blank
 All boxes are selected
 Downloads from
previous reservation
Downloads from
previous reservation
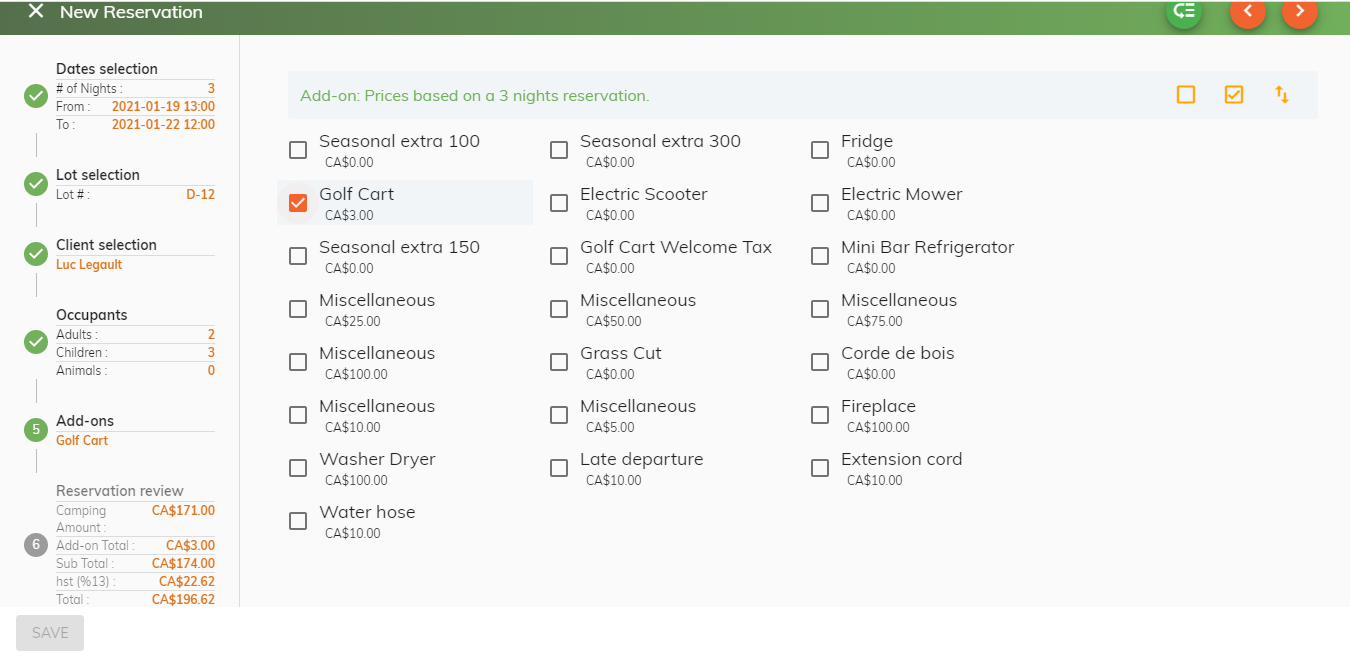
Check all applicable boxes that apply for seasonal or weekender sites.
Step 6 – RESERVATION REVIEW
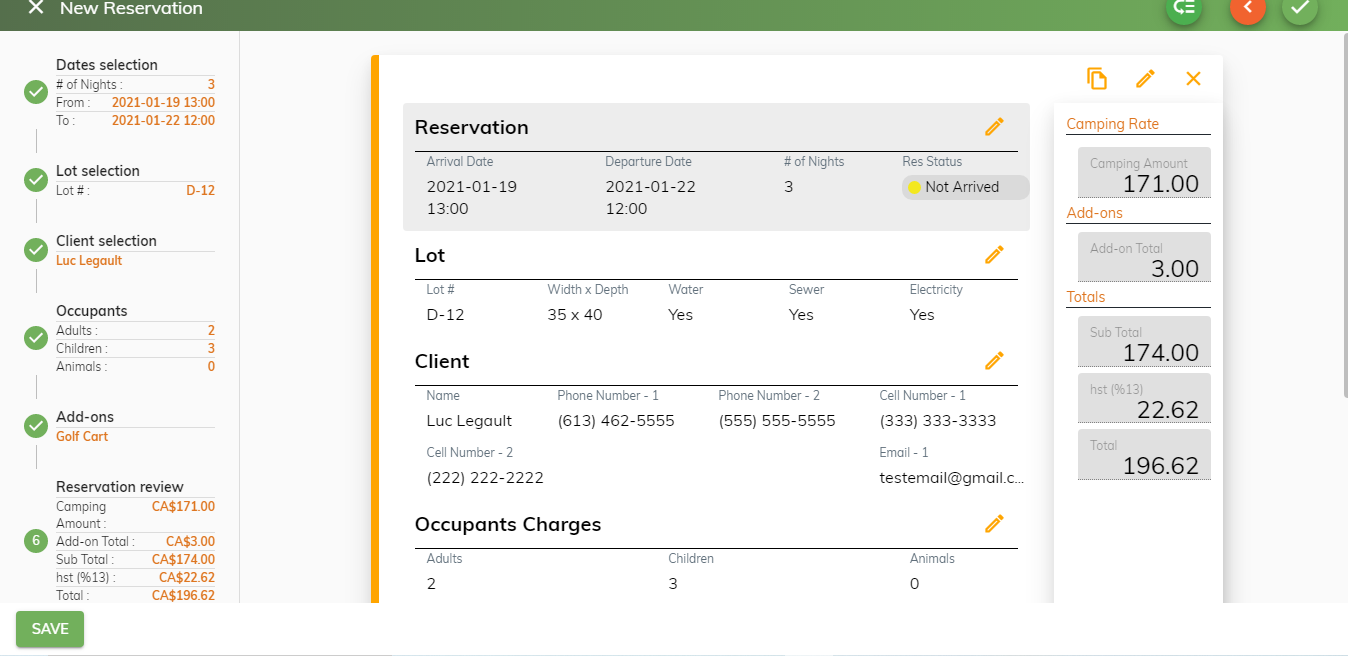
If all reservation information is accurate, click the
 button at the bottom of left column.
This opens up Editing Reservation Screen.
 Email
- An email is automatically sent to the client once the reservation has
been made complete with a copy of the receipt.
Email
- An email is automatically sent to the client once the reservation has
been made complete with a copy of the receipt.
 Receipt
– Print a copy of the reservation and file in the appropriate monthly
reservation file, by date of reservation preferably.
Receipt
– Print a copy of the reservation and file in the appropriate monthly
reservation file, by date of reservation preferably.
 Print Barcode – you can assign a barcode to customer should they need to
leave the campground and return after office hours.
Print Barcode – you can assign a barcode to customer should they need to
leave the campground and return after office hours.
 Waiver – a copy of the English waiver is automatically sent to the
client.
Waiver – a copy of the English waiver is automatically sent to the
client.
If a copy of the signed waiver is not in the file prior to customer arrival, it needs to be done when the customer checks-in. You can send a copy of the waiver to the Kiosk which is the tablet at the office and have them fill in the waiver and sign.