Managing Tills
Till management is the process of adding, removing and selecting a tills.
From the till management window you can also perform:
- Cash In
- Cash Out
- End of Shift.
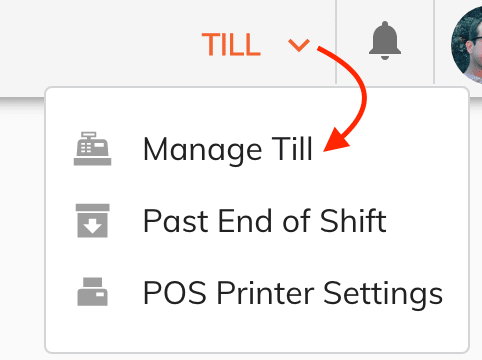
To access the Till Management panel click on the Till menu then select Manage Till.
Adding a New Till
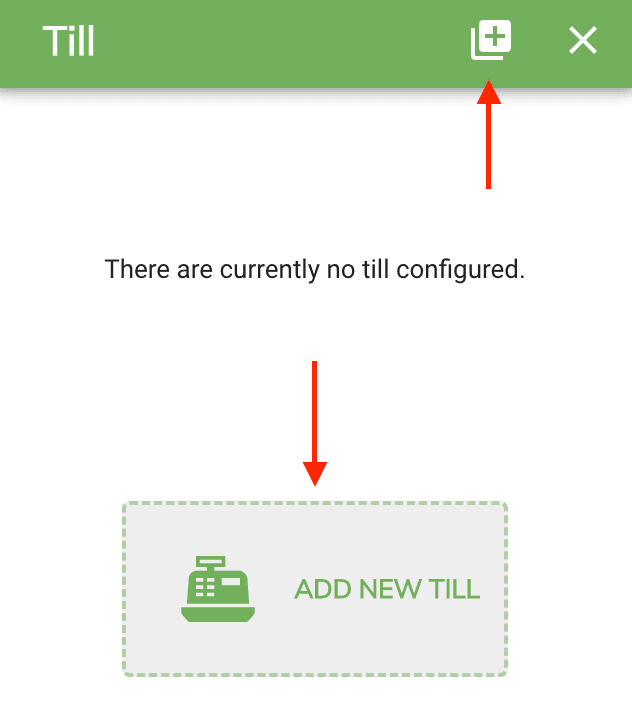
Adding a new till is done form the Manage Till panel and there are two ways you can add a new till.
Note
There are no limits to the number of till you can have.
- You can add a new till from the top right menu.
-
Or clicking on the add new till button if you don't have any till yet.
-
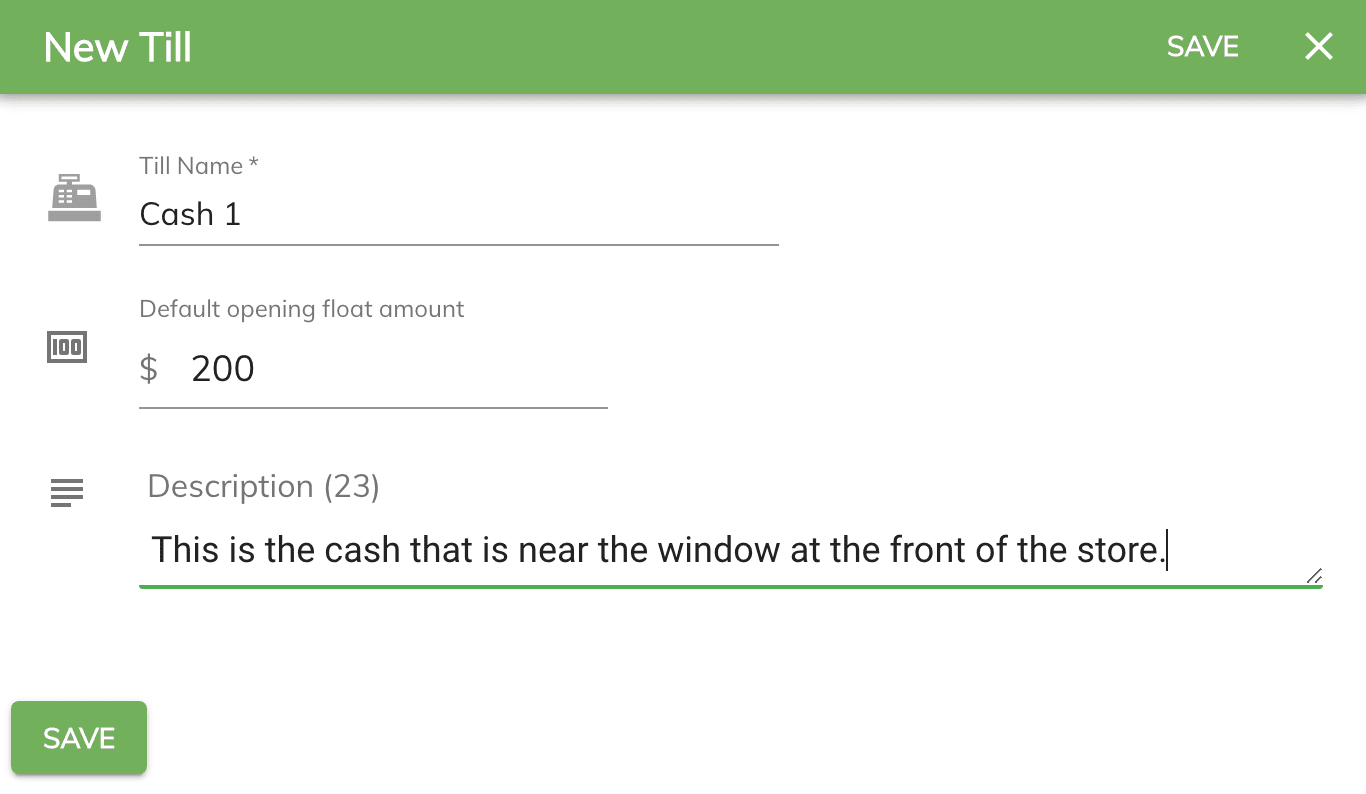
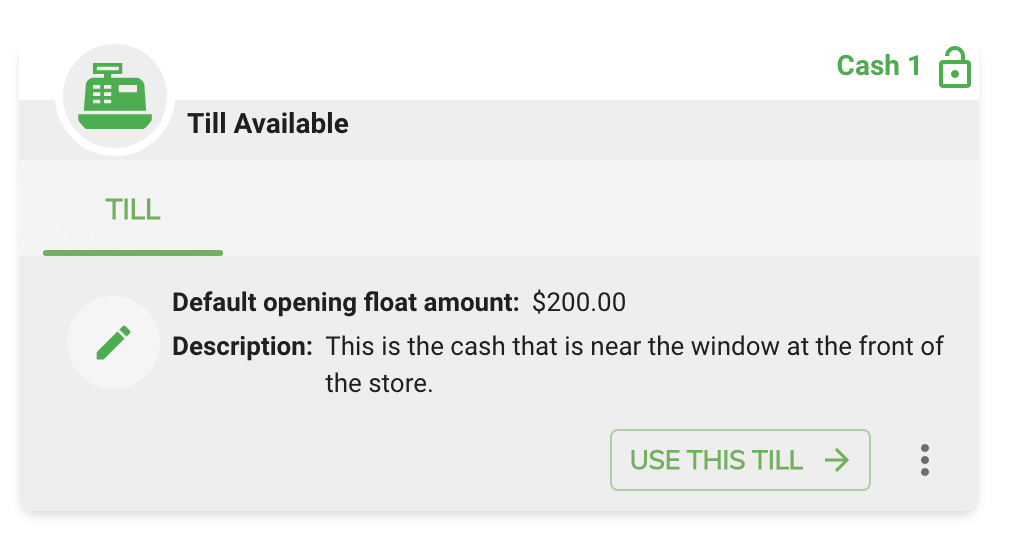
Enter the name of your new till. Give it something descriptive that you and your team will understand.
- Enter the default float amount. This is the default cash value you will have in your drawer at the start of your shift. This will be used as the default starting cash flow and you'll be able to adjust it should your till not have this exact amount at the start of your shift.
- Enter a description. This is optional however it could help your newer employees.
-
Then click on the Save button to add the new till.
-
Once the till is saved you will see it appear in the till management window.
Editing and Deleting a Till
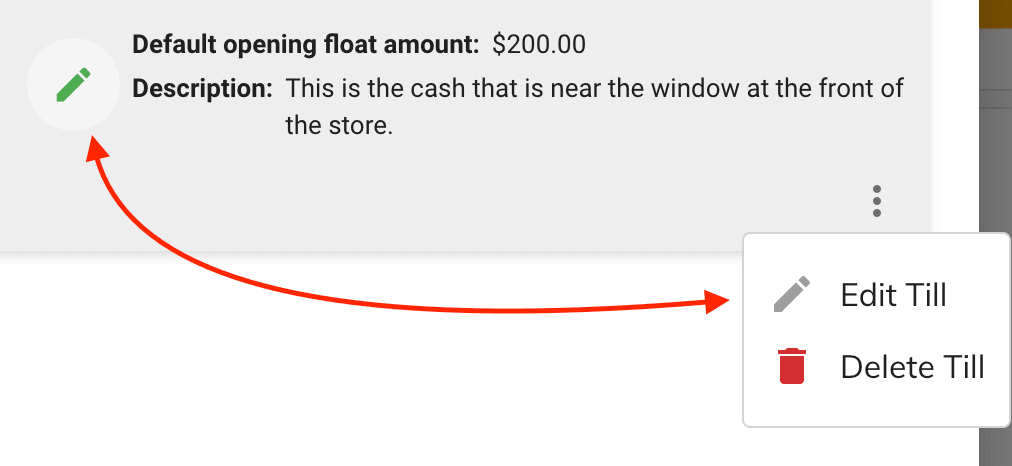
The till's default values can be edited by clicking on the edit button or by selecting the edit option from the dropdown menu.
- To edit a till click on Edit Till
-
To delete a till click on Delete Till
Selecting a Till
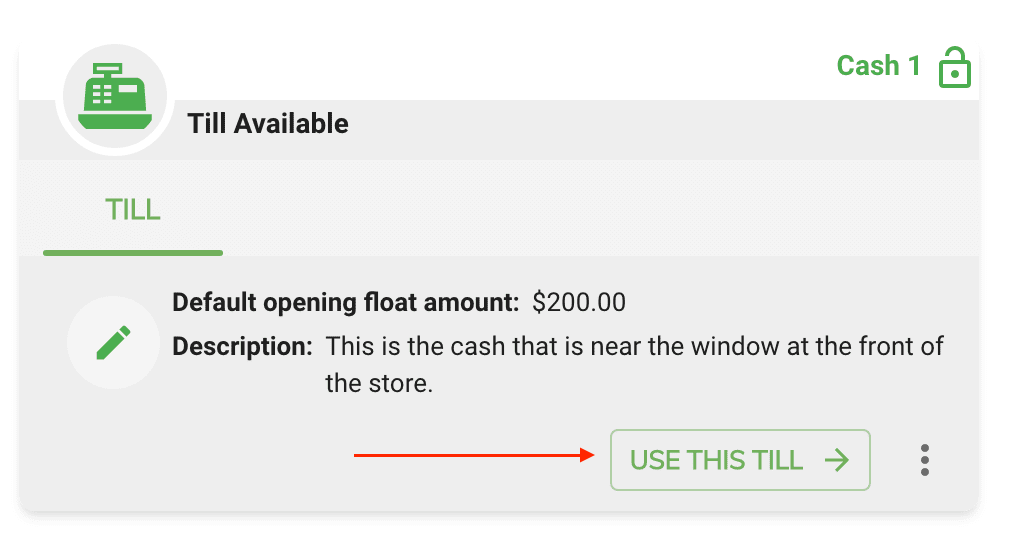
Once you have a till added you can then start to use the till by clicking on the Use This Till button.
This will then assign the till to your account and nobody will be able to use it during the period that it's assigned to you.
-
Click on the Use This Till button to select a till to be assigned to you.
-
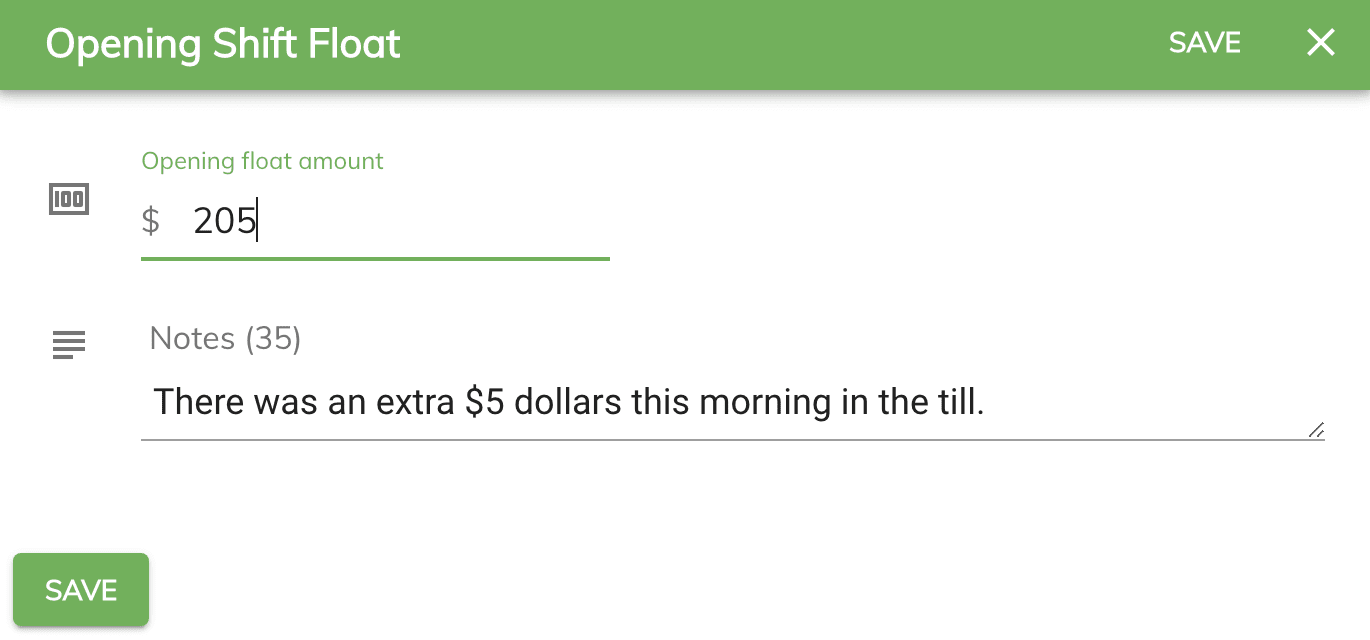
Then count the total cash value from the physical cash drawer.
- Enter that value in the
Opening float amounttext box. -
Adding a description is optional.
-
Click on the Save button to save your changes.
-
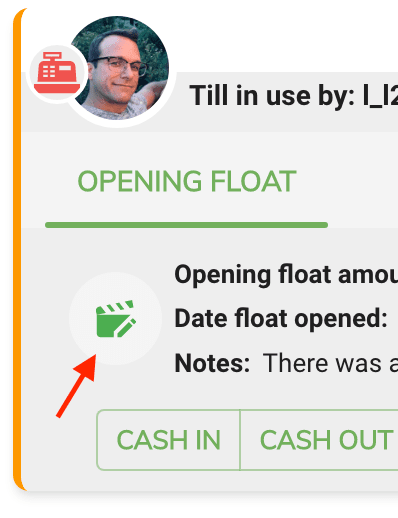
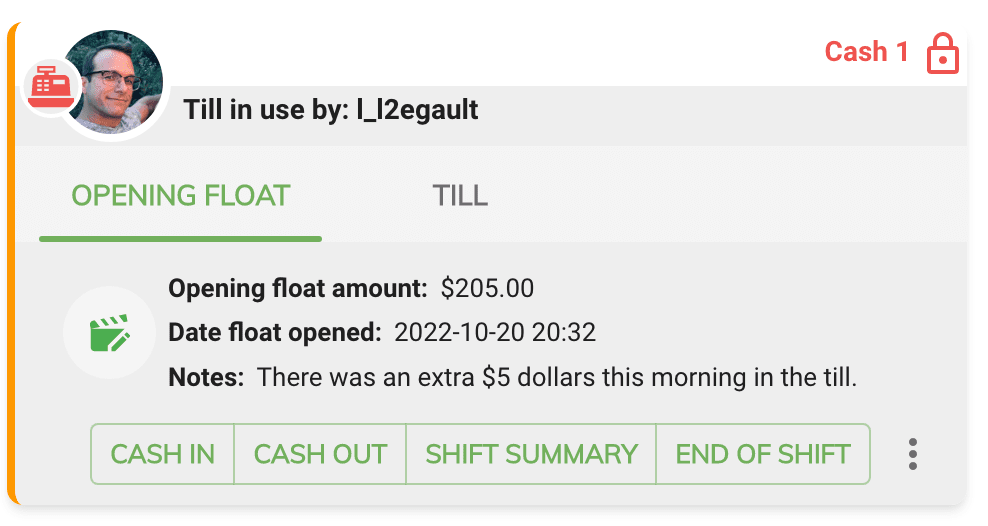
Then you will see the selected till assigned to you.
- You will see your avatar beside the cash register.
- The padlock in the top right of the till will turn red and be locked.
- And you will see an orange border to the left of the till item indicating this is your till.
Editing Opening Float Amount
Once the till has been assigned to you'll still be able to edit your opening float value and description by clicking on the edit button.