Emailing Clients
Using PitchCamp you can easily email your clients that are already entered. All that's required are the clients email address on their profiles.
Entering the Clients Email Addresses
You will need to open up the client's profile. This can be done from the reservation panel or the client pane.
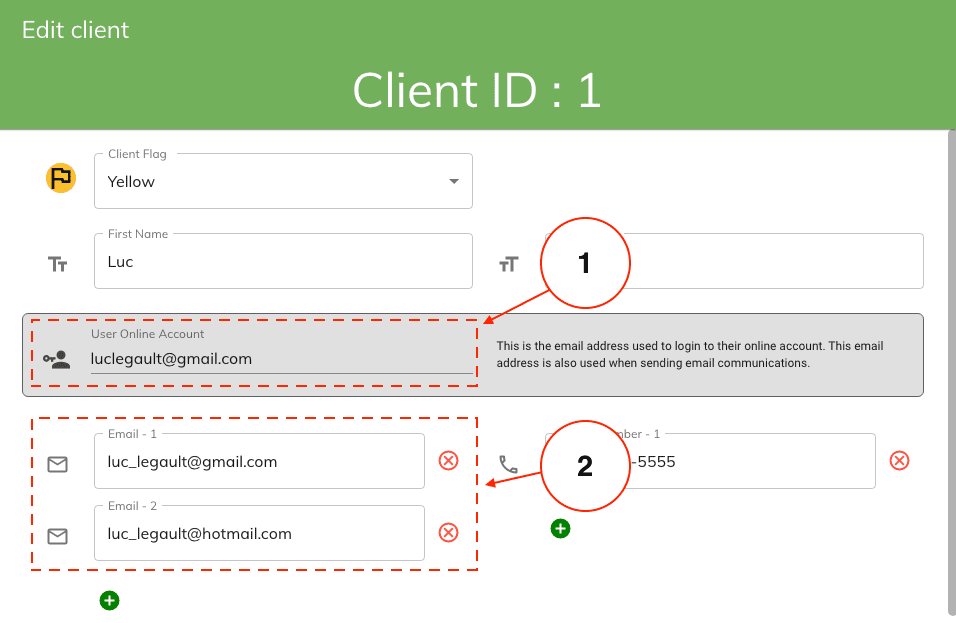
There are two areas that can be used to enter the clients email address when communicate with your clients.
- The first one is the User Online Account.
- The user online account is the email address used to login to the clients online portal account. This email address is also used when sending email communications.
-
The second one are the Email Fields.
- These emails are only used when sending email communications. You can add up to four of these emails per clients.
Sending Manual Emails
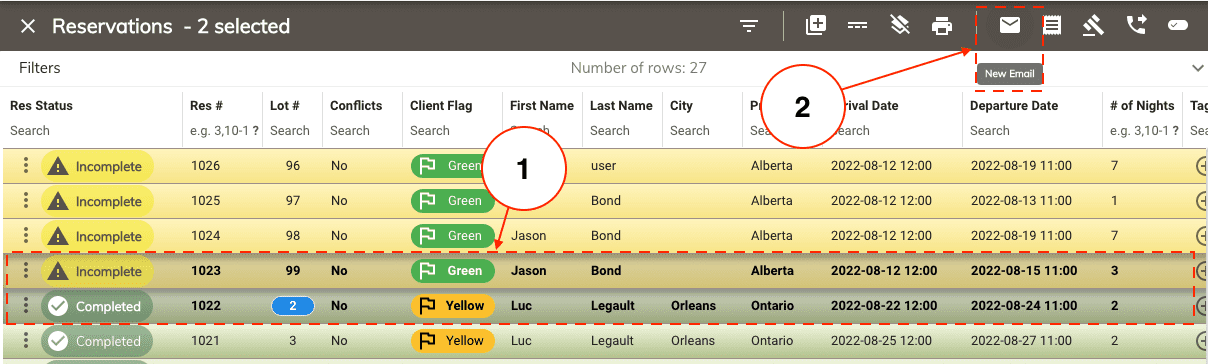
Emailing your clients manually is done from the Reservation panel.
-
Start by selecting the reservation(s) from the grid.
-
Then click on the New Email button from the menu.
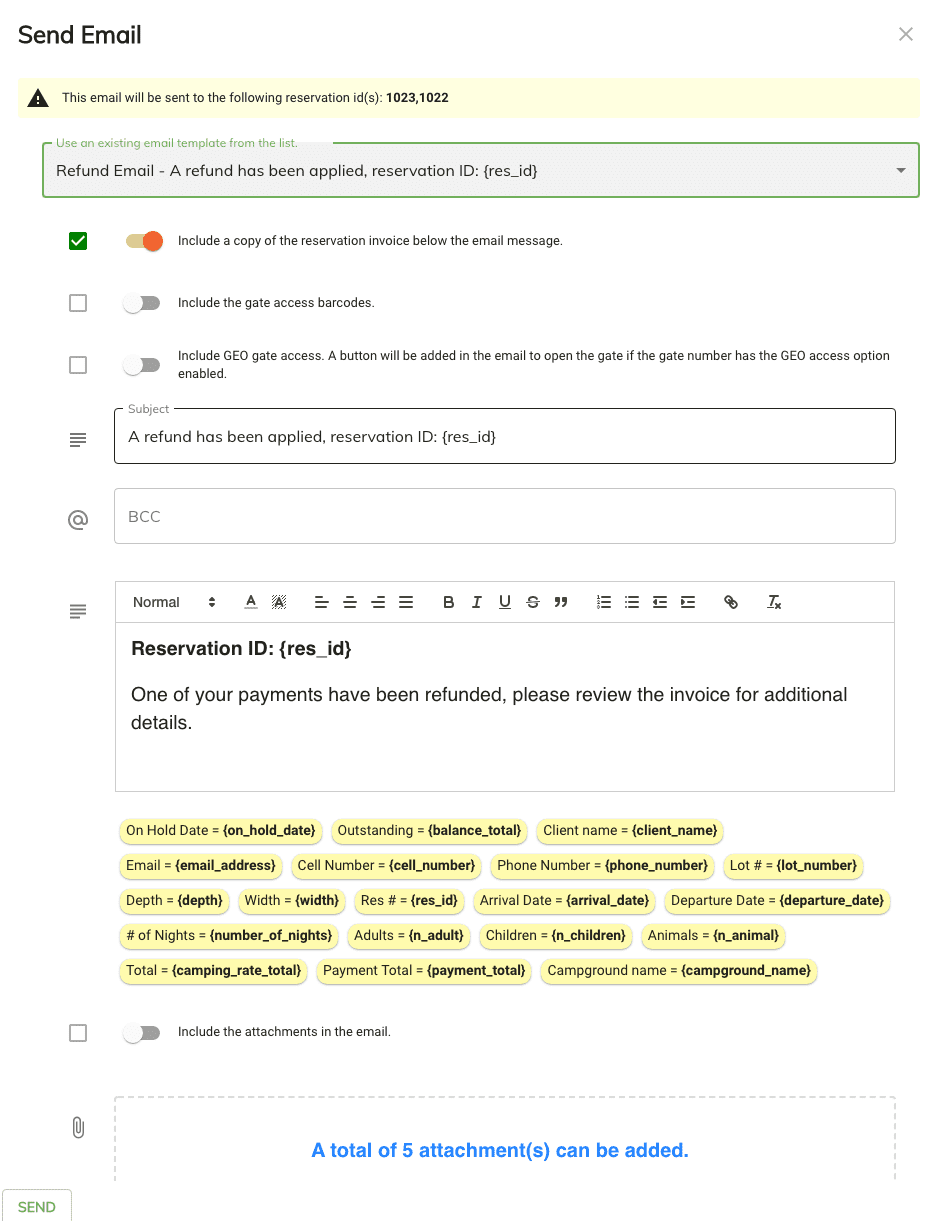
This will open up the email window where you will be able to:
- Use and existing email template.
- Control what to include in the email. Example (Invoice, Gate Barcode Numbers etc...)
- The subject and email body.
- Also attach PDF documents or images to the email.
Emailing your Seasonal Clients
Let's say that you would need to communicate with your Seasonal Clients only. This can be done by filtering your reservation grid accordingly before selecting your reservations/clients to be emailed.
Note
This required that your client types have been properly set for your Seasonal clients VS your Transient clients.
-
Let's start by filtering our reservations:
-
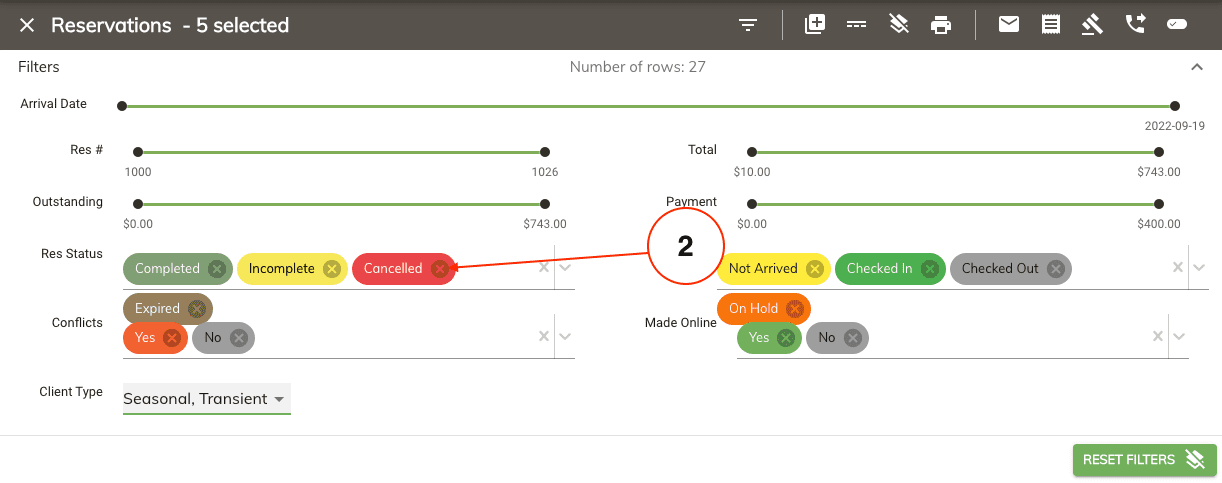
To open the reservation filtering panel start by clicking on the Filter bar located at the top of the reservation grid.

-
Remove the following reservation statuses Cancelled and Expired.
-
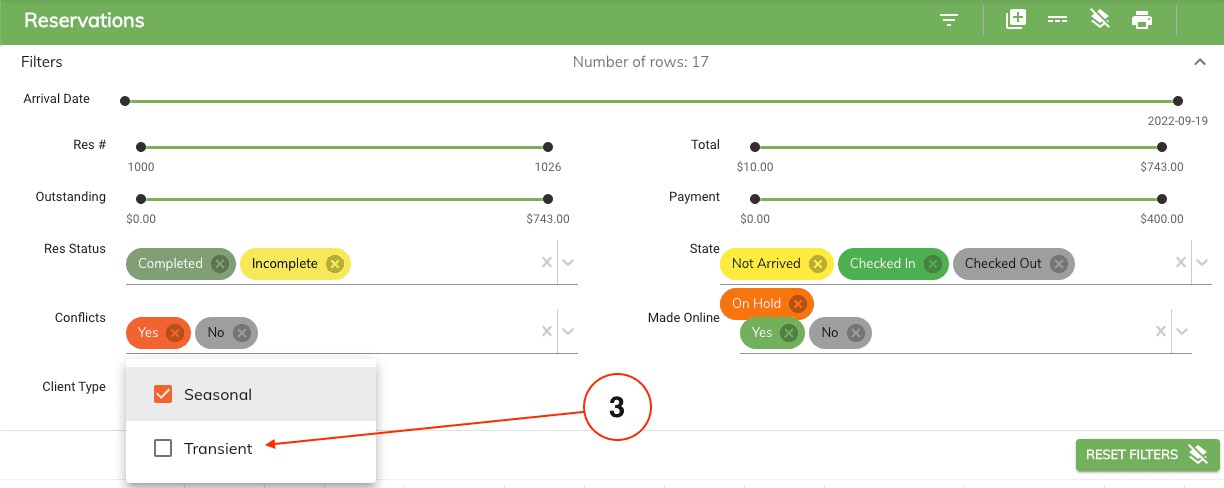
Uncheck the Transient client type so we only have the Seasonal client type selected.
-
Now close the reservation filtering panel by re-clicking on the Filter bar located at the top of the reservation grid so we can see our reservation grid.
-
Add additional filtering as needed.
-
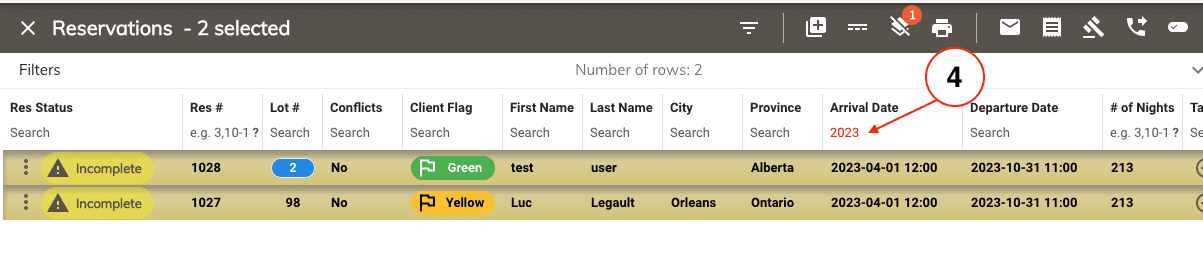
Example: let's say you would want to only email your clients that have a reservation booked with you for next year.
- On the reservation Arrival Date column type in the year. In our case we are interested in emailing only our reservations for 2023.
-
-
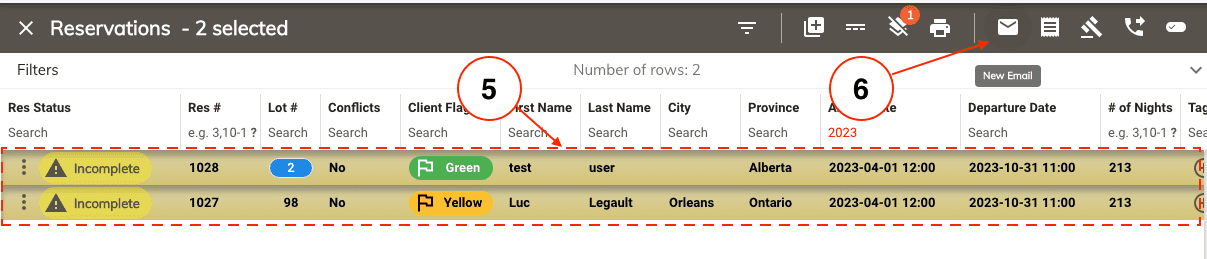
Then select all the reservations from the grid and click on the New Email button in the menu bar.
-
This will open up a new window where you will be able to send an email to all your seasonal client for 2023.
-