New Reservation from the Timeline
The following will teach you how to add a new reservation from the timeline.
Creating a reservation from the timeline panel allows you to have a better understanding of the overall availability before booking a new reservation.
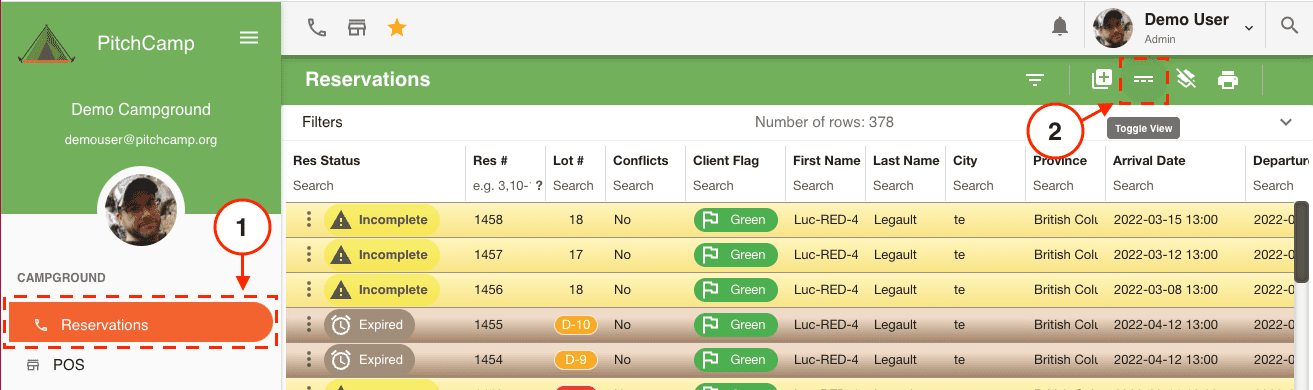
To create a new reservation from the timeline first start by going to your Reservation Panel and then going to the timeline panel by selecting the Toggle View menu.
Adding a New Timeline Item
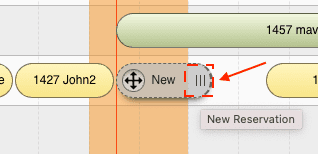
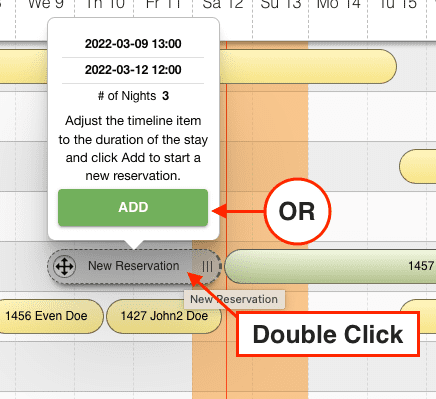
Once the timeline is open, identify which lot you want to add the reservation on. Then double click the starting empty spot on the timeline.
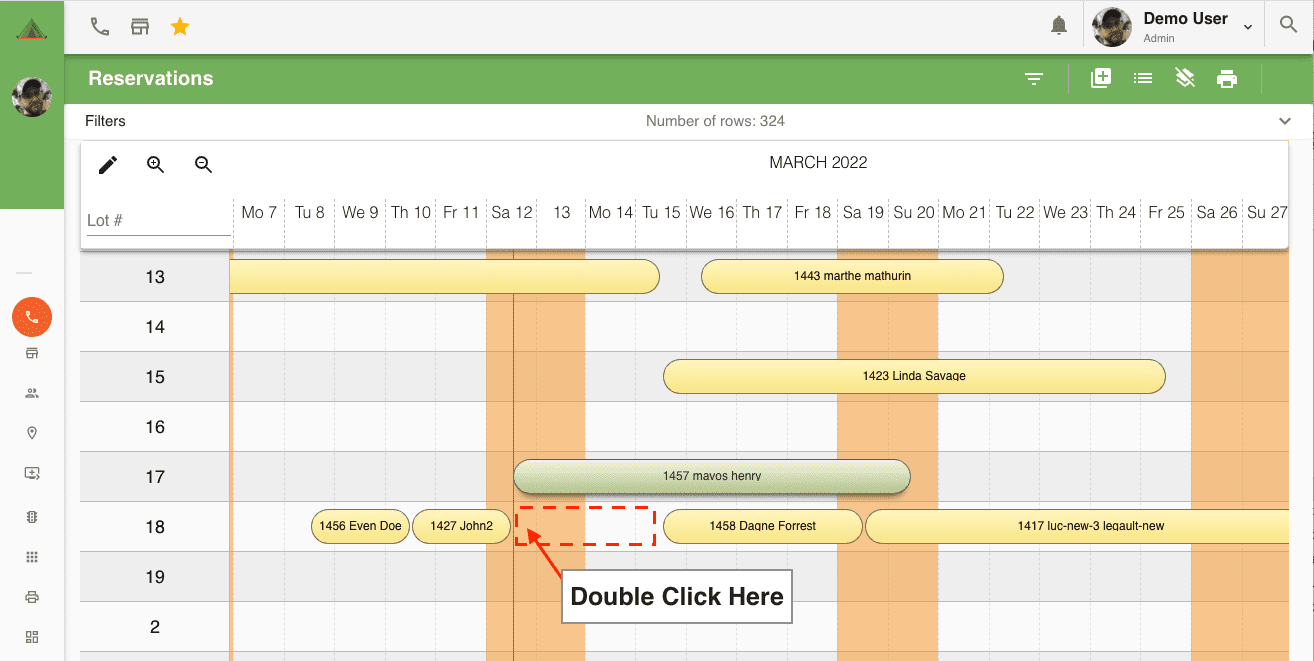
After you’ve double clicked on an empty spot you will see a New Reservation timeline item appear.
Adjusting the Timeline Item
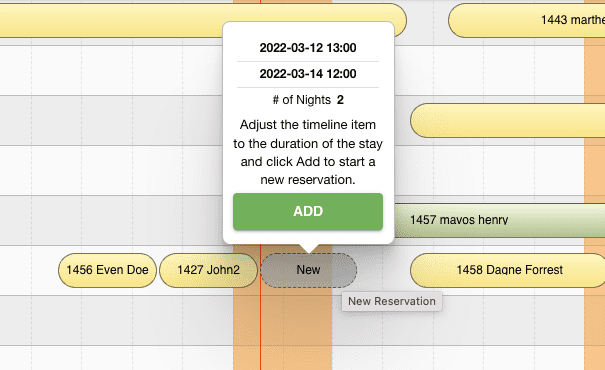
To adjust the duration of the new reservation timeline item click once on it to activate the navigation handles.
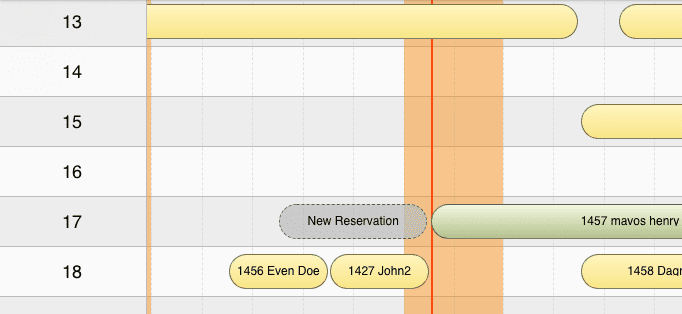
Using the navigation handles extend the new reservation item to the desired length of the stay.
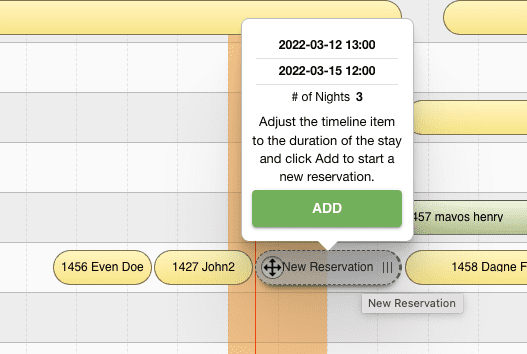
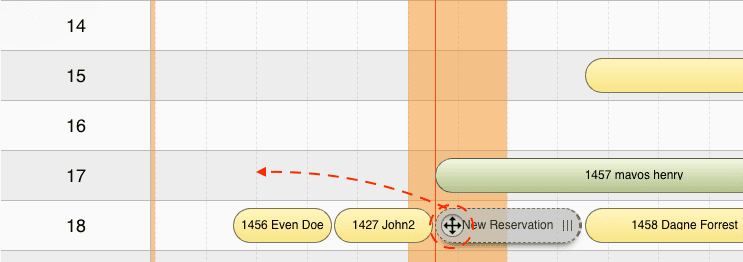
Also if you wish you can move the timeline item to a different lot number by simply dragging it.
Starting a New Reservation
Once you are done adjusting the new reservation timeline item you can either select the ADD button in the popup OR double click on the New Reservation timeline item to start a new reservation.
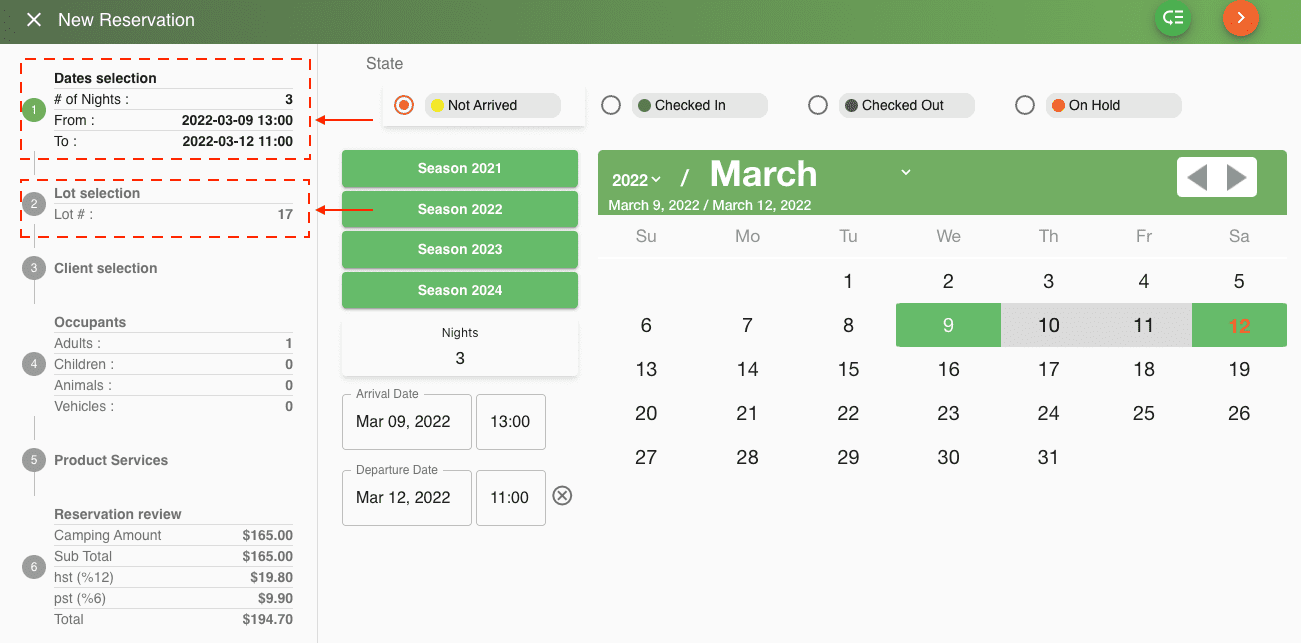
Step 1: Date Selection
Notice once the New Reservation panel opens the arrival and departure dates and the lot number are pre filled based on the timeline item from our previous steps.
So at this point you can adjust the dates if needed.
Once ready, advance to the next panel by selecting the Orange chevron button in the top right of the page.
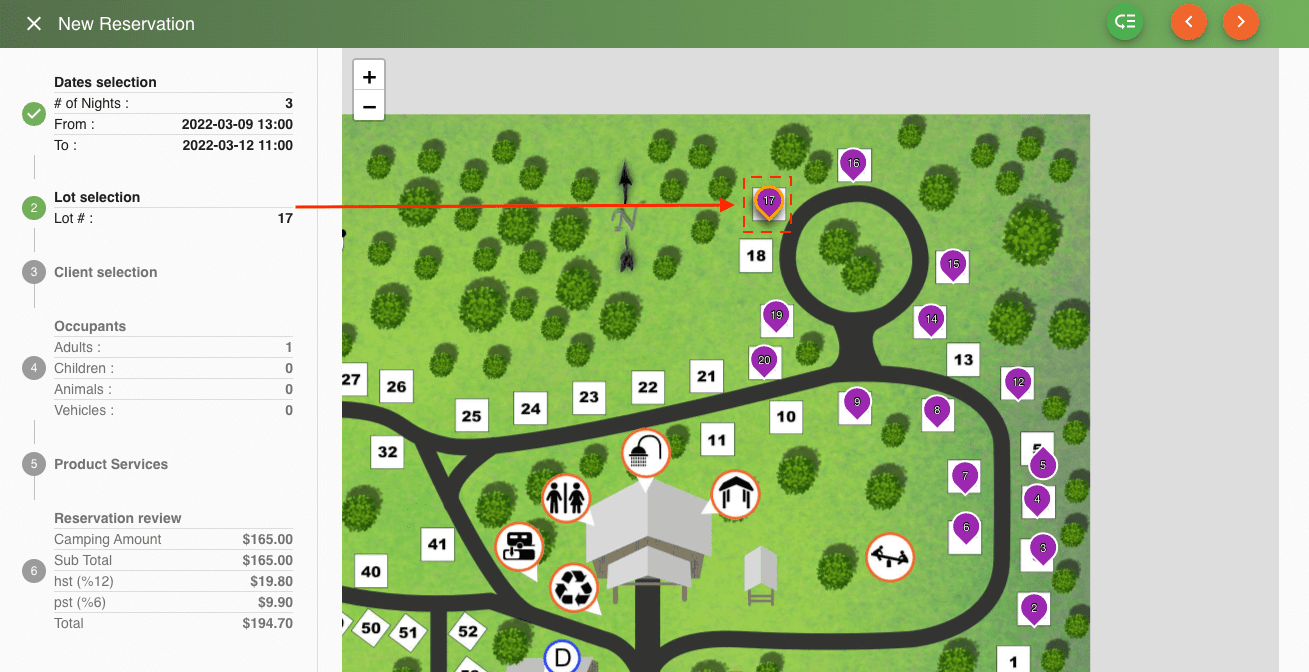
Step 2: Lot Selection
Once at the lot panel selection page notice how the lot number that was selected in our timeline is highlighted in orange. This means that the lot is already assigned to our reservation. If you wish you can select a different lot.
Once ready, advance to the next panel by selecting the Orange Chevron button in the top right of the page.
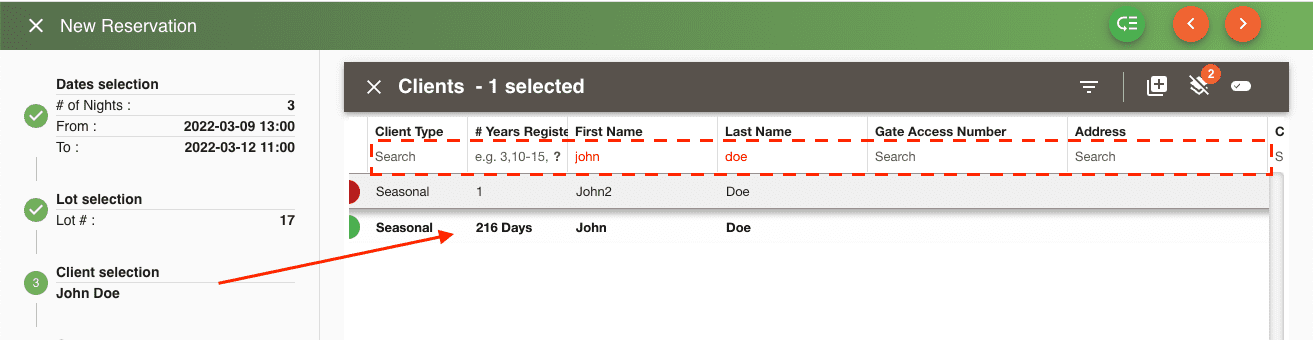
Step 3: Client Selection
Then select your client from the client panel. Filter down your clients by using the search fields at the top each row. Once you have found your existing client select it in the grid and advance to the next step.
Note
If you need to add a new client you can do so by selecting the Add New Client button located above the client grid.
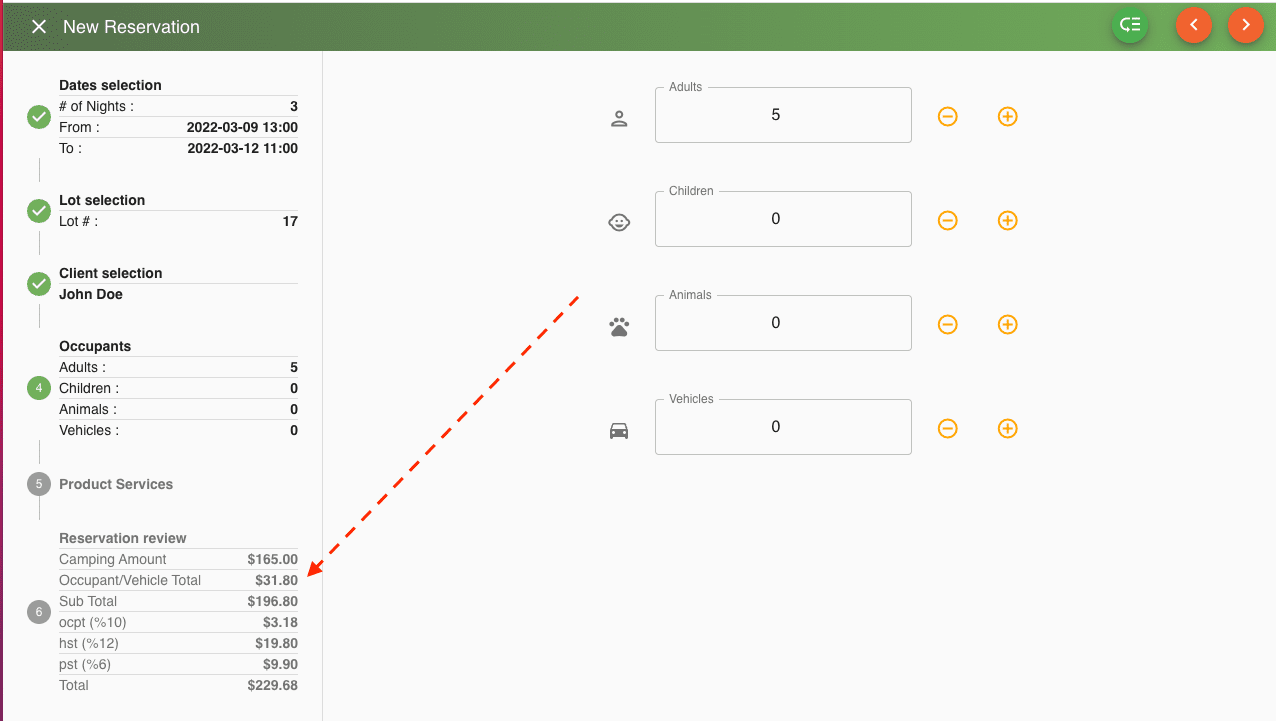
Step 4: Occupants
At the occupant panel add the appropriate number of occupants occupying the lot. Note if you’ve set up additional occupants rules the system will automatically add charges based on your rules. Once done, advance to the next step.
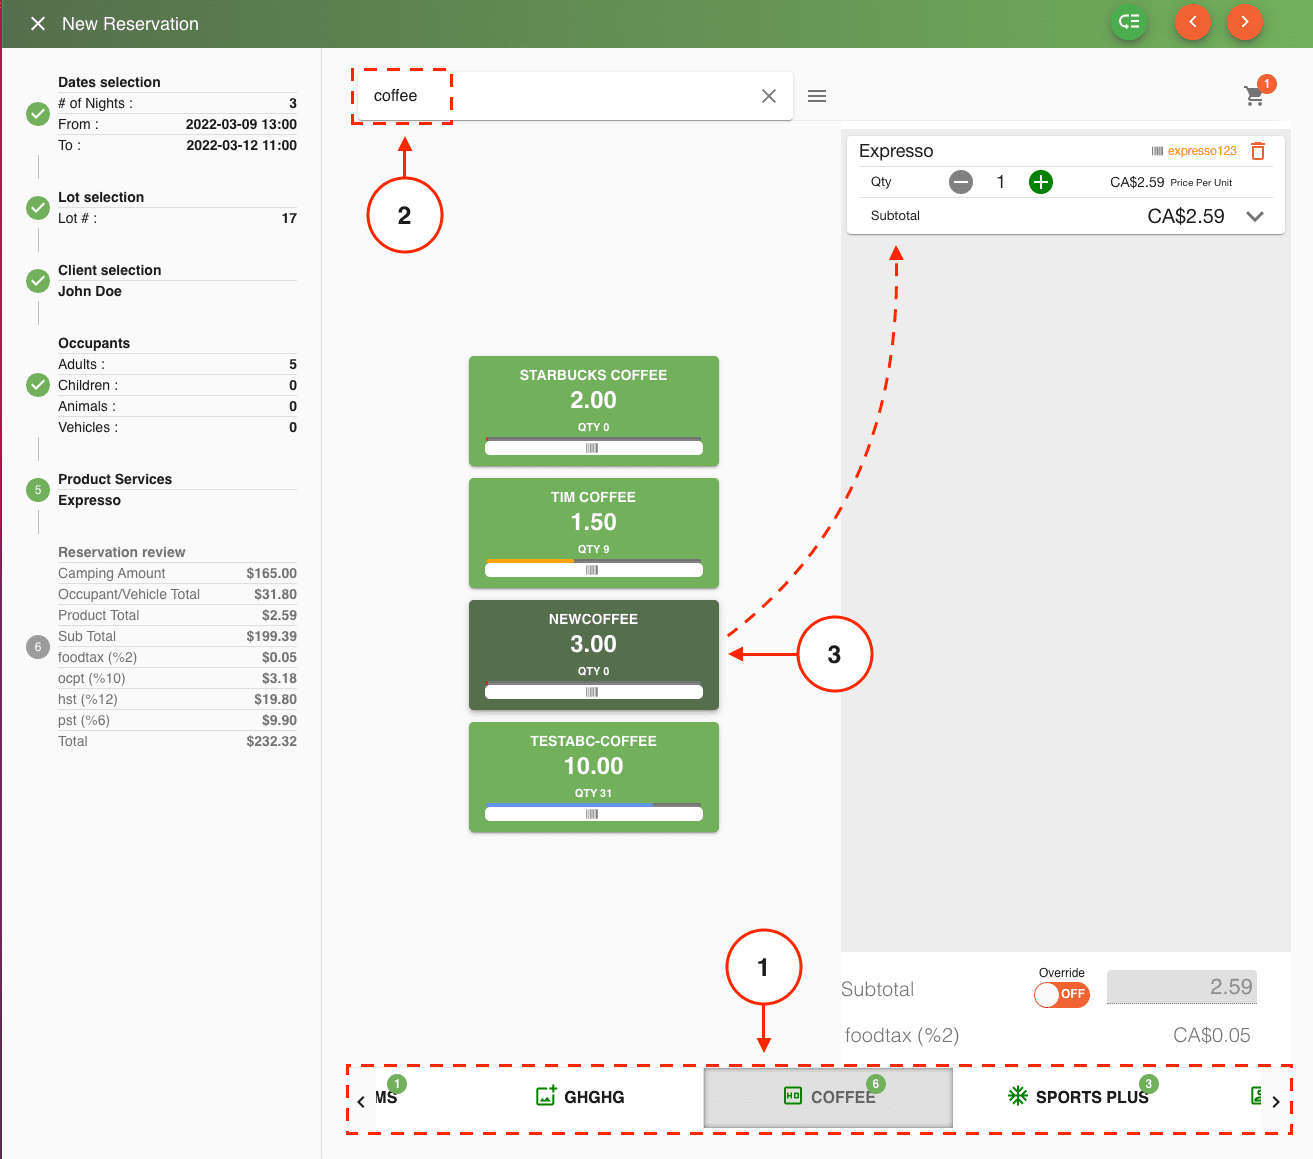
Step 5: Product and Services
At the Product and Service panel if needed you can add additional charges and services to the reservation.
Tip
To filter down your product and service list you can:
- Select the categories at the bottom of the page.
- Start typing the name or enter the barcode of the item. If the > barcode is scanned in the search box then the item will be > automatically entered.
- To manually add a product or service simply select it from the list.
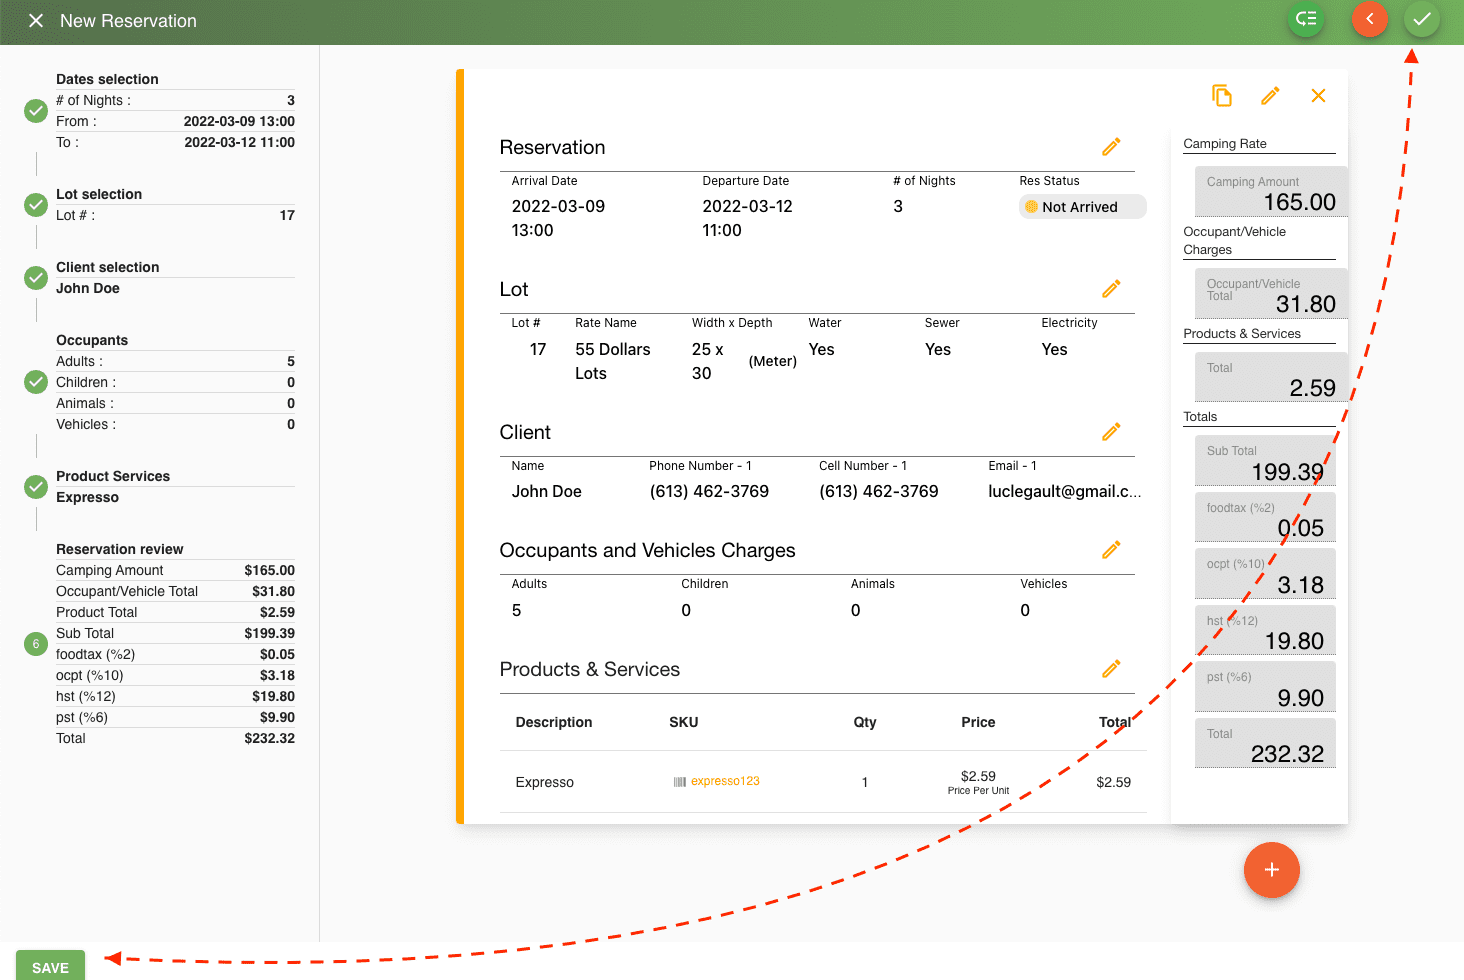
Step 6: Reservation Review
On the final step review and save your reservation to create it. This step allows you the chance to make modifications to the reservation and also duplicate it if needed.
Note
At this point the reservation is still not created. Meaning if you exit out of this panel the reservation will not be saved.