Tax Groups
Tax groups are used to group up multiple taxes if needed and the tax group is also what will be assigned to your products and services such as your camping rates, fees, products etc...
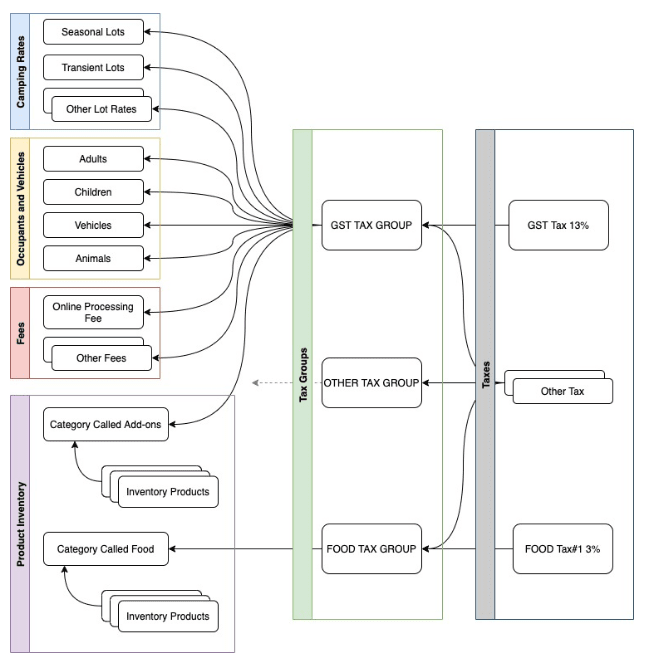
The following illustration shows you how the tax groups links up the various taxes to your products and services.
Tax Group
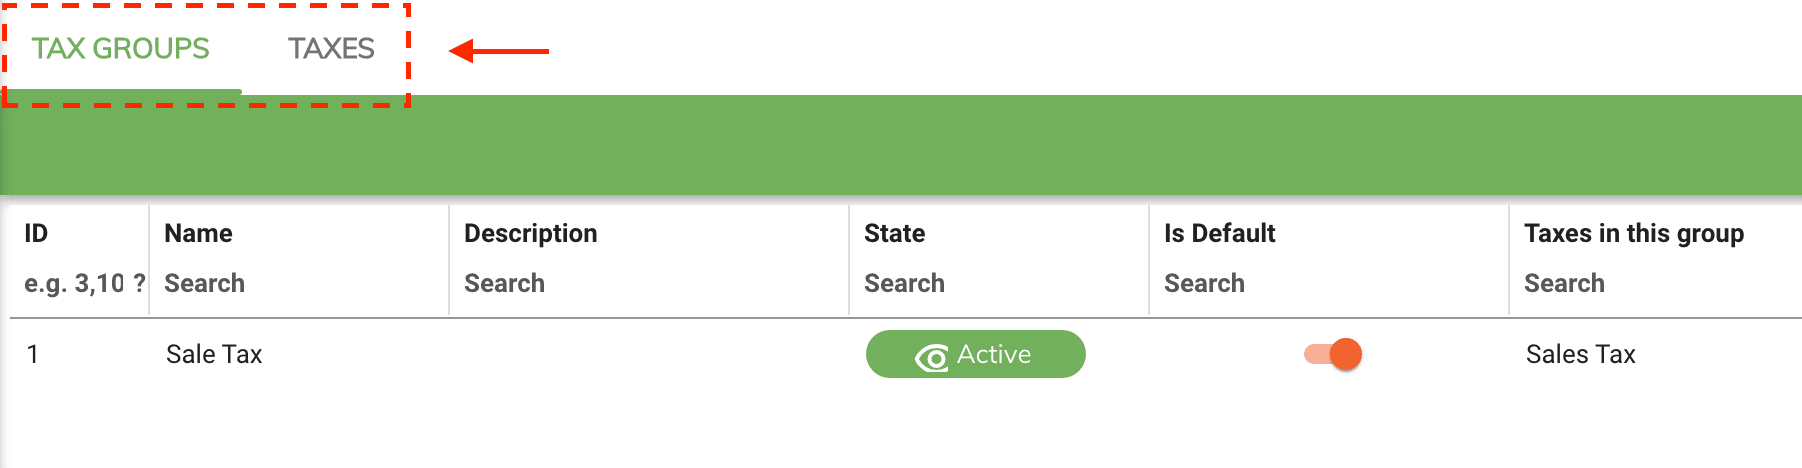
To open up the tax group grid go to Admin -> Taxes from your menu. From here you will be able to toggle between the Tax Groups and Taxes grid.
Adding and Editing a Tax Group
To add a new tax group select New Tax Group from the menu.
To edit an existing tax group simply double click on the item in the grid.
Tax Group Name
Tax group name is what you will use when assigning your tax group to other products and services. Keep it simple and short.
Example of recommended tax group name format
Keep your tax group name simple but descriptive at the same time.
Example
- Sale Tax
- No Tax Items
Tax States
Tax states controls whether or not the tax group item will be visible when assigning the tax group to products and services.
Is Default
The is default switch controls if this tax group will be automatically selected when adding new products and services throughout the application. This eliminate the need of manually selecting the tax group from the drop down when creating a new product or services.
Taxes in this Group
The taxes in this group field allows you to select which taxes will be included in the tax group. There are no hard limits and if you need to create a No Tax group category then leave this field blank.
Deleting a Tax Item
To delete a tax item double click on the tax item from the grid and select the delete icon located in the bottom right.
Note
If the tax group item was previously used in a transaction then you won't be able to delete it. If it's no longer needed then change it to Not Active.