Products
The product panel is where you controls the items and services that will be sold on your POS system and when doing a reservation add-on.
Products are used to charge for additional items and or services related to the reservation or perform a POS transaction.
Products can also be used to up-sell your clients on goods and services. Example: lets say that you have fire wood bundles that you would like to offer to your clients when they book. You will be able to add any of your products to the reservation process. This is also known as a reservation add-on.
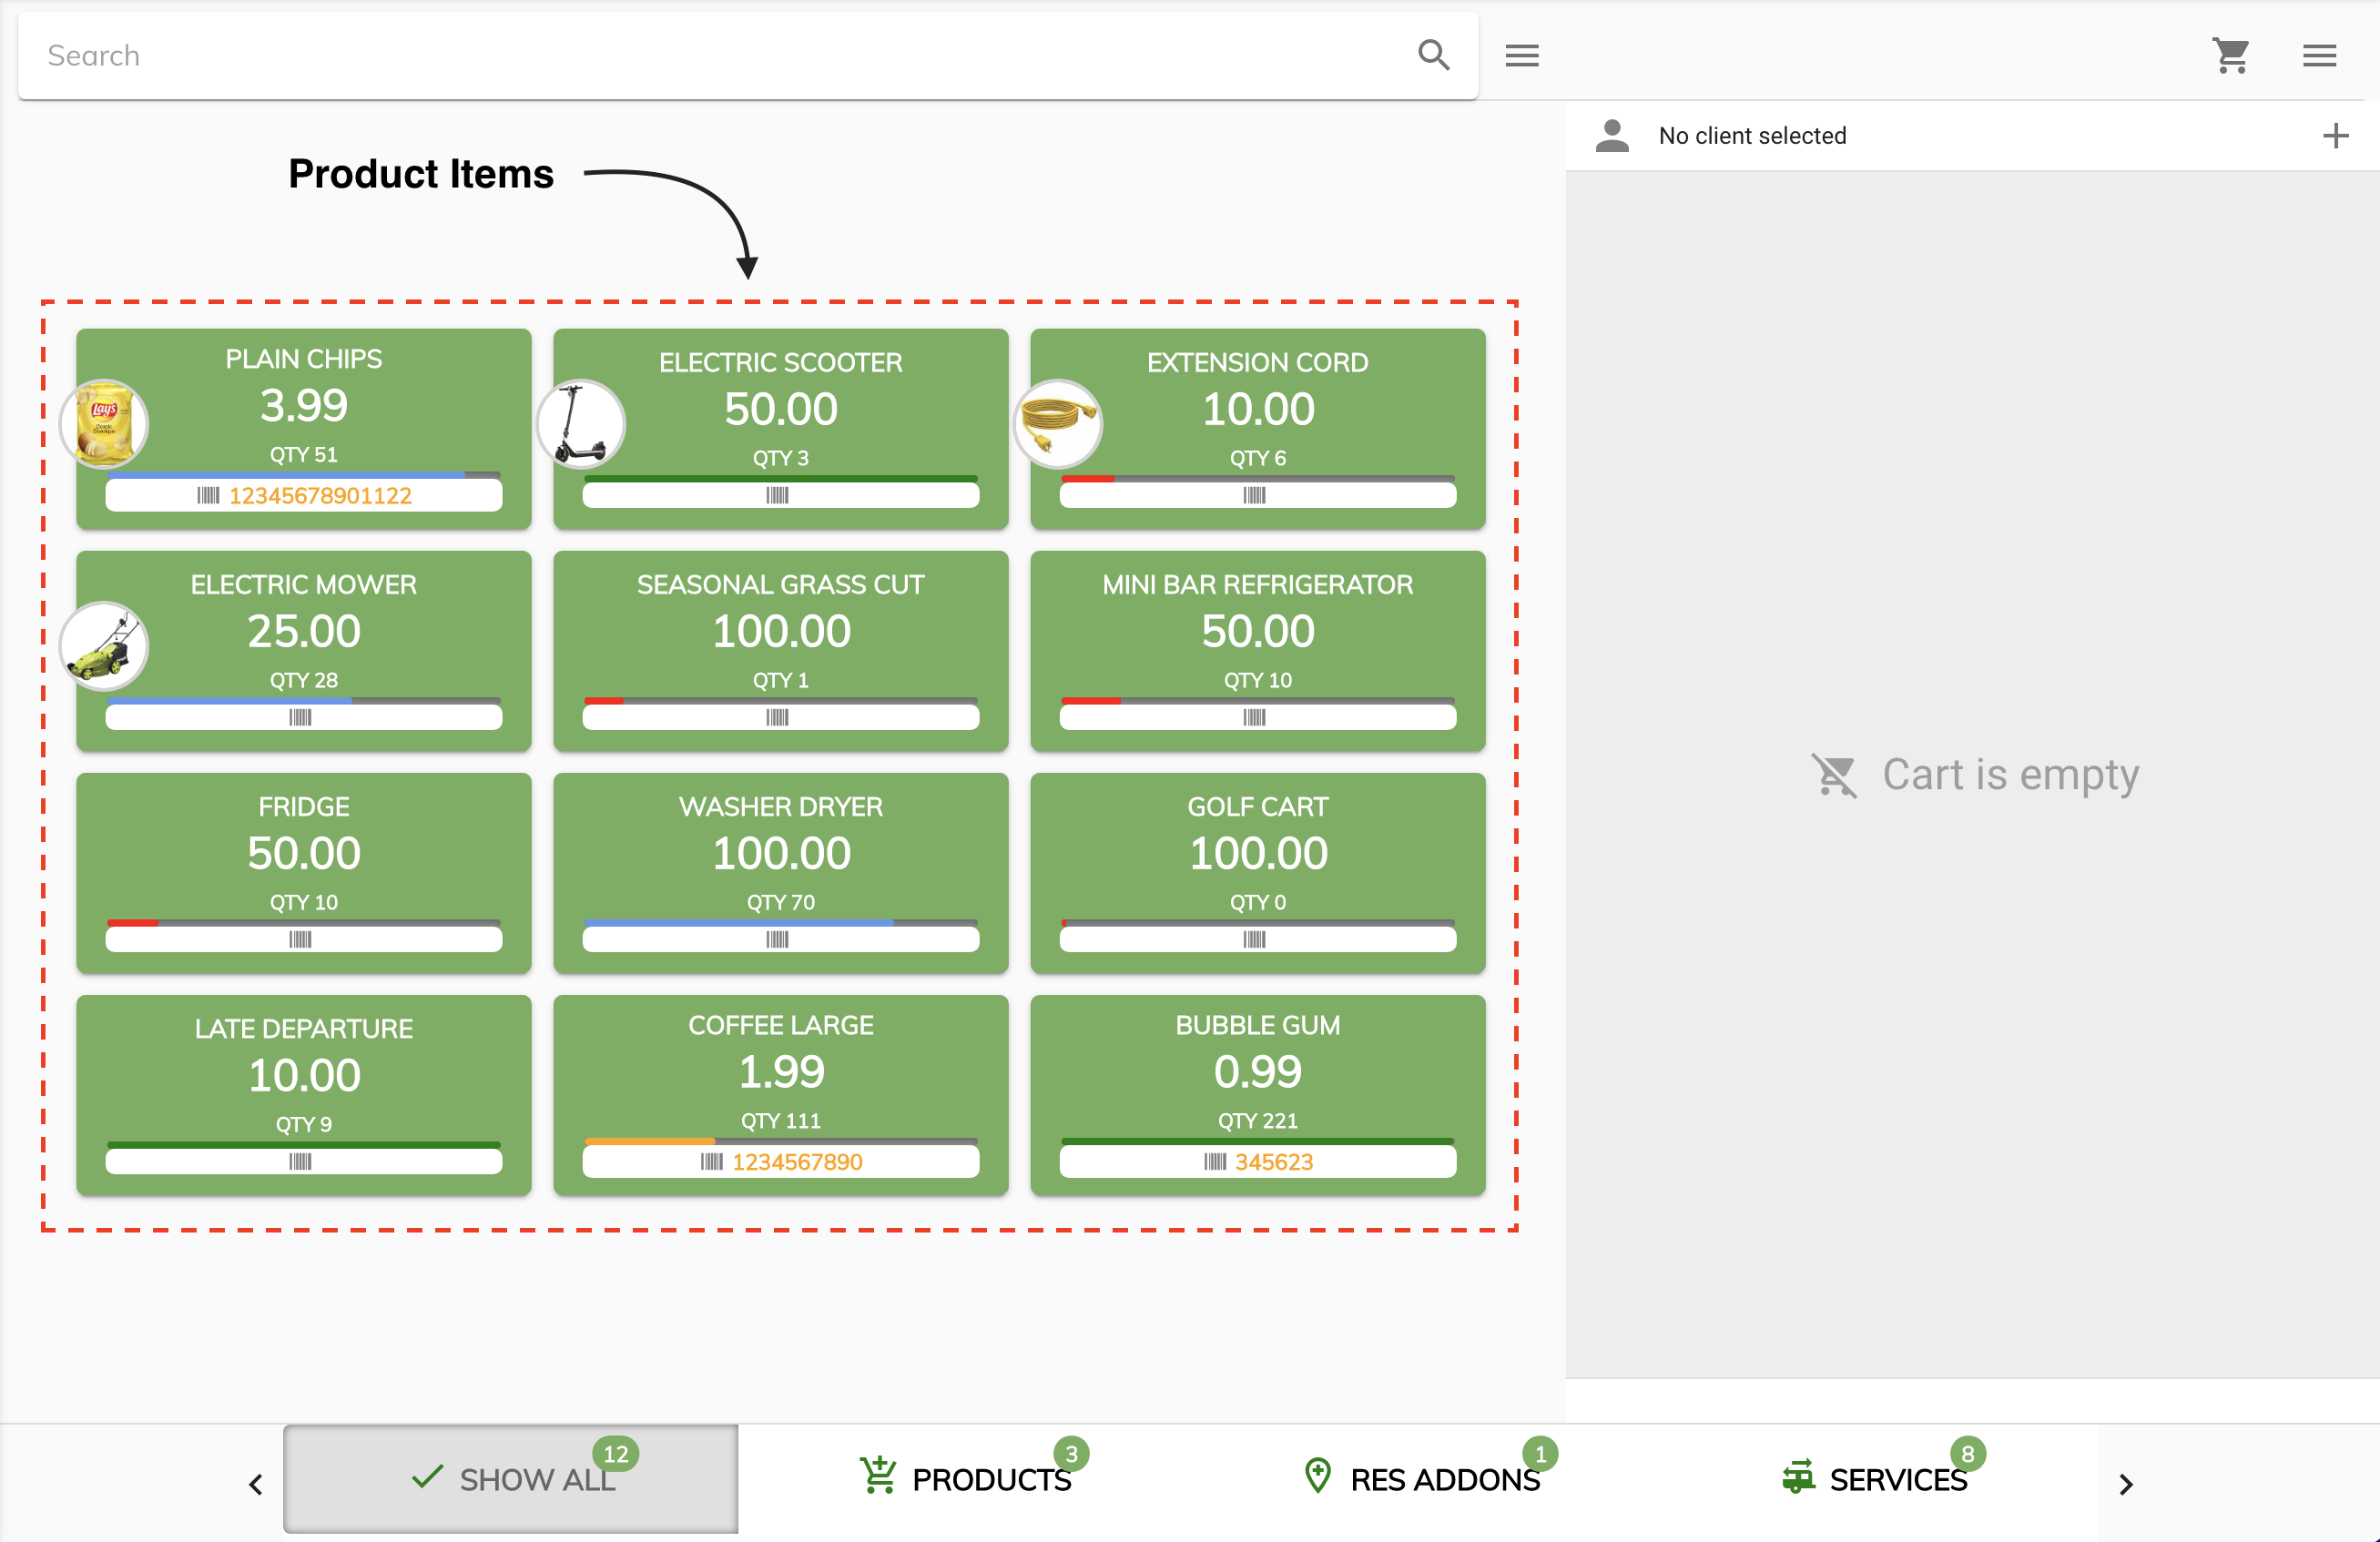
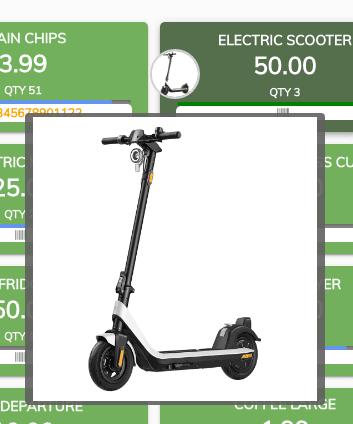
The products will be displayed on the POS/Add-on panel in the product area. These items is what will be sold to your clients and used to perform a sale.
Products Grid
To open up the products grid go to Admin -> Product Inventory from your menu and click on the Products tab located in the top left of the panel.
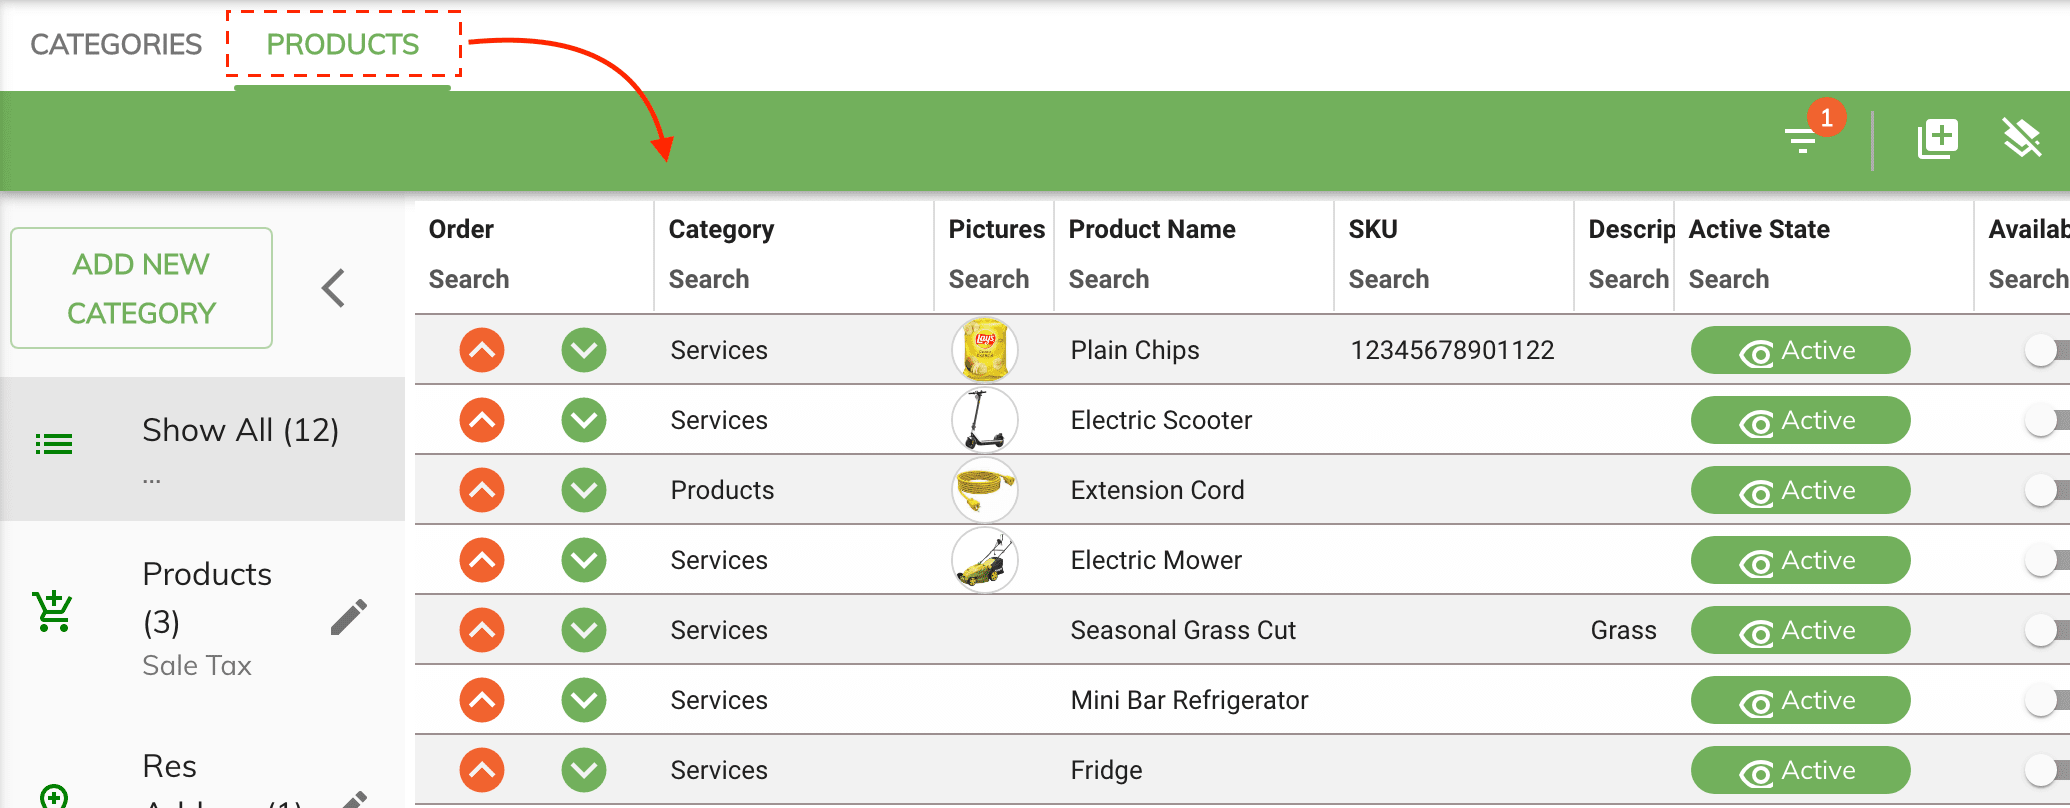
Grid Order
The grid order column allows you to control the position the products will be displayed in when visualized on the POS/Add-on panel.
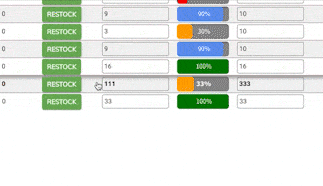
Restocking Items
The product grid offers three methods of quickly restocking your product inventory.
Using the Restock Button
From the product grid scroll over to the Qty columns and you will see a Restock button. Clicking on the restock button will open up a dialog windows where you will be able to enter the
`Restock Qtyvalue. This will replenish both the Qty and Initial Qty counts to the entered value.
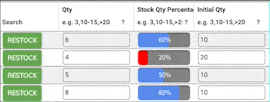
Adjusting the Qty Fields
Again from the product grid scroll over to the Qty columns and click on the grid Qty field you wish to update.
- When the field is selected you will see a blue square in the bottom right corder of the cell.
- Just start typing and you will see the cell styling change to a larger cell.
- To save your new changes either hit the Enter key or move to a different cell using your arrow keys on your keyboard.
Copying the Qty Fields
Again from the product grid scroll over to the Qty columns and click on the grid Qty cell you wish to use in order to copy the value to the other cells.
- Start by selecting the cell you would like to copy over to the other fields.
- When the field is selected you will see a blue square in the bottom right corder of the cell.
- Grab the blue box with your mouse and drag it down or up to the cells you would like to copy this value.
Adding Editing a Products
To add a new product select Add New Product from the menu.
To edit an item simply double click on it from the grid. Once the dialog box is opened you will be able to change the attributes of the item.
Warning
The product names can be edited and changes. However, the updated name will also be reflected by existing reservations and financial reports. It is recommended to create new product instead of re-purposing existing ones.
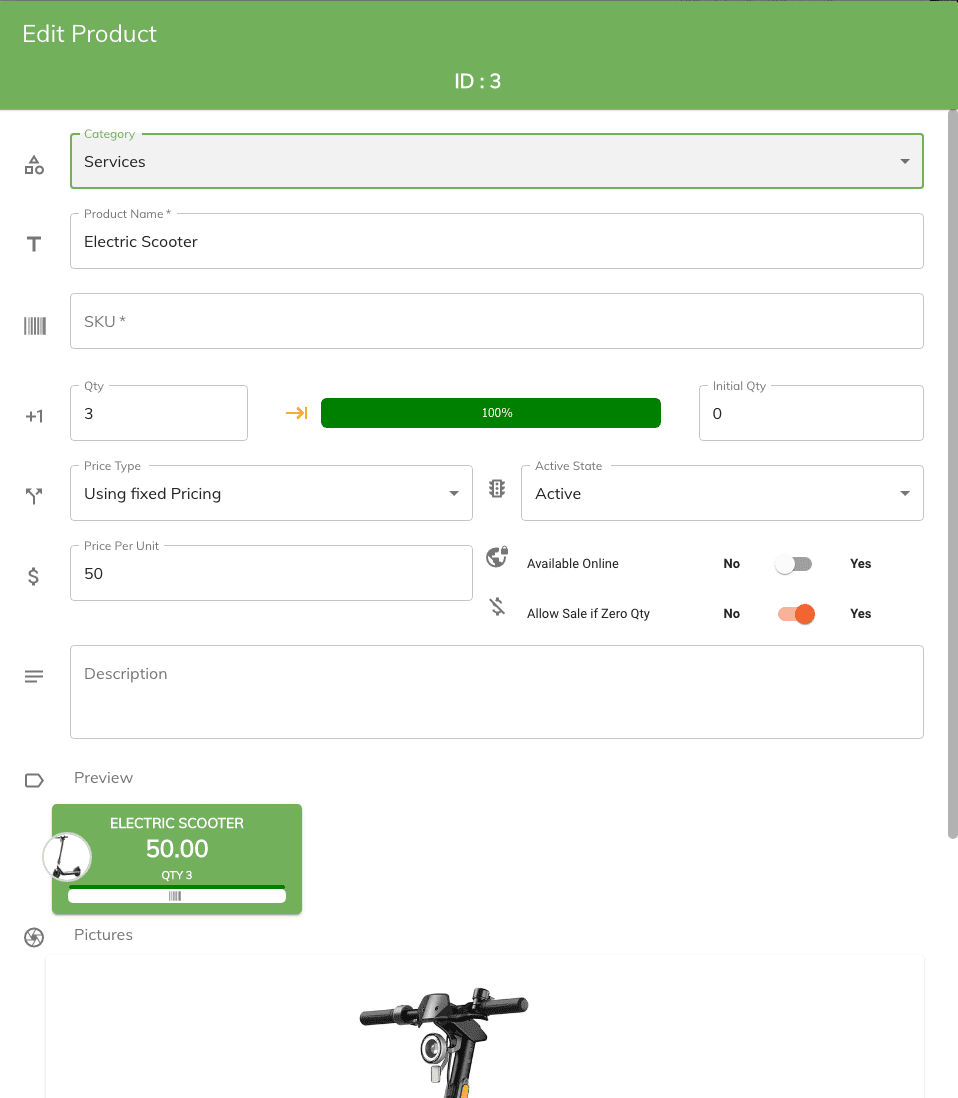
Product Category
The product category allows you to choose under which category to group your items.
Note
The taxes are assigned to the categories. When selling your products the taxes assigned to the category will be used as the sale tax for the items that are grouped under each categories.
Product name
The names used for the products are alpha numerical meaning you can include characters and numbers when creating your items.
Info
Make your product item name clear and focused on the goods or service they offer. The name is also what your clients will see when presented on the bill of sale.
Example of a good product names
-
Concert Ticket
-
Wood Bundle
-
Grass Cut
SKU
The SKU is optional however it allows you to find and sell your products faster. To enter your SKU number position your cursor in the SKU text box and scan the items barcode using your barcode scanner.
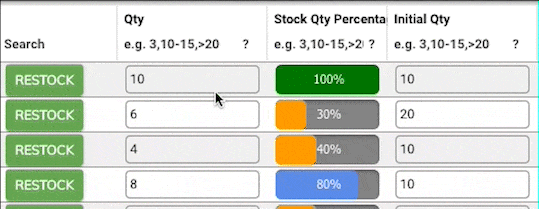
Qty and Initial Qty
The Qty and the Initial Qty fields allows you to track how many items you had initially and also how many items are in your current inventory. As you sell your items the Qty count will track how many items you should have in your store.
- The progress bar indicates the remaining quantities threshold based on the initial qty in your store giving you a graphical representation of the percentage of items remaining in your stock.
- Examples:
- When your stock is completely restocked the progress bar will show as Green.
- When your stock is between 50% - 90% the progress bar will be Blue.
- When your stock is between 30% - 50% the progress bar will be Orange.
- When your stock is between 0% - 30% the progress bar will be Red.

Price Types
The price type controls the pricing structure used.
There are two types of pricing structures:
-
Fixed Pricing:creates a product with a fixed price amount. When using fixed pricing the product amount will only be charged once regardless the number of rental nights the reservation is for. -
Tier Pricing:is used to create a product based on the following four tiers.Nightlythis is the price associated to a 1 night reservation.Weeklyrates are based on a 7 nights reservation.Biweeklyrates are based on a 14 nights reservation.Monthlyrates are based on a 28-30 nights reservation. (Depending on how you define a month)Seasonalrates are used to calculate the camping rates for the entire seasonal period. The seasonal period of your campground are defined in the campground parameters
If a rate tier is left empty or zero then the rate tier for that entry will be skipped when performing the calculating for that price tier.
Make Product Available Online (Not Implemented Yet)
The available online options allows you to make the products available to your online reservations. This can be seen as a way to up-selling your products and services to your online clients.
If the available online options is set to No then the product will only bee seen by your front office.
Allow Sale if Zero Qty
The allow sale if zero qty will do just that. If turned off the system won't allow you to sell that item if the quantities of the product is zero. If you would like to continue to sell the product even if the qty of the item is at zero then turn on this switch.
Active State
The states allows you to deactivate the product so it no longer appears in the list when selling your products and services. The state is a way of hiding the item without deleting it.
Description
The description is only seen by your online clients. This is used to describe the product or service you are offering.
Images
The uploaded images will be displayed on the product item. When selling your products the image will appear on the product item. You can see a larger image when hovering over it.
Deleting
To delete an item simply double click on the item from the grid and select the delete icon located in the bottom right of the dialog window.
Note
If the item was previously assigned to a reservation then you won't be able to delete it. If the item is no longer needed then change it to Not Active.