Printer Setup
The printer settings page allows you to:
- Choose which printer you would like to use.
- Configure the thermal printer settings.
- Perform a test print.
Opening Up the Printer Settings Page
-
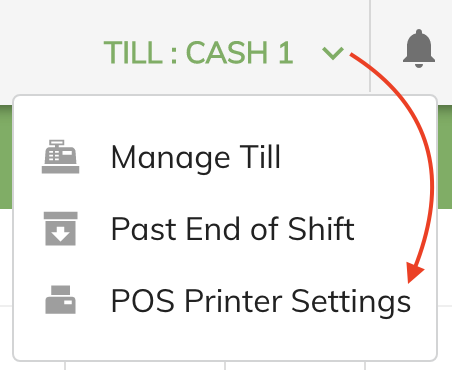
To open up the printer settings click on the Till menu and select the POS Printer Setting from the drop down menu.
Selecting the USB Printer
Note
Before selecting your thermal POS printer make sure the printer is installed and working on your PC.
-
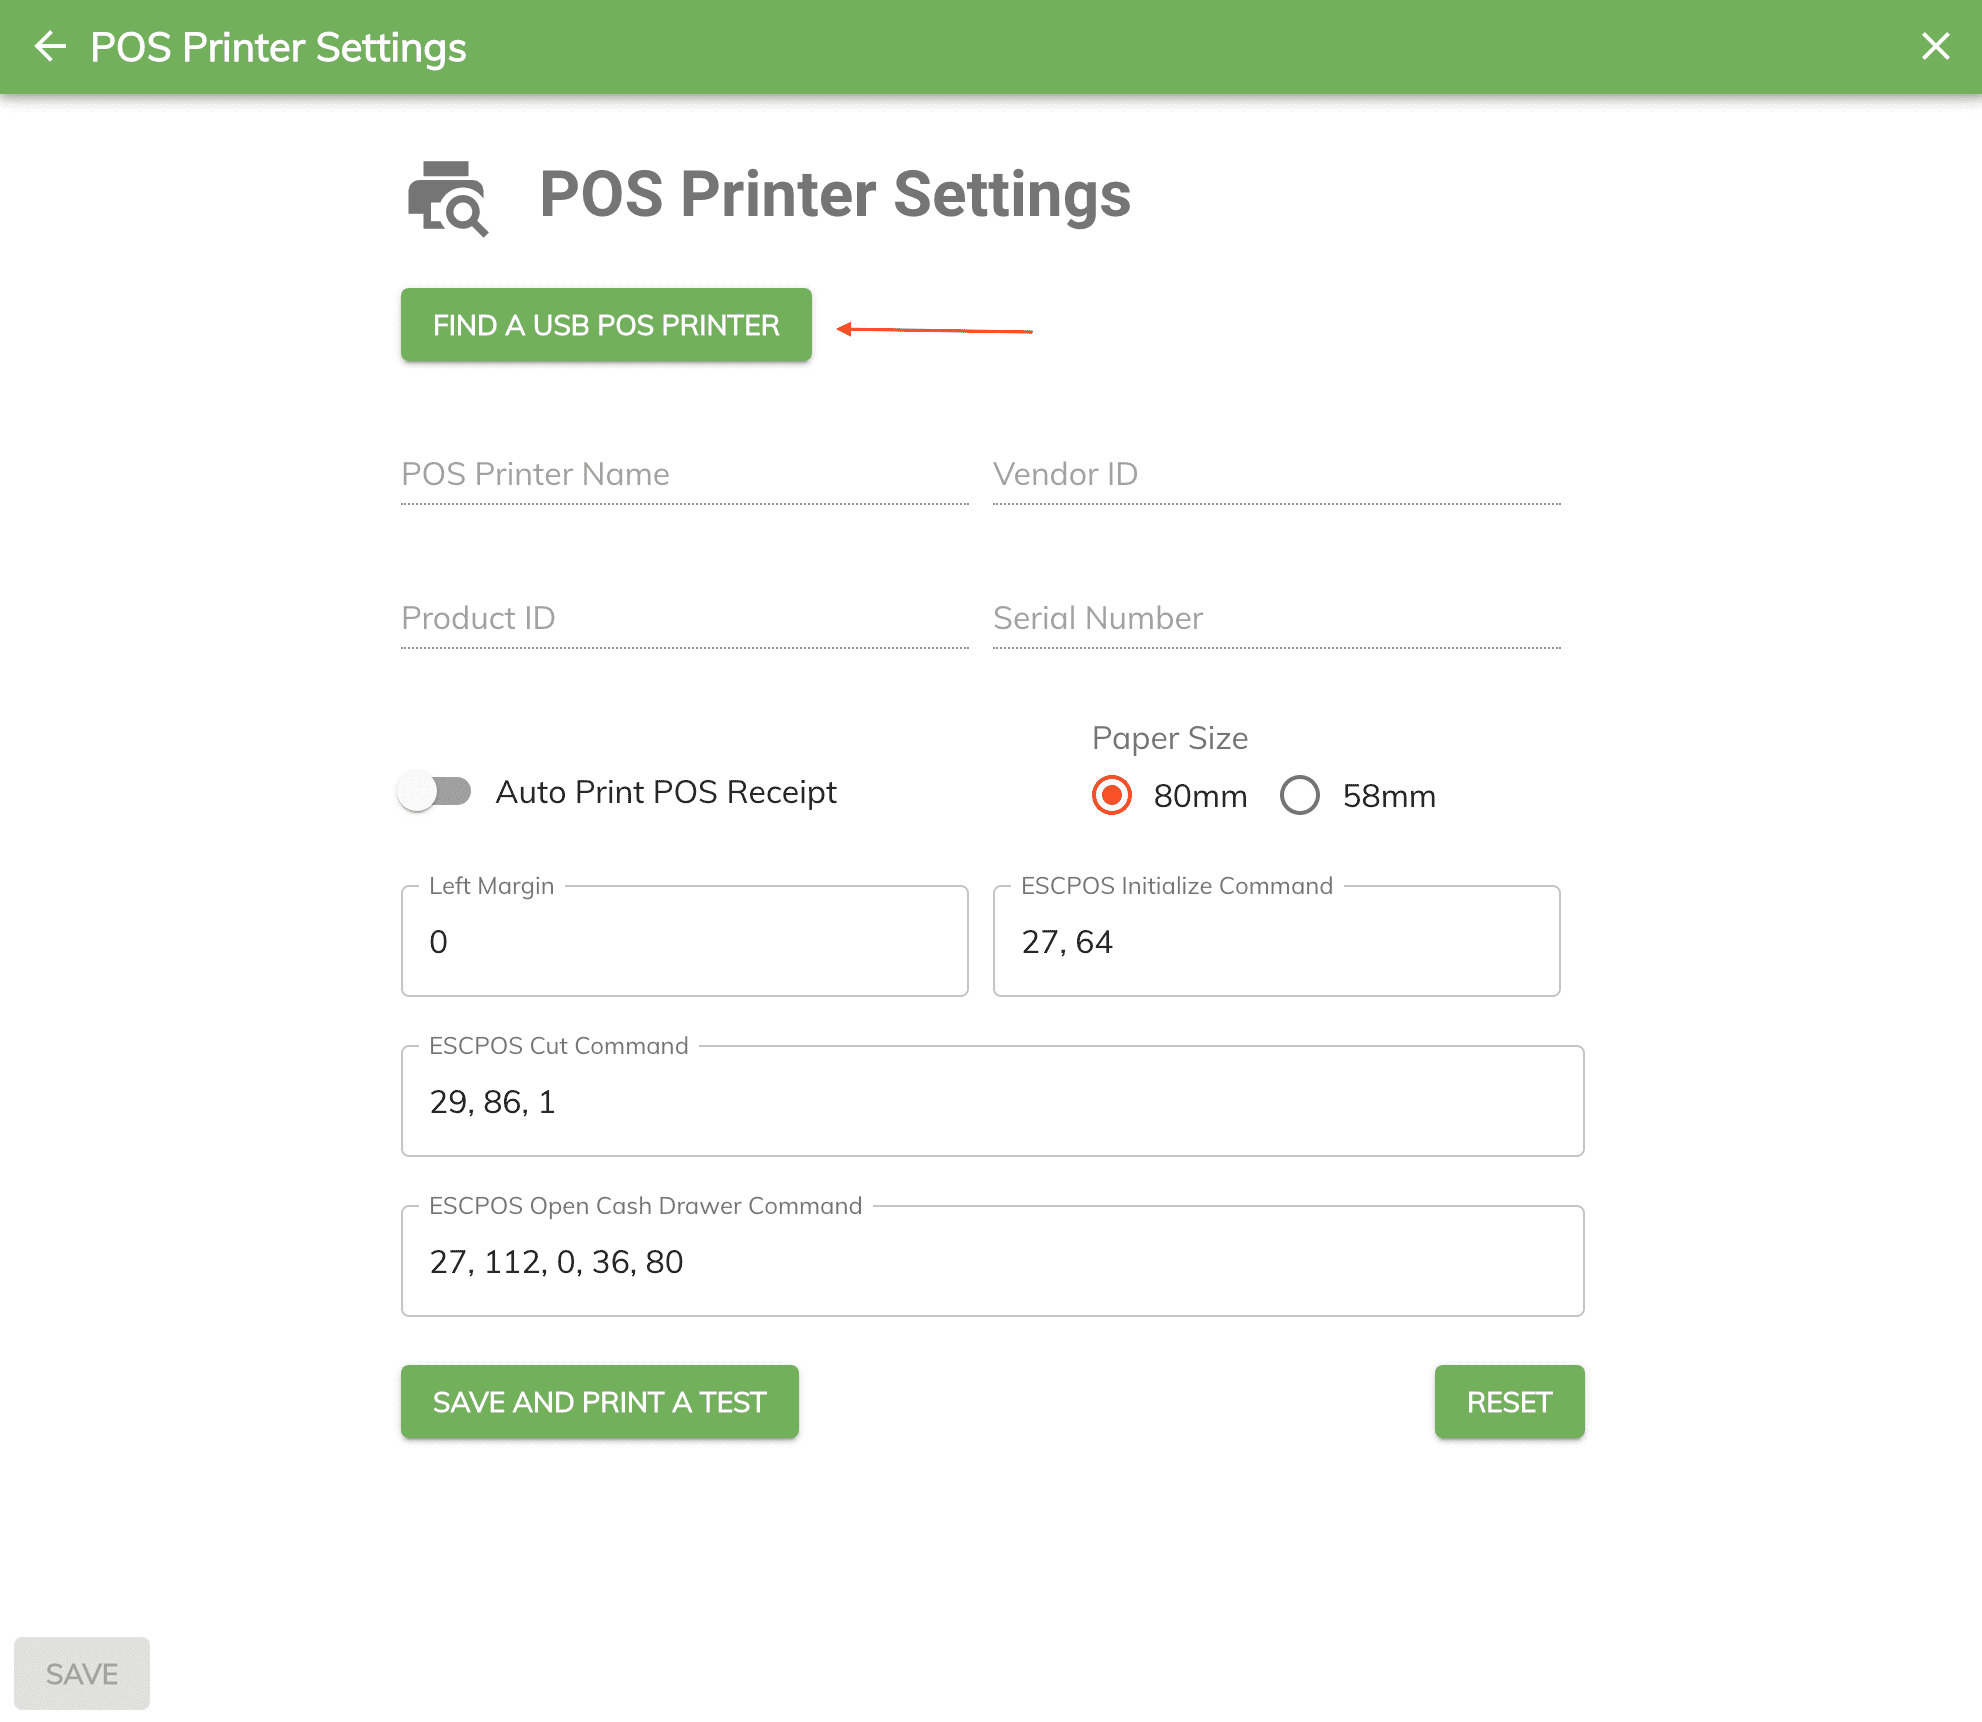
Click on the Find a USB POS Printer button to select your installed thermal printer.
-
Then select the installed thermal printer from the list and click on the Connect button.
Info
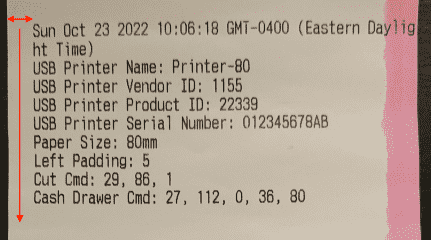
In my example below my installed thermal printer name is called
Printer-80. On your PC the name of the printer will depend on how you called it.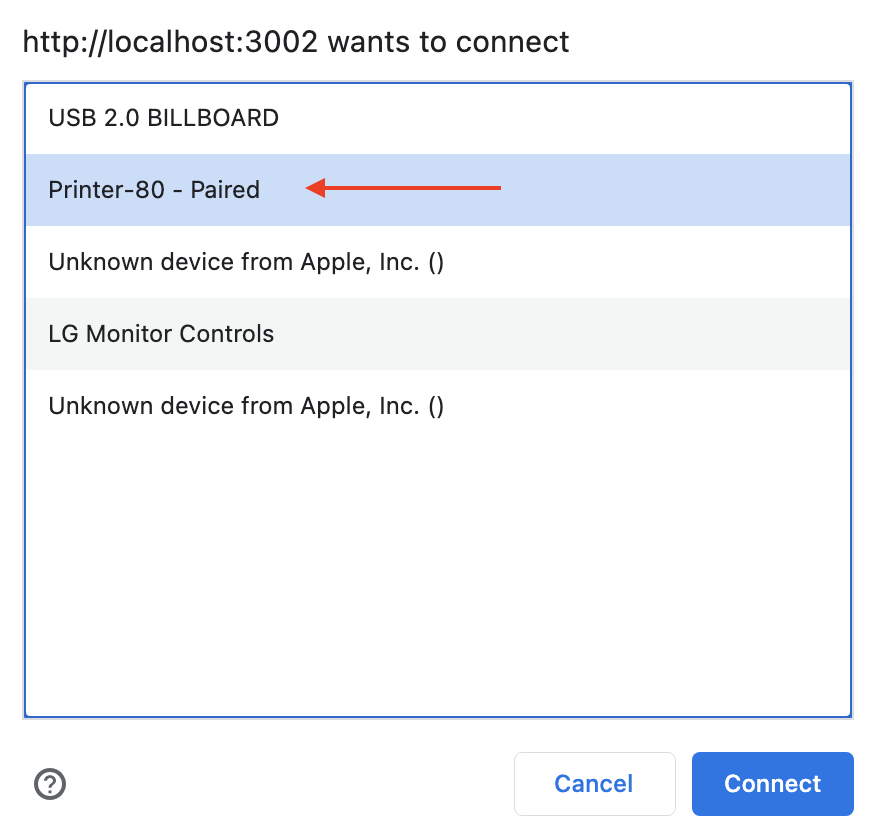
-
To test out if PitchCamp is able to communicate with your printer click on the Save and Print A Test.

-
If PitchCamp is able to communicate with the printer a test page will be printed out onto your POS printer.

Adjusting the Printers Margins
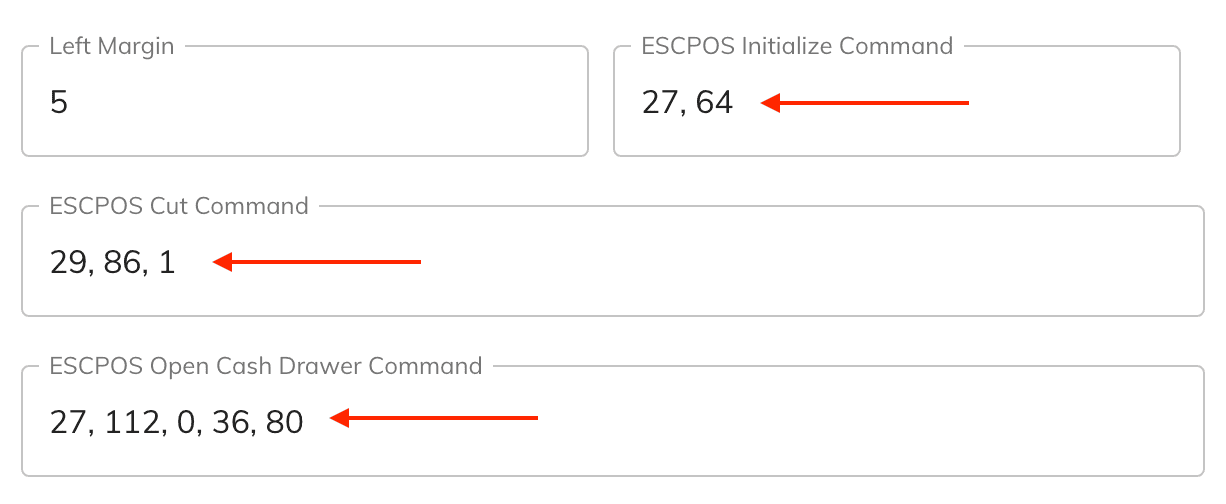
You might need to adjust the left margin of the printed out receipt if the text is getting chopped off at the start of the printout.
-
To adjust the printers margins enter the number of spaces you would like to have as the left margin in the
Left Margintext box.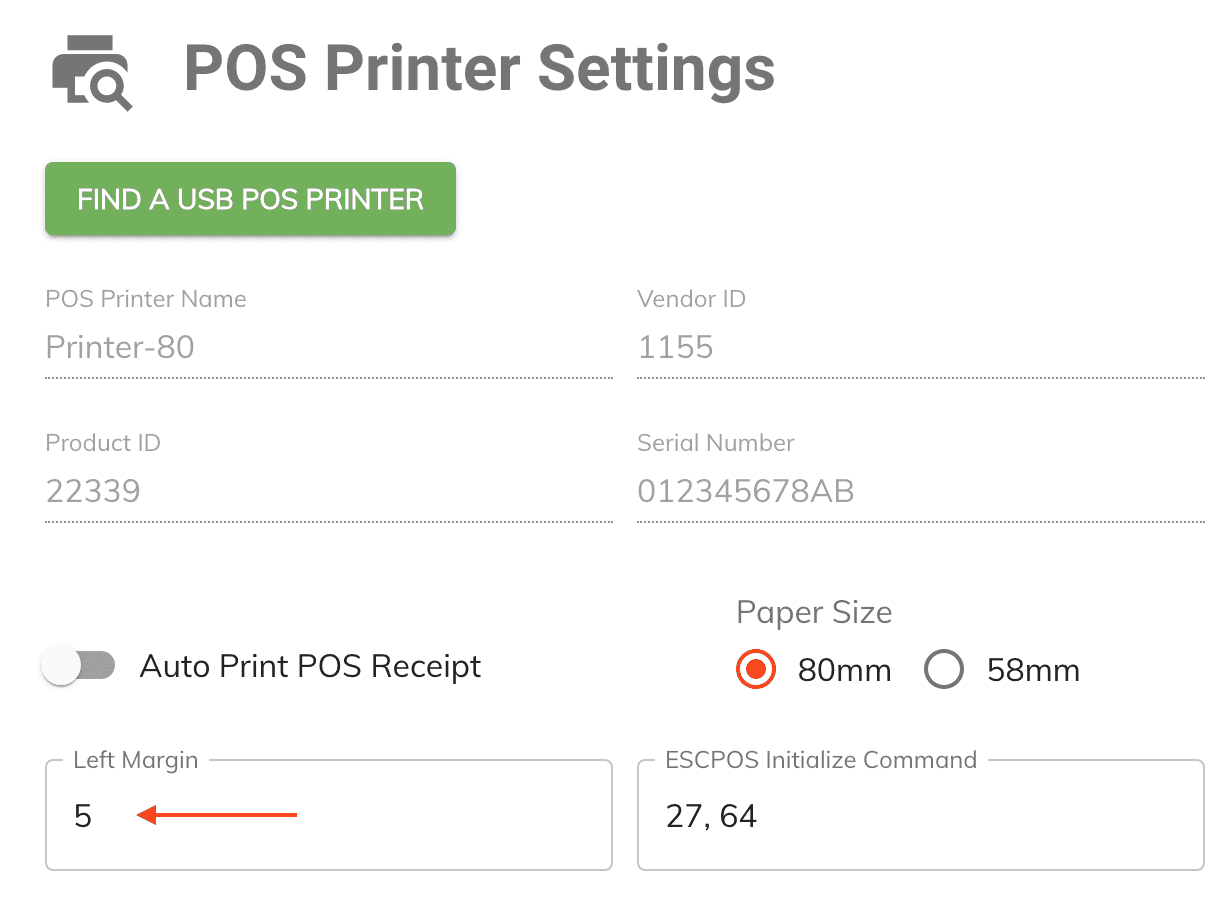
-
Then click on Save and Print A Test button.
-
Keep repeating the above steps until you have an acceptable left margin on your test printout.
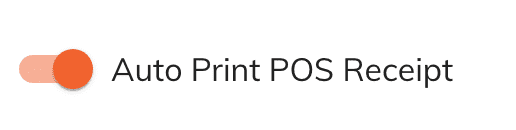
Auto Printing Receipt
The auto print option allows you to tell the system to automatically print out the receipt without needing to click on the print button.
This is useful if you are performing a lot of POS transactions and you would like to save a mouse click at the end of your transaction.
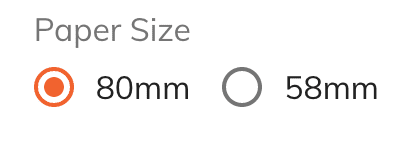
Paper Size
The paper size setting allows you to specify the paper size width you would like to use.
Two paper sizes are supported:
- 80mm
- 58mm
Note
The recommended paper size is 80mm however if your printer supports the 58mm paper size then the print outs will be adjusted accordingly to your selection.
Printer Commands
The commands fields are HEX codes that are sent out the the printer to perform specific actions.
Topically you should not need to changes these settings however, they are exposed incase your printer needs a different command other than the defaults.
Resetting the Default Value
- To reset the printers to it's original setting click on the Reset button in the bottom right corner of the panel.
- Then click on the Save or Save and Print a Test button.