Adding a New Reservation Payment
This guide will show you how to add a new reservation payment.
Payment Types
There are three types of payments that can be added to a reservation:
Offline/Manual Payments
These payments, such as cash, debit, or e-transfer, do not require a payment gateway. They are manually recorded in the system to track external payment methods.
Online Stripe Payments
These payments are processed through the Stripe payment gateway, a secure method that allows clients to pay online or store their credit card details for automatic processing.
Terminal Reader Payments
These payments are processed in person using a terminal reader, allowing clients to pay via tap-and-go, chip and PIN, or swipe.
Step 1: Adding a New Payment
There are two ways to add a payment to a reservation:
- From the Grid View
- When Editing a Reservation
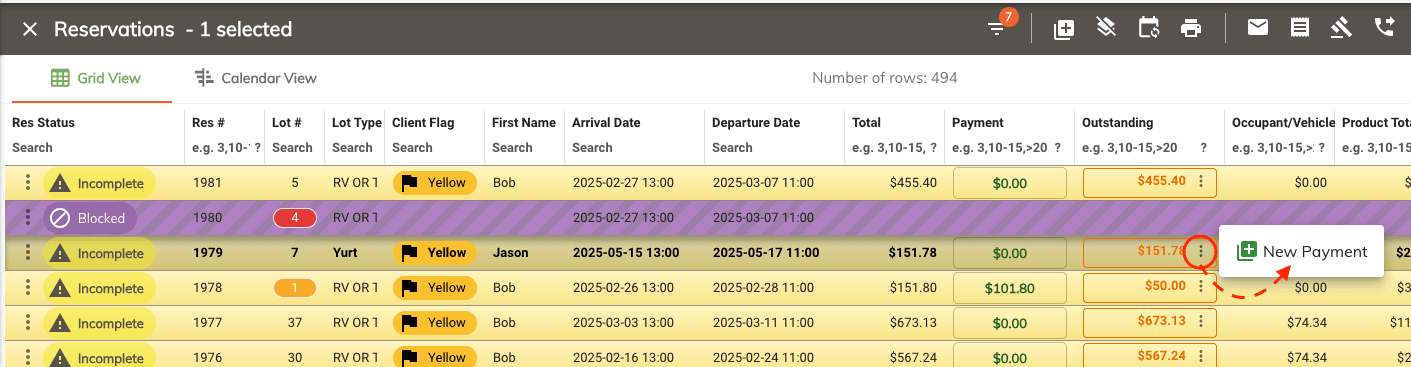
Adding a Payment from the Grid View
- Hover over the three vertical dots beside the outstanding balance.
-
Click on New Payment from the menu.
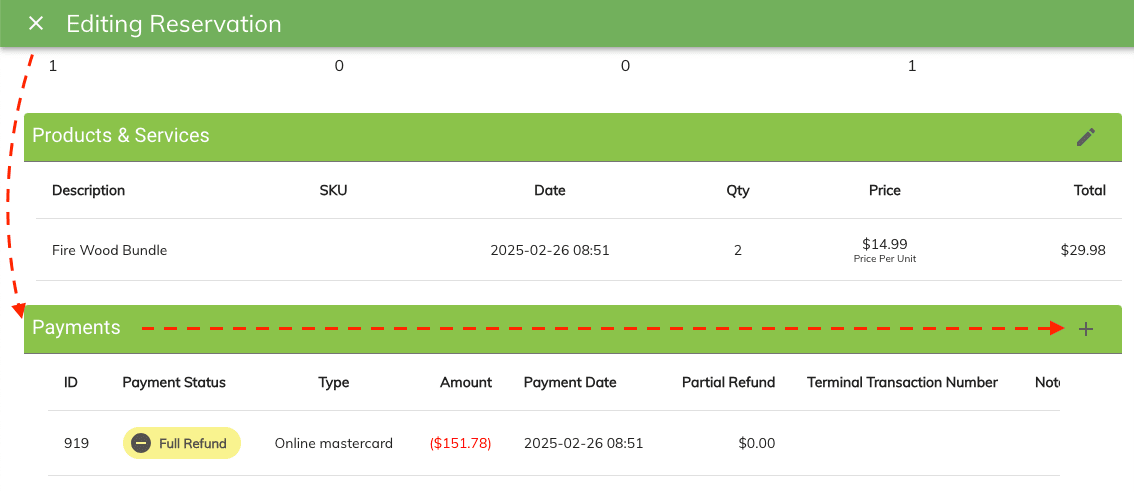
Adding a Payment from a Reservation
- Edit the reservation by double-clicking on it.
-
Scroll down and click the Plus (+) icon beside Payment.
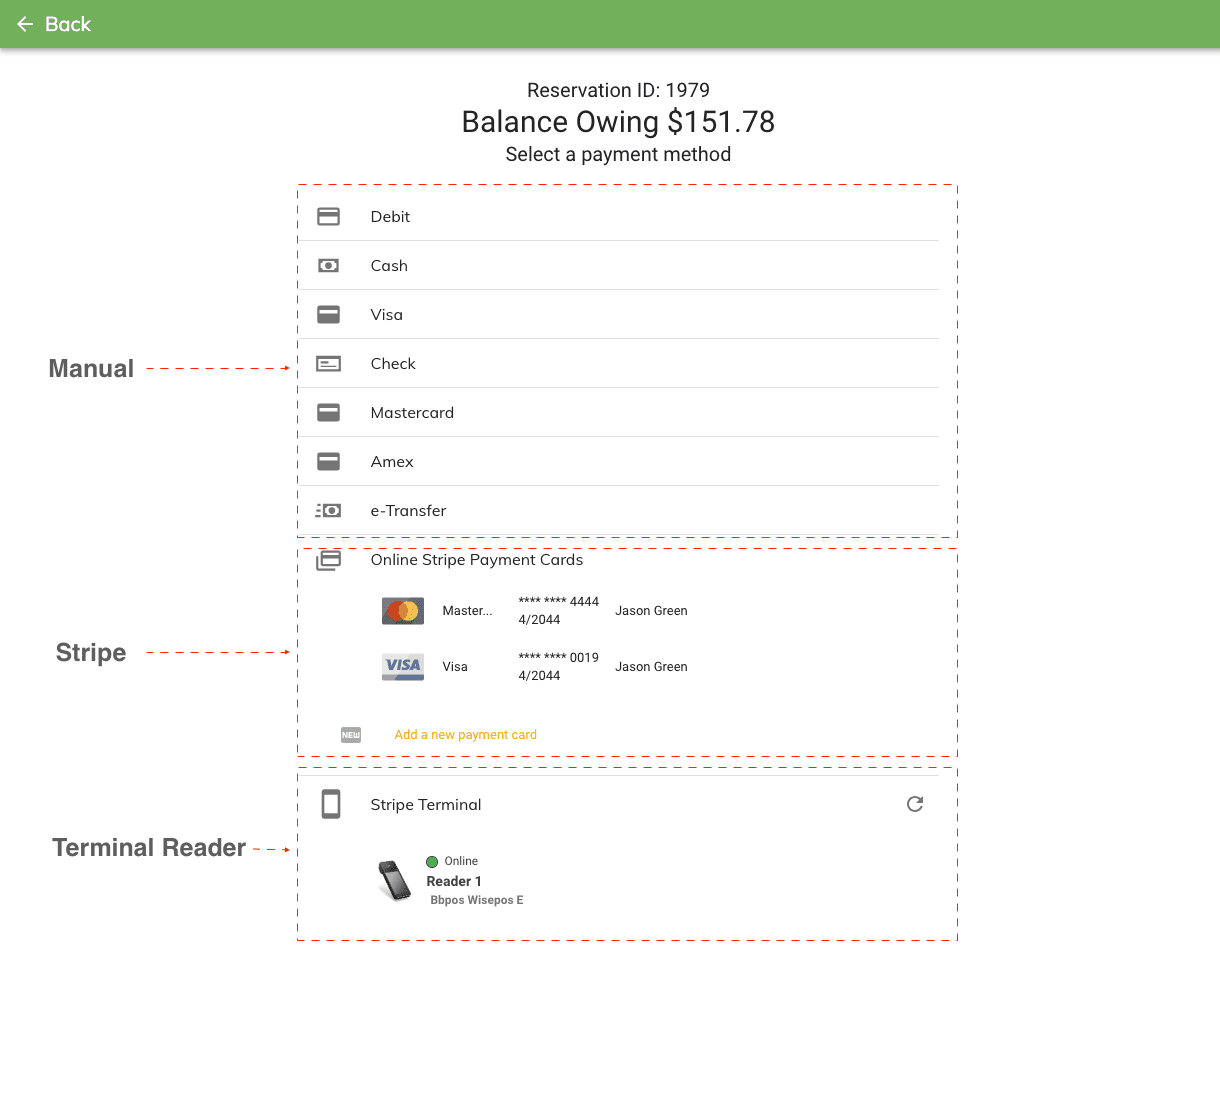
Step 2: Selecting a Payment Method
- Once on the Payment window.
-
Choose the payment method(s) to add.
-
Enter the payment amounts in the text boxes.
-
Click the yellow arrow button beside the text box to copy the full outstanding amount (optional).
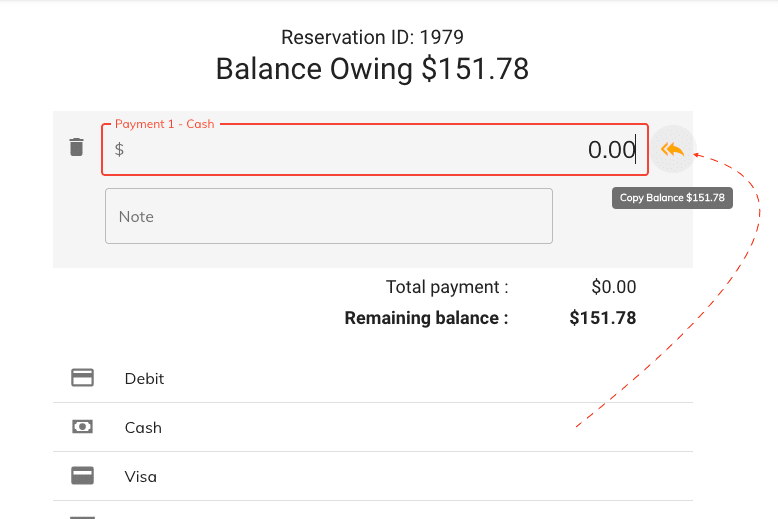
-
Click the Payment button (located in the top-right or bottom-left corner of the screen).

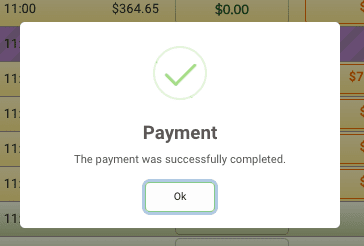
Step 3: Payment Confirmation
- Once the payment is added, a confirmation window will appear.
-
Click OK to return to the reservation.
Payment Methods in Detail
Offline/Manual Payments
📌 Note: These payments are not processed through a payment gateway; they are simply recorded for tracking purposes.
The following payment types can be added as offline payments:
- Debit
- Cash
- Visa
- Cheque
- Mastercard
- Amex
- E-Transfer
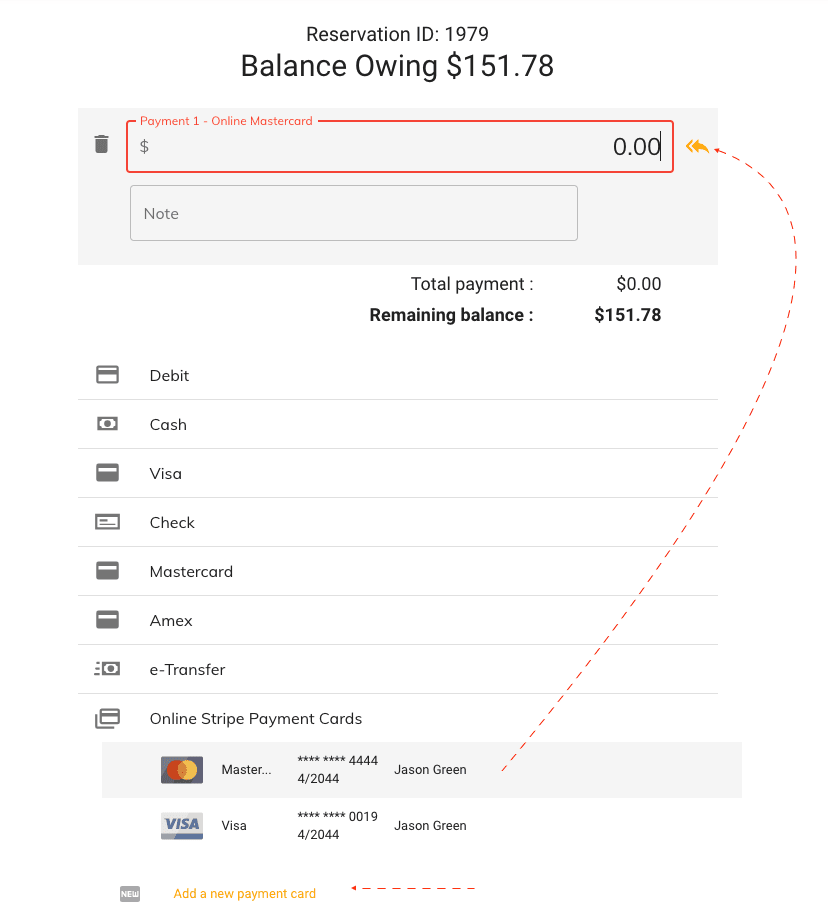
Online Stripe Payments
📌 Note: These payments are securely processed via the Stripe payment gateway, allowing clients to pay online or store a credit card for future payments.
- In the payment window, locate the Online Payments section.
- If Stripe is enabled, you will see an option to add a new payment.
- If a client has a credit card on file, select it from the dropdown list.
-
Enter the payment amount and click Payment.
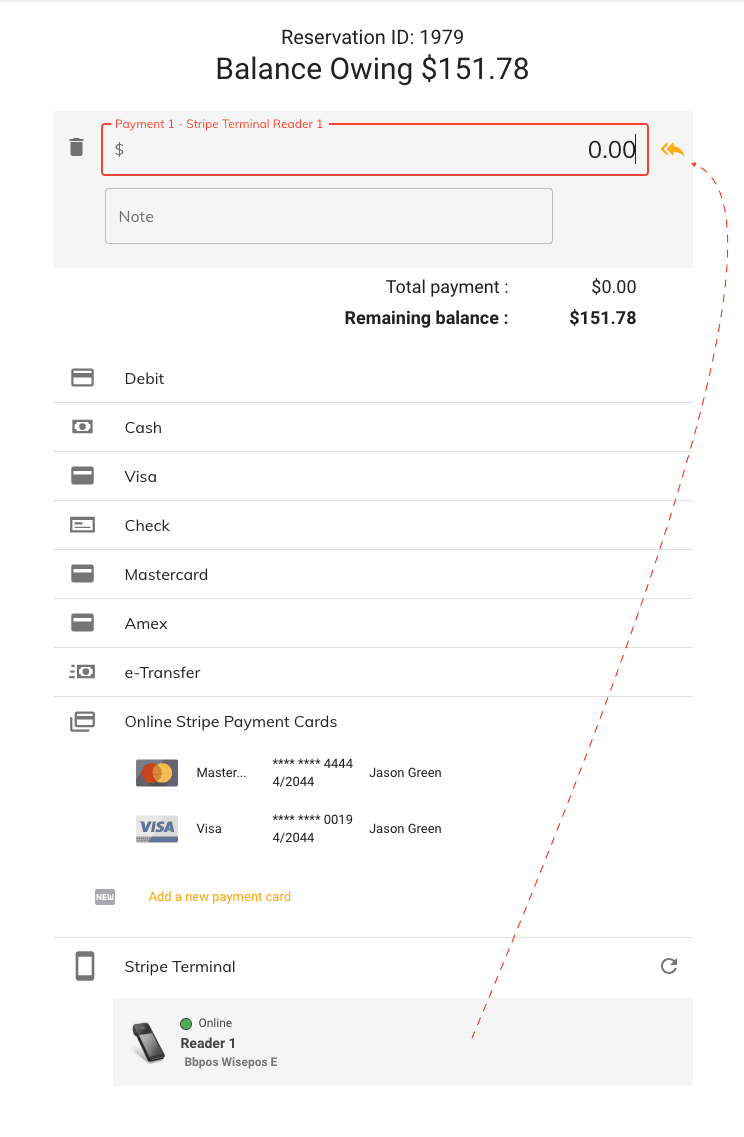
Terminal Reader Payments
📌 Note: These payments are securely processed through a terminal reader, allowing in-person transactions via tap-and-go, chip and PIN, or swipe.
- In the payment window, locate the Terminal Payments section.
- If a terminal reader is enabled, select the terminal you want to use.
- Ensure your terminal reader is connected and ready to process payments.
- If you have multiple terminals, select the one you want to use.
- If you are waiting for your terminal to connect, click Refresh to update the list.
-
Then enter the payment amount and click Payment.
-
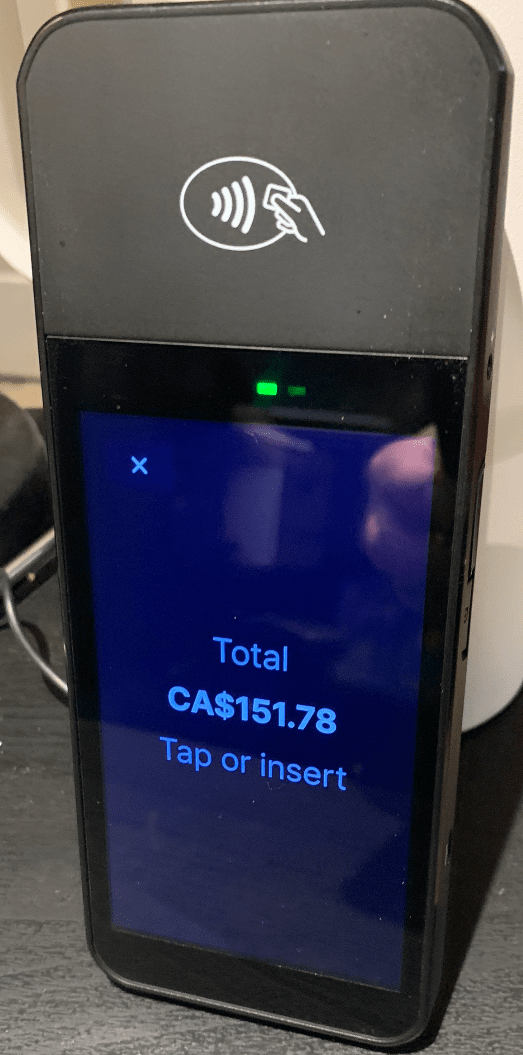
A popup window will appear prompting you to follow the terminal reader instructions.
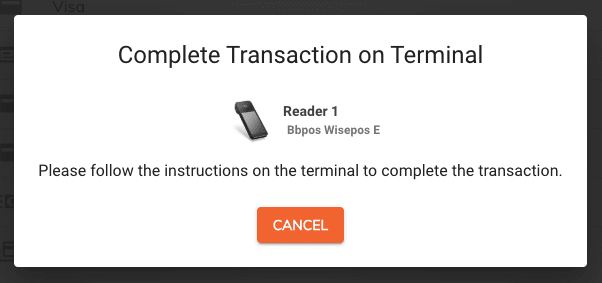
-
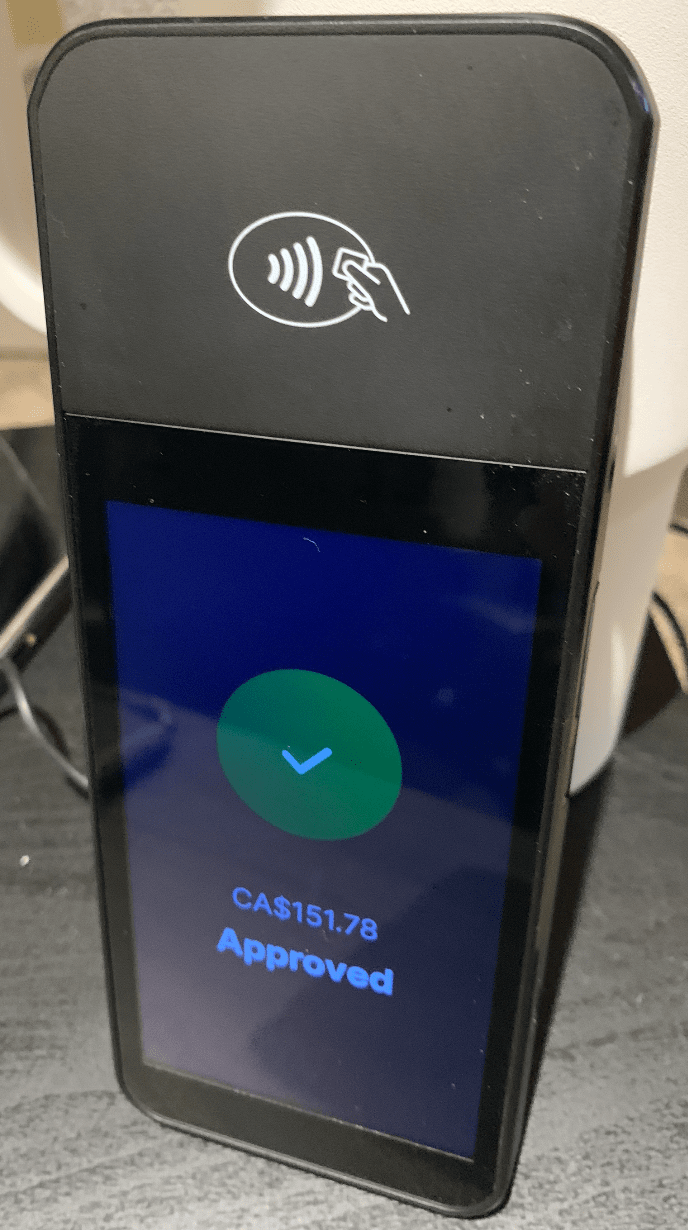
On the terminal reader, follow the instructions to complete the transaction.
-
Once the transaction is complete, the payment will be recorded in the system.
Linking a Payment to a Charge
Note
Payment linking and the Linked Charge column require the Payment Linking setting to be enabled in Campground Settings. When the setting is off, the picker and column are hidden. Payment Linking is automatically turned on whenever the Wallet Credit System setting is on, since the wallet feature depends on it.
Every payment on a reservation carries a linking status. The status determines which invoice section the payment appears on and how the per-category subtotals reconcile.
| Status | Effect |
|---|---|
| Unlinked | Counts toward the reservation total only. Shown on the reservation invoice, not on the meter invoice. |
| Linked to Meter | Counts toward the meter section subtotal. Appears on both the reservation invoice (in the meter section) and the Meter Invoice. |
| Linked to POS | Counts toward the POS section subtotal. Appears on the reservation invoice (in the POS section). |
Staff can set or change the linking status in two places: when creating a new payment, and after the fact from the payments table.
Linking when adding a new payment
When you create a payment from the payment window, a LINK TO A CHARGE picker appears below the payment amount and method. It has three card buttons: Unlinked, POS, and Meter.

- Open the payment window (from the grid or the reservation editor; see Step 1 above).
- Enter the payment amount and choose a payment method.
- Under LINK TO A CHARGE, click the category that matches what the guest is paying for. Leaving the default keeps the payment Unlinked.
- Save the payment.
The picker is only shown for reservation-payment flows. Wallet-funding and POS-sale flows skip it because the category is already implicit.
Pre-filling the amount with the category Apply button
When you pick POS or Meter in the picker, a sub-panel appears under the buttons showing the unpaid balance for that specific category along with an Apply button.
- The panel shows the unpaid balance for the selected category only, not the whole reservation balance.
- Clicking Apply copies that unpaid amount into the payment amount field so you do not have to retype it.
For example: a guest hands over cash for exactly the meter portion. Pick Meter, click Apply, and the form is pre-filled to the meter unpaid amount.
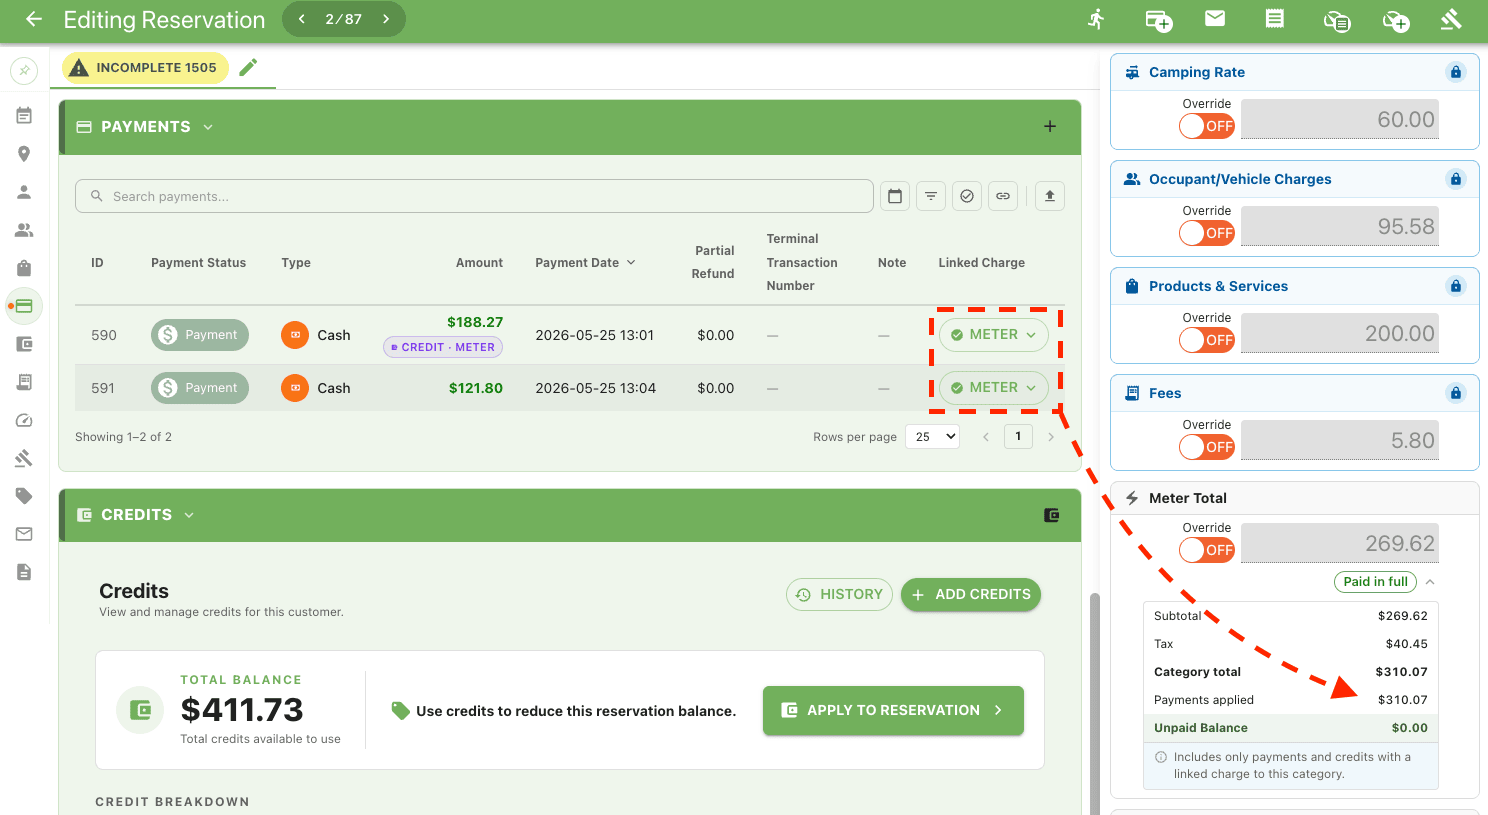
Changing the link on an existing payment
The payments table inside the reservation editor has a Linked Charge column. Each row shows the current status as a pill (Unlinked, METER, or POS), and the pill is itself a dropdown.
- Open the reservation.
- Scroll to Payments.
- Find the row you want to change and click its pill in the Linked Charge column.
- Choose the new status from the dropdown.
The change is immediate; there is no separate Save step. The relevant invoice subtotals recompute right away.
When and why this matters
Example: Seasonal meter deposit collected up front
A guest hands over $150 cash before any meter readings exist, intending to cover their seasonal meter usage. Adding the payment with Link to Charge → Meter ensures the amount shows up in the Meter Invoice's payments table later, instead of looking like a general reservation payment.Example: Correcting a mis-tagged payment
A payment was added as Unlinked but it really should have counted against the meter section so the Meter Invoice reconciles. Open the Payments table, click the Unlinked pill in the Linked Charge column, and pick Meter. The meter section subtotal updates immediately, no payment re-entry needed.