Emails
In this section you'll learn how to create and edit existing email templates which are used for specific actions. Also how to setup the email triggers which allows you to send emails automatically when a specific action is done.
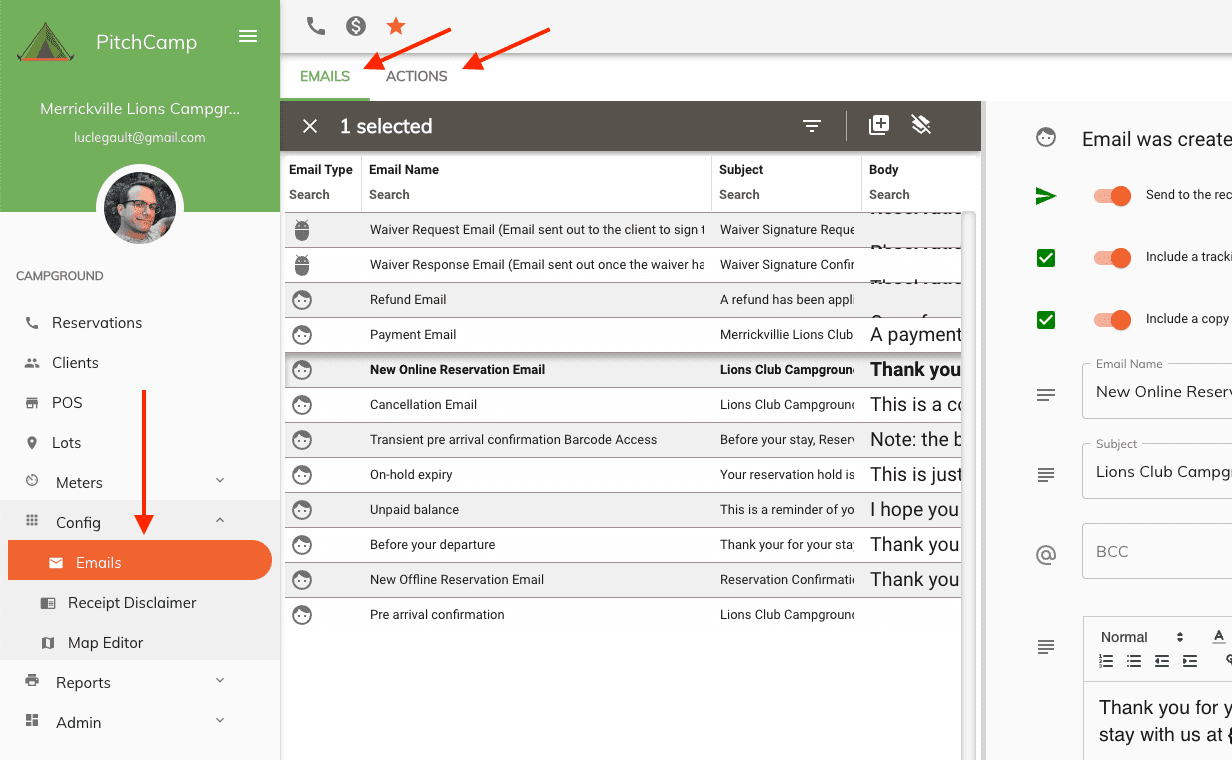
To access the emails go to Config and click on Emails.
Emails
The email panel is divided into two sections:
-
Emails - This section allows you to create and edit email templates. Email templates are the actual email that is sent to the client. You can create as many email templates as you want and use them for different purposes. Email templates can be used for sending emails manually or automatically when a specific action is done on a reservation.
-
Actions - This section allows you to setup emails to be sent automatically when a specific action is done on a reservation. For example, when a reservation is confirmed, an email can be sent to the client confirming the reservation. You can setup as many email triggers as you want and use them for different purposes.
Creating and Editing Emails
To create a new email template click on the New Email button located in the top right of the email section.
To edit an existing email simply select the email from the left grid. Then the email template will be loaded in the right panel.

The email has several fields that can be edited:
-
Send to the recipients assigned in the reservation - If this option is checked, the email will be sent to the recipients assigned in the reservation. This is the default option when sending out emails to your clients/reservations. As you can see in the image above, this option is checked. This means that the email will be sent to the recipients assigned in the reservation. If you want to send the email to a different email address, you can uncheck this option and specify the email address in the Send to field when sending out the emails. However, having this option enabled is useful when sending out emails to your clients/reservations. For example, when sending out a confirmation email, you want to send the email to the client's email address. This option allows you to do that without having to specify the email address every time you send out an email.
-
Include a tracking pixel in the email to know if it was opened - If this option is checked, a tracking pixel will be included in the email. This allows you to know if the email was opened by the recipient. This is useful when sending out emails to your clients/reservations. For example, when sending out a confirmation email, you want to know if the client opened the email. This option allows you to do that.
-
Include a copy of the reservation invoice below the email message - If this option is checked, a copy of the reservation invoice will be included in the email. This is useful when sending out emails to your clients/reservations. For example, when sending out a confirmation email, you want to include a copy of the reservation invoice. This option allows you to do that.
-
Email Name - The name of the email template. This is used to identify the email template in the system.
- Email Subject - The subject of the email.
- BCC - The email address to send a blind copy of the email to. This is optional. This is also a good way to include yourself in the email should you want to receive a copy of the email in your inbox.
- Message - The email message to send out. This can be formatted using HTML. You can use the Insert Field button to insert fields into the email. These fields will be replaced with the actual values when the email is sent out. For example, if you insert the {res_id} field, when the email is sent out, the field will be replaced with the actual reservation number. This is useful for sending out emails with dynamic information.
- Attachments - You can attach files to the email. This is optional. You can attach multiple files to the email. To attach a file click on the Add Attachment button. Then select the file you want to attach. You can also remove an attachment by clicking on the Remove button next to the attachment.
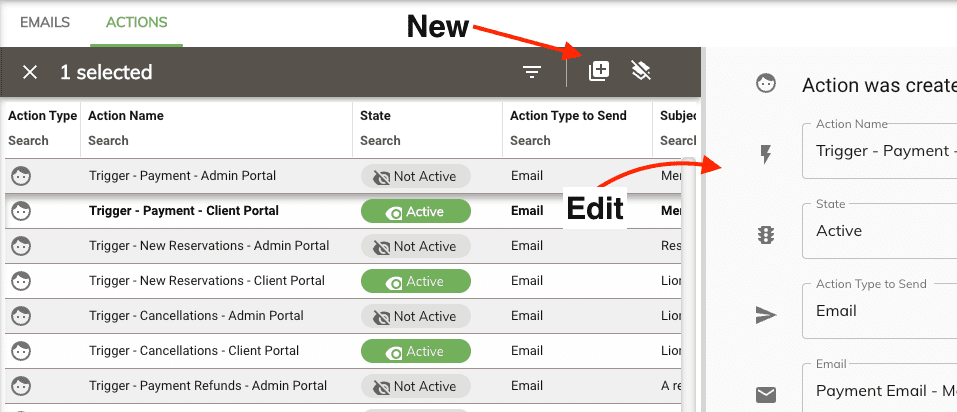
Creating and Editing Actions
Email actions allows you to setup emails to be sent automatically when a specific action is done on a reservation. For example, when a reservation is confirmed, an email can be sent to the client confirming the reservation. You can setup as many email triggers as you want and use them for different purposes.
To create a new email action click on the New Action button located in the top right of the actions section. To edit an existing email action simply select the email action from the left grid. Then the email action will be loaded in the right panel.
The email action has several fields that can be edited:
-
Action Name - The name of the email action. This is used to identify the email action in the system.
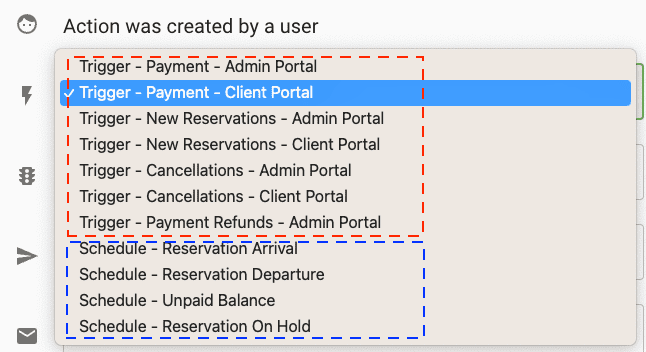
- Note: the email names are divided into to sections:
- Triggers: These are the actions that are done on a reservation. For example, when a reservation is confirmed, an email can be sent to the client confirming the reservation. These are the actions that trigger the email to be sent out.
- Schedule: These are scheduled actions that are done on a reservation. For example, you can setup an email to be sent out 2 days before the reservation start date. These are the actions that trigger the email to be sent out.
- Note: for each trigger there is one for the Admin Portal and another for the Client Portal.
- Admin Portal - These are the actions that are done in the admin portal. For example, when a reservation is created by you on the admin portal, an email can be sent to the client confirming the reservation.
- Client Portal - These are the actions that are done in the client portal. For example, when a reservation is created by the client on from the online booking page, an email can be sent to the client confirming the reservation.
- Note: the email names are divided into to sections:
-
State - The state of the email action. This can be either Active or Not Active. If the state is Active, the email action will be triggered when the action is done on a reservation. If the state is Not Active, the email action will not be triggered when the action is done on a reservation.
-
Action Type to Send - The type of email to send. This can be either Email or Waiver. If the type is Email, the email template will be used to send out the email. If the type is Waiver, a waiver will be sent out by this action.
-
Email - The email template to use when sending out the email. This allows you to pick your email template which you've created in the Emails section. This is only available if the Action Type to Send is set to Email.
Note: a preview of the email body will be displayed below the email template dropdown. This allows you to see what the email will look like when it is sent out.
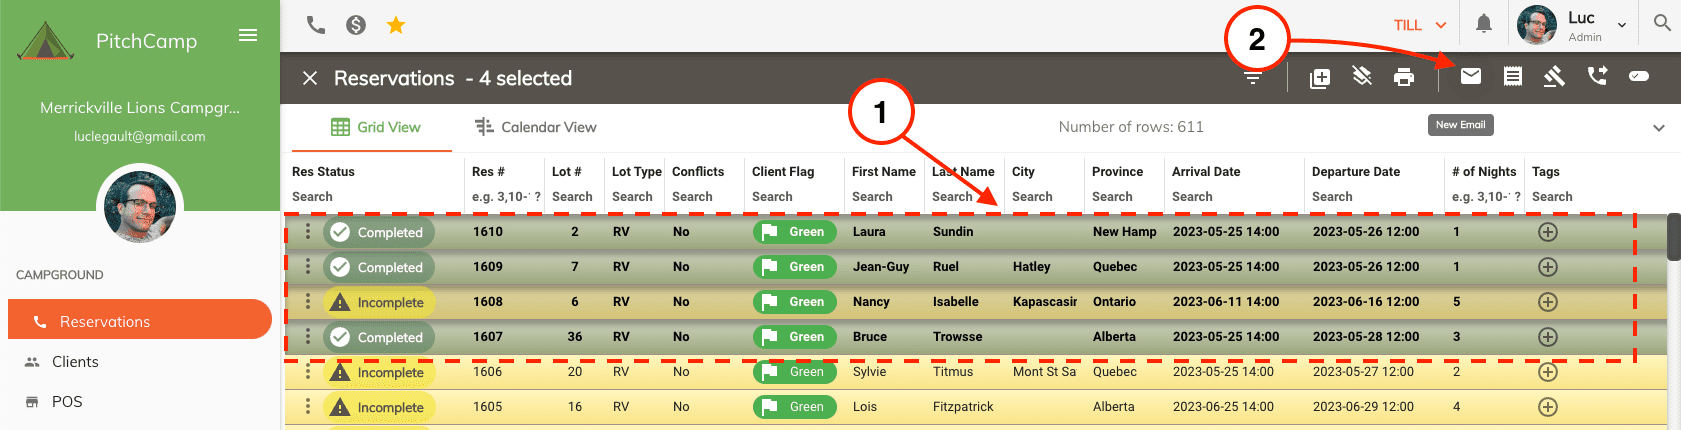
Manually Sending Emails
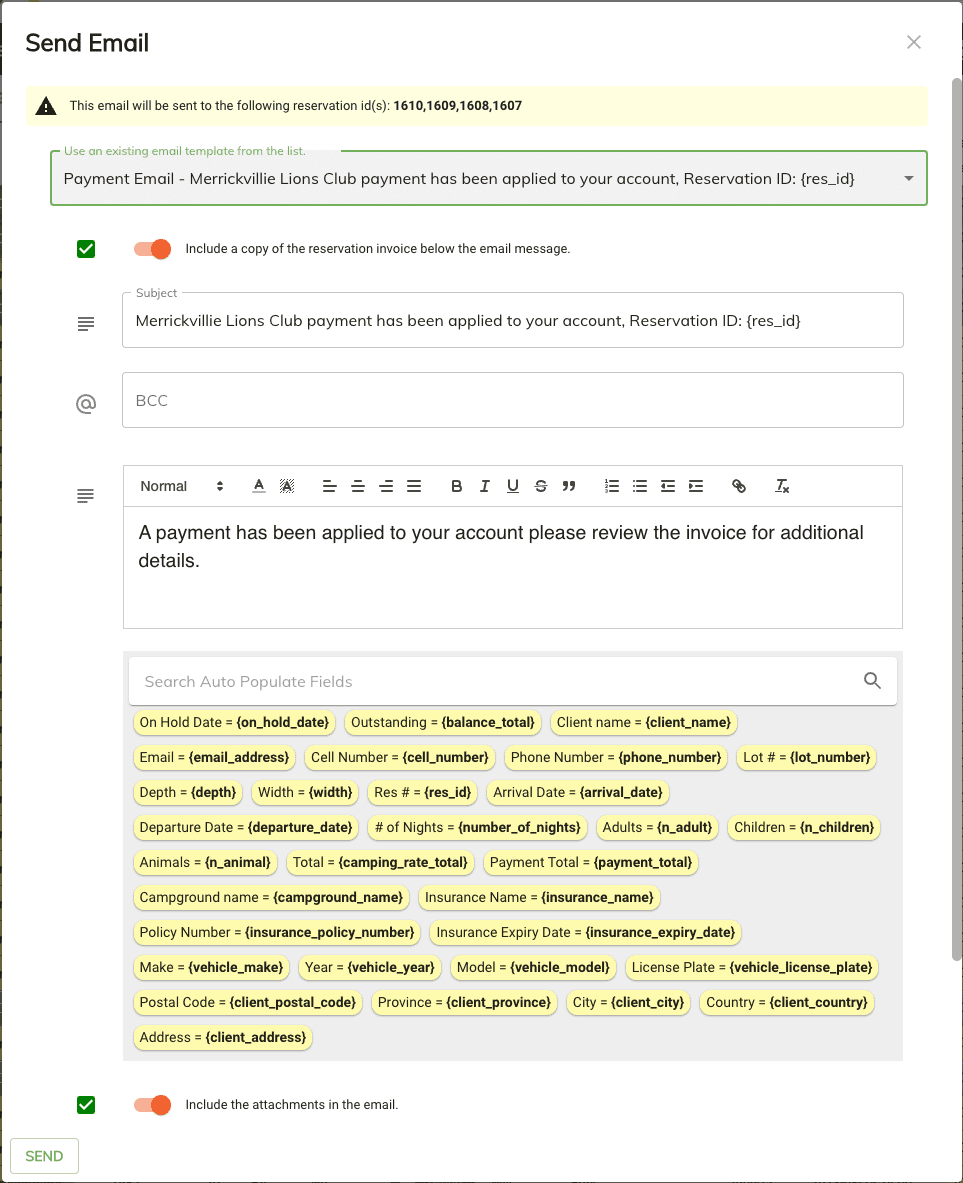
To manually send out an email go to your reservation grid. Then select the reservations you want to send out the email to. Then click on the Send Email button located in the top right of the grid. Then select the email template you want to send out. Then click on the Send button. The email will be sent out to the recipients assigned in the reservation.
To send out the same email to multiple reservations select all the rows from the reservation grid and then click on the Send Email button. Then select the email template you want to send out. Then click on the Send button. The email will be sent out to the recipients assigned in the reservations.
Once the email window opens you'll be presented with the option to select your email template. Once the email template is selected the email will be pre-filled with the email template information. You can then edit the email if you want. Then click on the Send button to send out the email.
- BCC - the bcc field allows you to specify a bcc email address. This is optional. This is also a good way to include yourself in the email should you want to receive a copy of the email in your inbox.
Viewing Email History
To view the email history go to your reservation grid. Then hover over the Sent Emails filed. This will open up the email history window. This window will display all the emails that were sent out for the selected reservation. You can also view the email history for a specific reservation by opening up the reservation and going to the Sent Emails section.
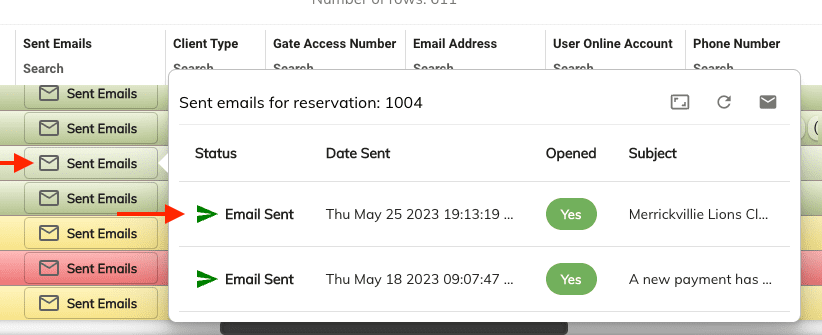
Note: the email history popup displays if the recipient has opened the email or not. This is only available if the Email Tracking option is enabled in the Emails section.
You can preview the email that was sent out by clicking on it from the email history window. This will open up the email in a new window. You can also resend the email by clicking on the Resend button. Before sending the email you can also include additional receipts by adding the email address in the To field by placing a comma between each email address.
If there are multiple emails in the email history you can view the next email by clicking on the next or previous button located at the top of the email window.