Renewing a Reservation
The reservation renewal process is used when you want to reuse the same information from a past reservation but with different dates. This speeds up your process of re-booking your re-occurring clients such as seasonal or yearly bookings.
Tip
You can also use the timeline to renew a reservation by using the same steps as below.
Step 1:
Got to the reservation panel.
- Select the reservation you would like to renew from the grid or the timeline by clicking on it once.
Step 2:
-
Now with the reservation that you want to renew selected click on the
Renew Reservationicon from the top tool bar.
Step 3:
-
This will open up the reservation renewal dialog where you will be able to start the process of renewing a reservation.
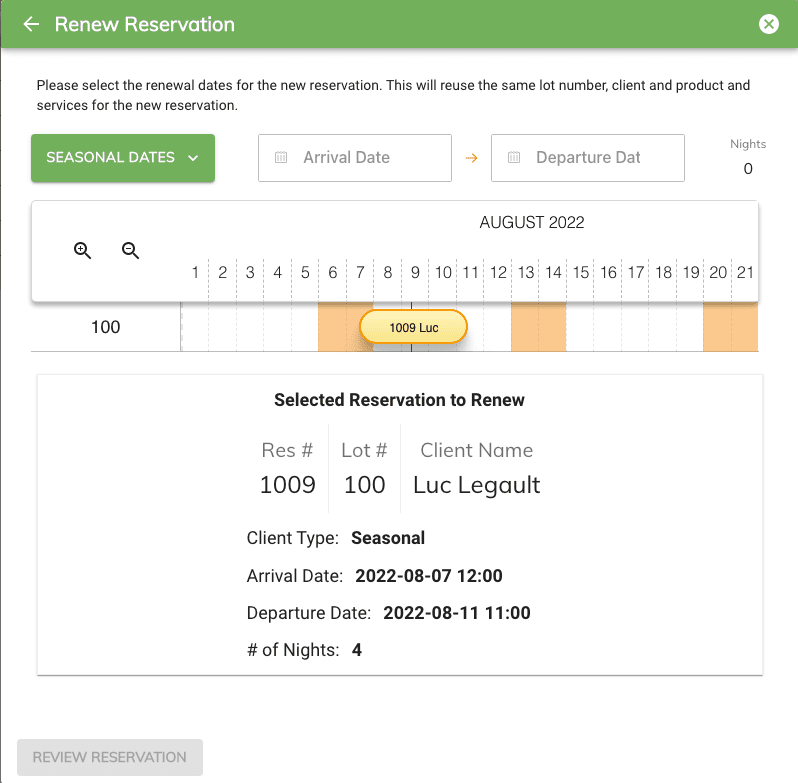
-
Select the new
ArrivalandDeparturedates of the new reservation.
-
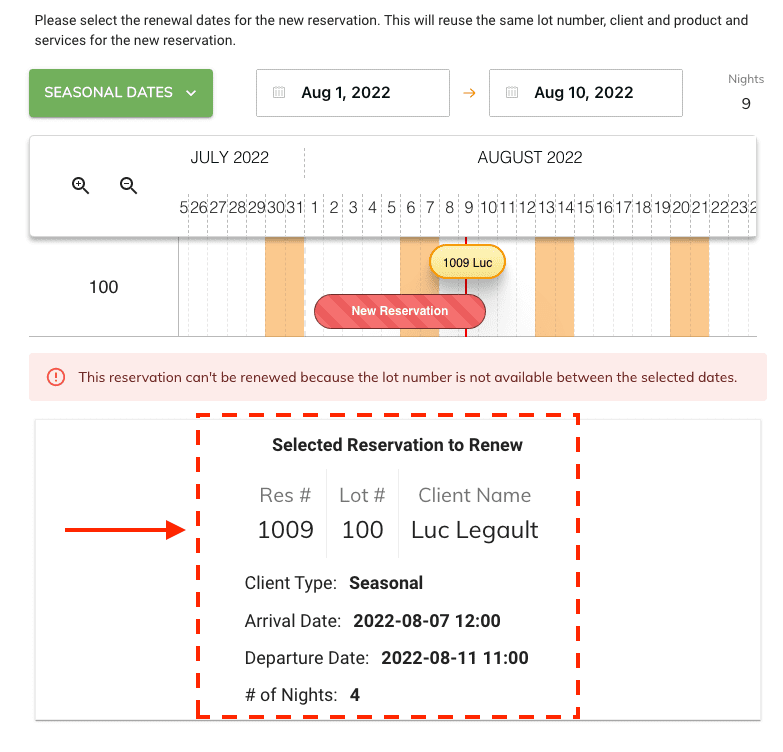
You can also select your seasonal date periods by clicking on the
Seasonal Datesdropdown button. This will pre-fill your dates based on your seasonal dates for the selected year.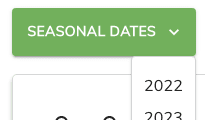
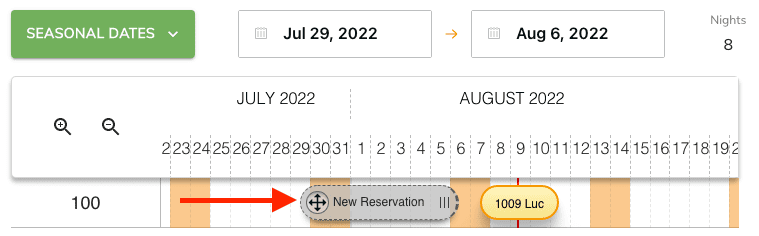
Tip
You can also use the timeline below the date range selection to adjust the start and ending date of the reservation. By double clicking on the timeline will add a new reservation item allowing you to move and resize it to your desired position.
Step 4:
-
If there are no conflicts detected with the selected dates then you will be able to continue with the
Reservation Renewalby clicking on the Review Reservation button. If there is a reservation conflict then you will need to correct it before you're able to proceed.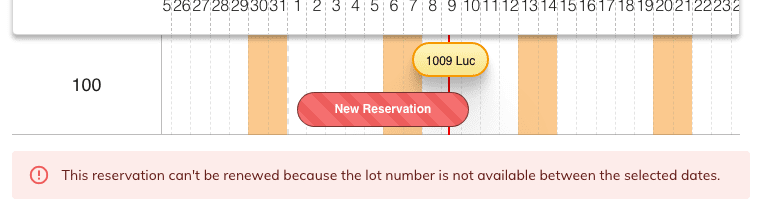
-
The information displayed at the bottom of this renewal window is from the selected reservation. This is to give you some quick information on the current selected reservation.
Step 5:
- Click on
Review Reservationbutton to move to the next step.
Step 6:
-
Now you will be presented with the reservation review panel containing the following:
-
The new
ArrivalandDeparturedates selected for the renewal. -
Along with all the same information from the selected reservation from step 2.
- Lot number
- Client
- Occupants and Vehicles
- Products and Services
-
This is the same process used as when we are creating a new reservation. Therefore you can edit any parts of the reservation before saving/creating the new reservation.
Note
The reservation total might vary depending on the dates/number of nights selected and or new rates.
Step 7:
- Once you are ready to create/save the new reservation select the
Savebutton. - At this point you will have successfully created a new reservation.