Lot Directions
The driving direction feature allows you to include a map or driving directions on how your clients can or should navigate to their campsite/lot once they arrive at your campground.
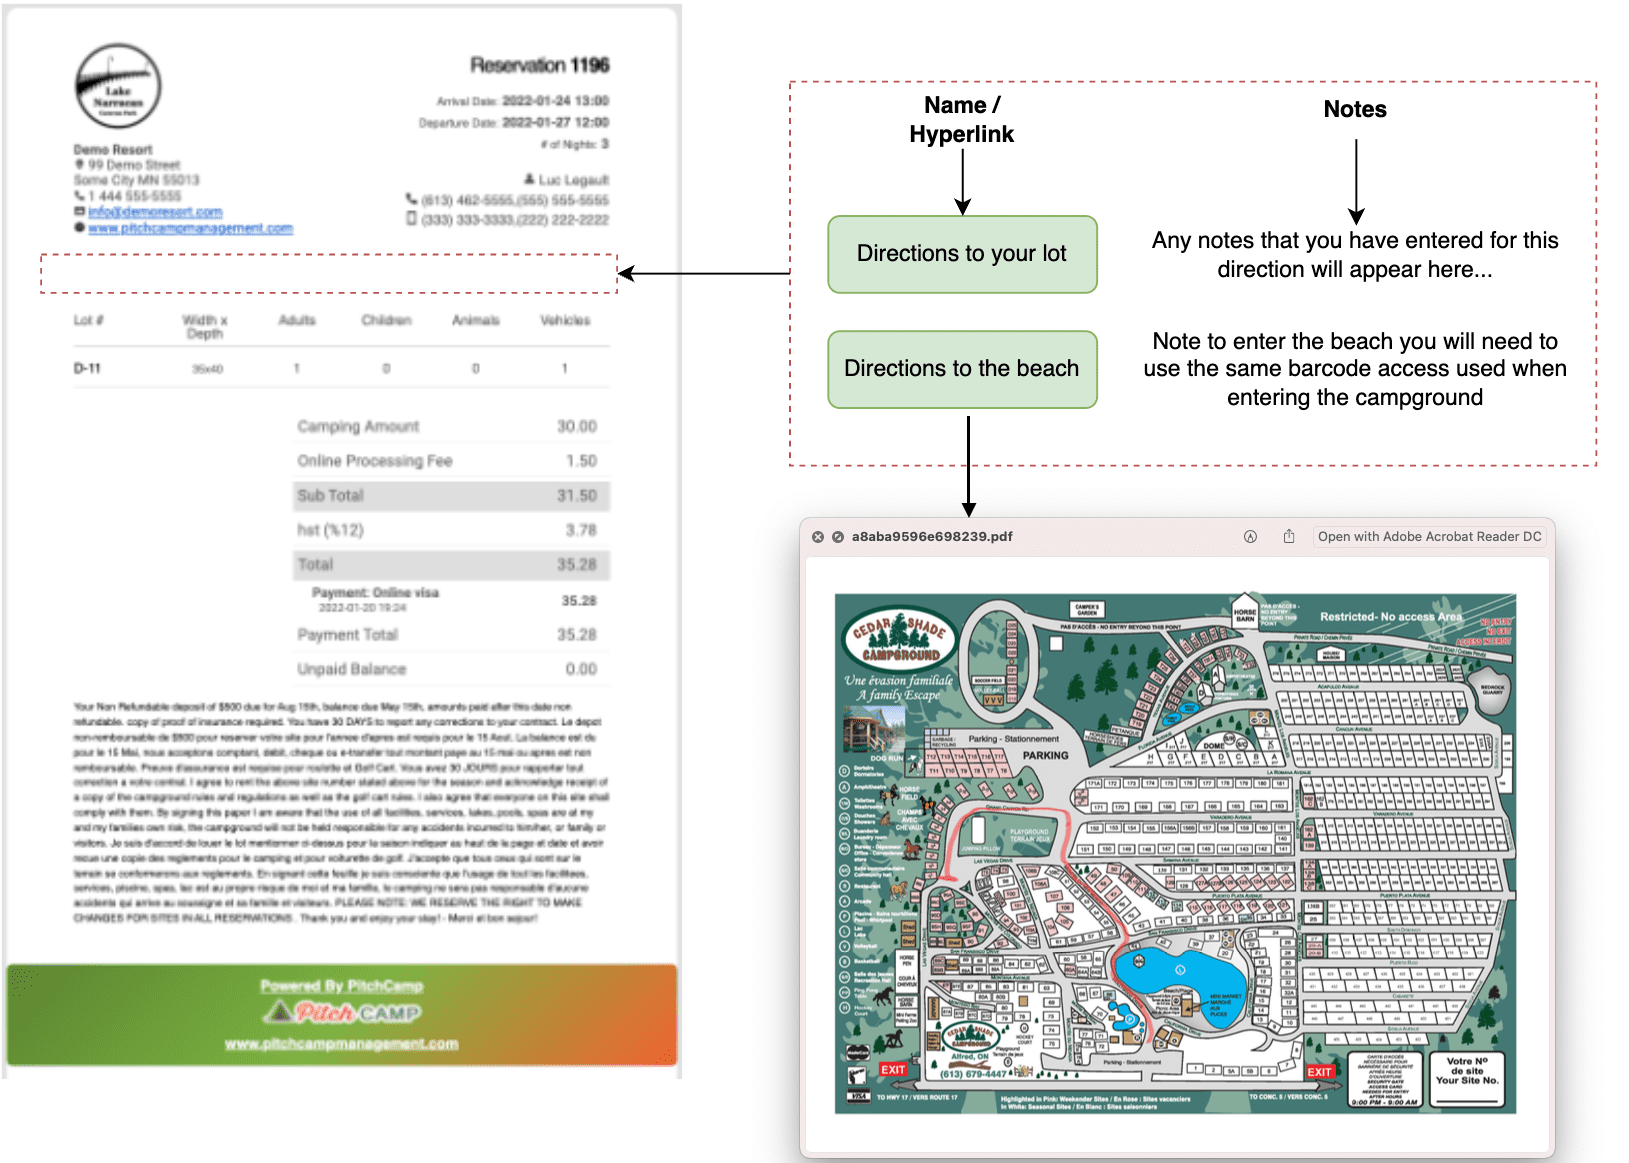
The driving directions/map will be included in the confirmation email sent to your clients. Your clients will be able to click on a link from within the email that will open up a map for the lot assigned to that reservation.
Driving Directions are Attached to Your Lot
-
A lot can have a maximum of two driving directions.
-
The uploaded map can be a PDF or an Image(s). If you decide to upload an image(s) the system will convert your image(s) into one PDF document and use that PDF document as the map direction.
-
The uploaded files must be less than 5mb in size.
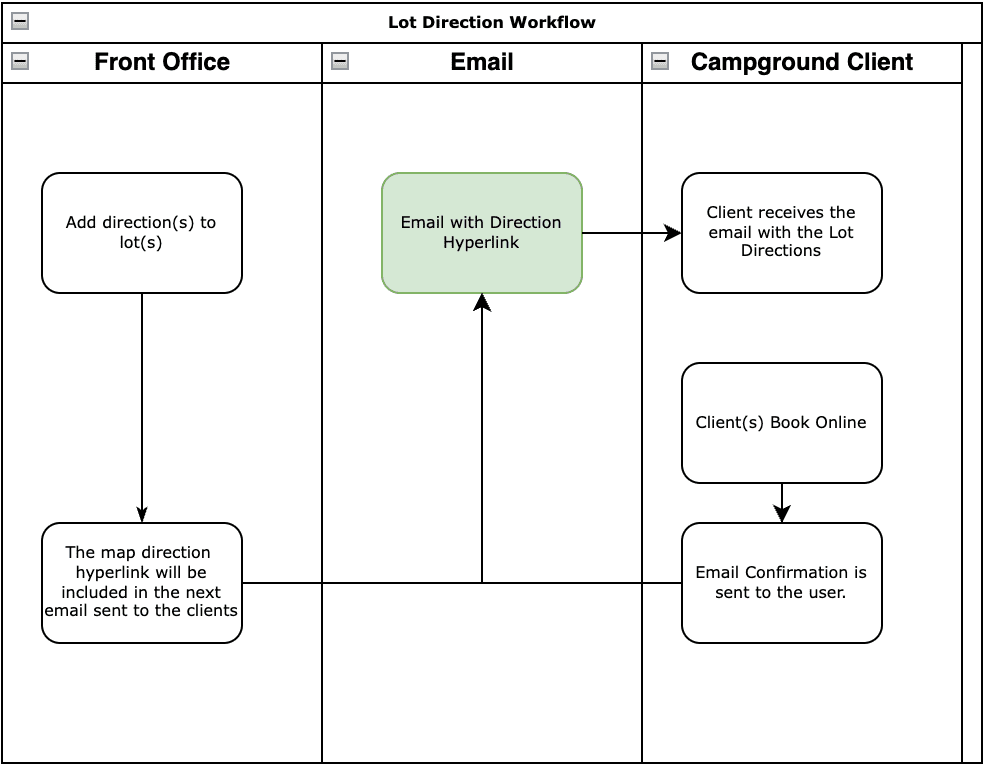
Lot Direction Workflow
The following shows the workflow how the lot direction feature works end to end.
Adding a Driving Directions to a Lot
To add driving directions to a lot you first need to navigate to your lot panel. From the application menu select Lots.
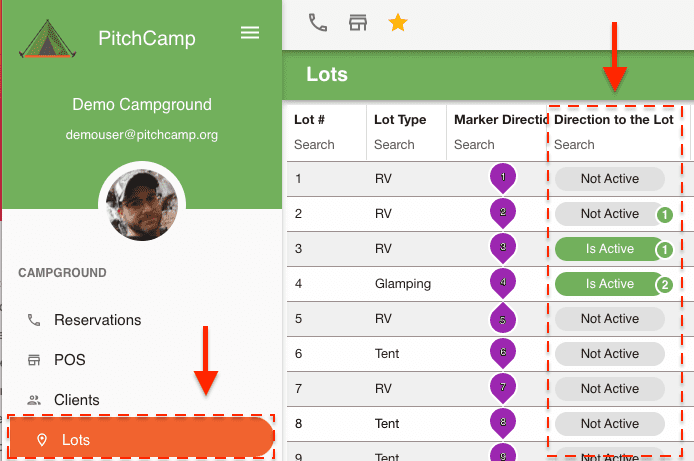
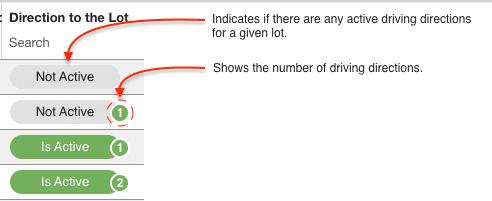
A column called Direction to the Lot indicates the current status for each lot in your system.
Edit the lot by double clicking on it and scroll to the bottom of the page and expand the driving direction.

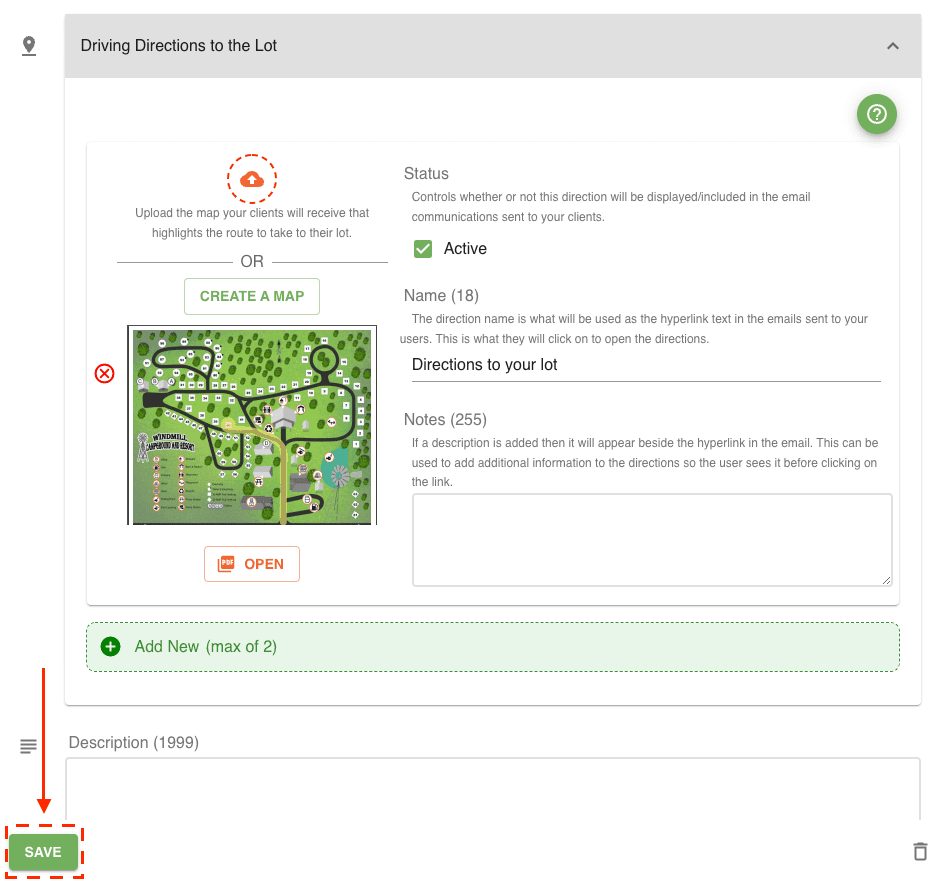
Once the driving direction panel is open you will be able to add, remove and edit the driving directions assigned to that specific lot number.
-
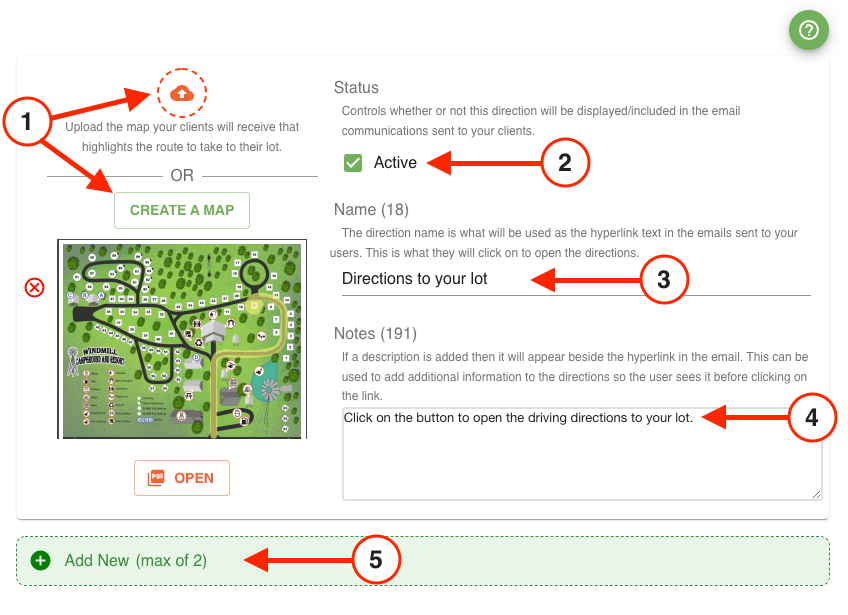
Use the Upload Button to add a map with the pre highlighted route that you want your clients to follow. Note: this can be a PDF file or an Image. You are responsible to highlight the route on the map before uploading the file to the system.
- OR Create a map using the Create a Map button.
-
The Active status allows you to make the direction active or not. If the driving direction is active then it will be included with the next invoice email sent to your clients.
-
The direction Name is what will be used as the hyperlink text in the email sent to your clients. This is what they will click on to open the uploaded map.
-
The Notes section allows you to add additional information/instructions that will be presented beside the Name hyperlink button in the email sent to your clients.
-
To add a new driving direction for a given lot click on the Add New button.
Creating a Map
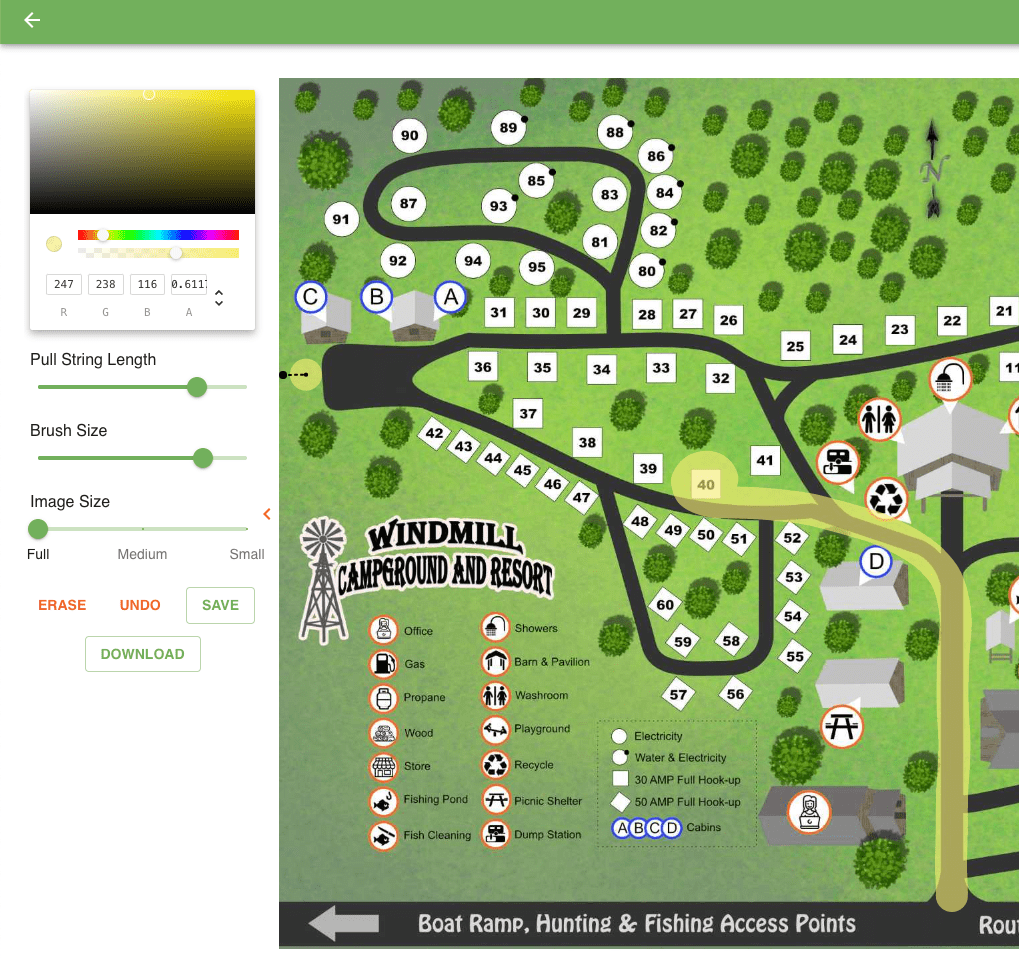
To start drawing an your campground map click the Create A Map button which will open the panel allowing you to draw the desired route you wish your client take when driving to their lot.
This will allow you to trace out a path on your map which will help your clients to get to their lot.
Color: Using the color pallet you can choose your desired brush color and also adjust the color transparency.Pull String Length: Adds a pull string to your brush making lines smoother.Brush Size: Controls the radius of the brush when stroking the map.Image Size: Changes the height and width of the campground map. There are three sizes that can be used (Full, Medium and Small)Erase: Removes all the brush strokes on the map.Undo: Undo the last brush stroke on the map.Save: Saves your changes to the lot driving direction.Download: Downloads and image of the map with the brush strokes.
Saving the Driving Directions
Once the driving directions are added select the Save button located at the bottom of the panel to save your changes.