Printing Gate Numbers to Dymo Label Printer
The following will walk you through on how you can print your gate access numbers onto a label as a Barcode. This enables you to open your front gate using a barcode/gate number associated with the clients/reservation when using the PitchCamp gate access module.
The PitchCamp gate module has a barcode reader that enables your clients to open your gates using a gate access key or a barcode.
A lot of campgrounds don’t want to give a gate access key to their transient campers as it creates friction and adds an additional variable where the clients need to return their gate access key at the end of their stay.
PitchCamp allows you to create a temporary gate access number that automatically expires. Using the temporary gate access numbers given to your clients PitchCamp has a feature that enables you to print the gate access number as a barcode so your clients can open the gate from the PitchCamp gate access module.
This way you don’t need additional gate access key cards and or worry about lost/stolen gate access keys.
Example
Here’s how some of the campgrounds are using the gate access number as a barcode.
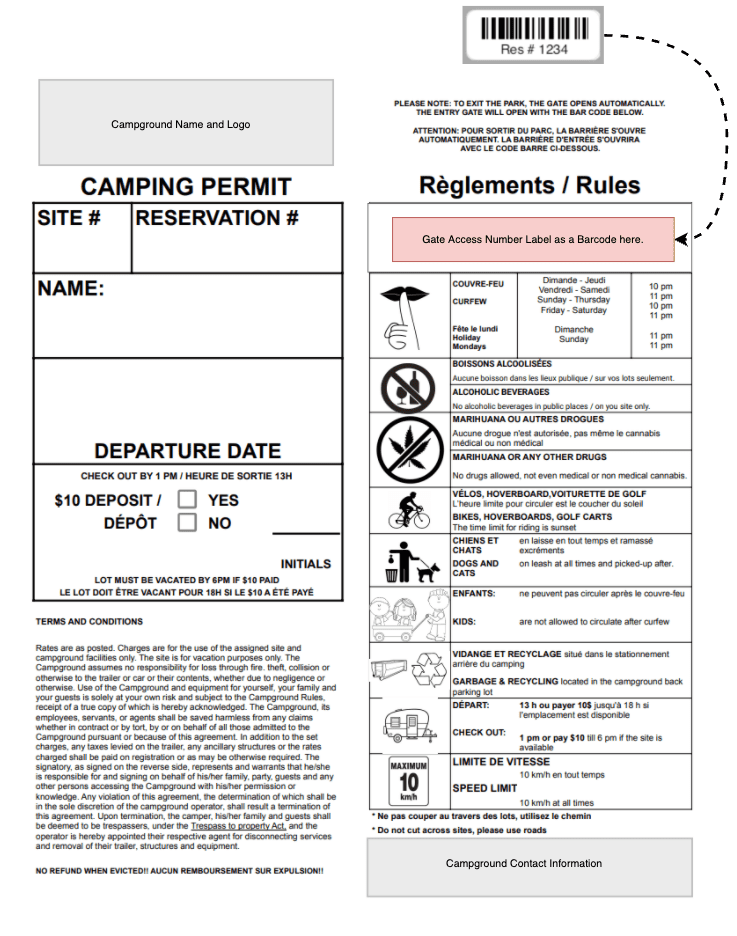
As you can see from the example above the campground designed their own camping permit which was made and printed by their local print shop in order to lower printing costs and simplify the process.
Then they manually enter the transient campers' information such as the site number, reservation number and their names.
Afterwards the gate numbers are printed onto a Dymo label as a barcode affixed on the camping permit.
Your transient clients would then keep the camping permit as their proof of access to your campsite and to open the front gate. Once their reservation is over the temporary gate access number is automatically deactivated.
Assigning a Temporary Gate Access Number to a Client
Before you can print your temporary or keycode gate access number you must first assign a gate access number to a client.
To assign a gate access number to a client first start by editing a reservation by double clicking on a row.
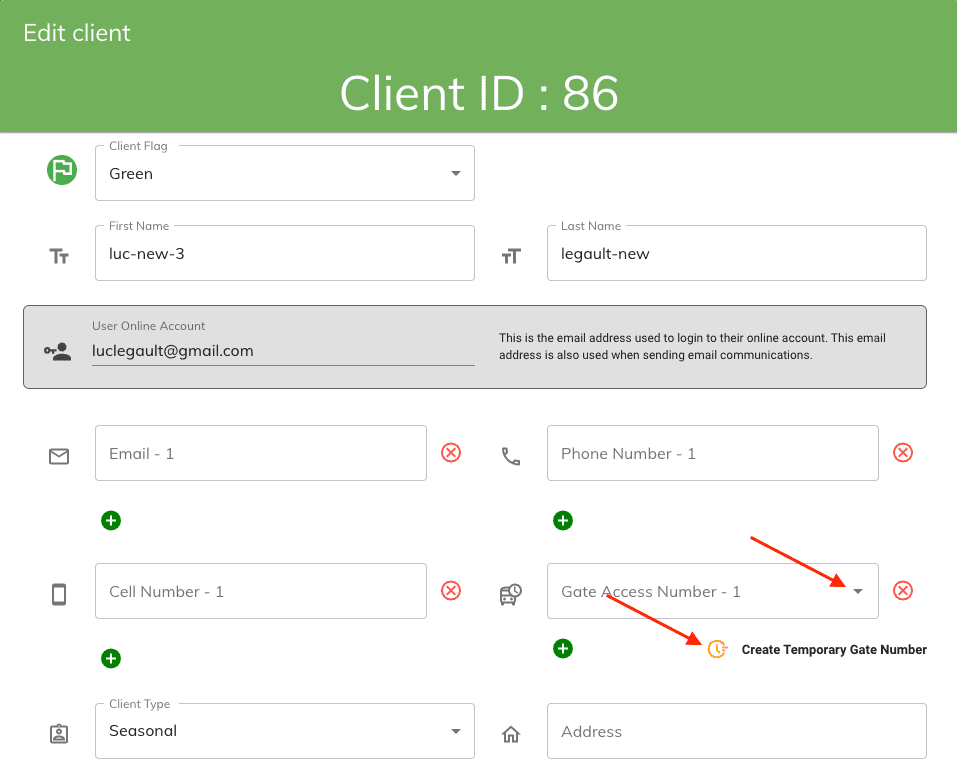
Once in the reservation you can edit a client by clicking on the client section OR selecting the edit icon.

Then in the client panel you can eight assign or create a new temporary gate number for the selected client.
-
Selecting an existing gate number: To select an existing gate number click on the drop down where you will be presented with the gate numbers currently in your system.
-
Creating a Temporary Gate Number: To create a temporary gate number simply click on the ‘Temporary Gate Number’ button and this will create a new temporary gate access number for your client.
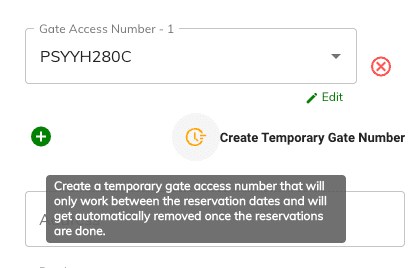
Save your client changes by selecting the save button.
Printing Gate Access Numbers onto a Dymo Label
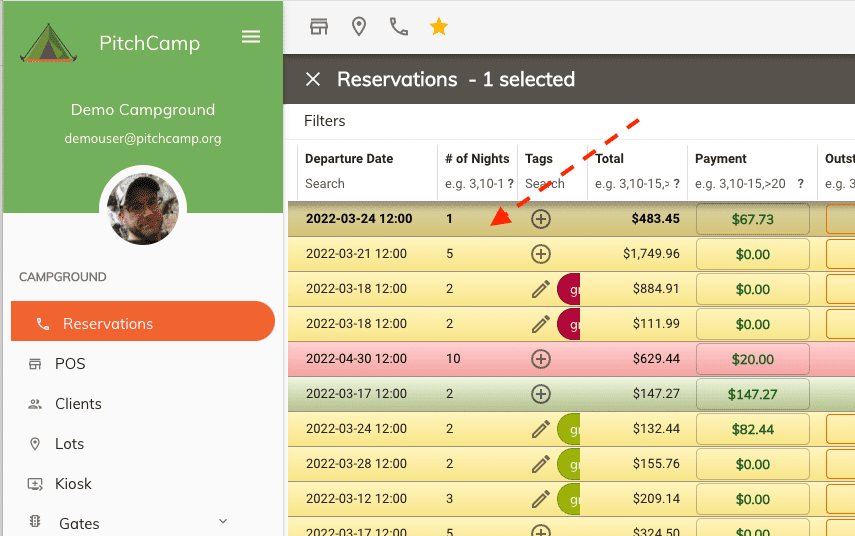
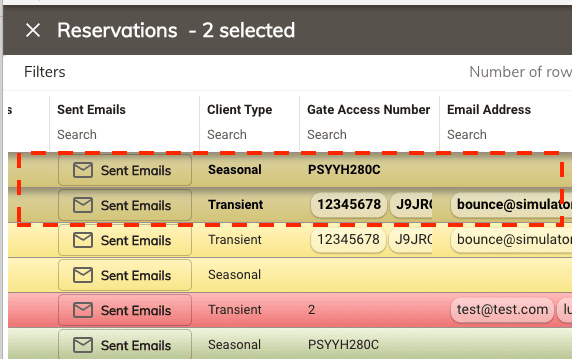
From the reservation grid select the reservation(s) having gate numbers you would like to print.
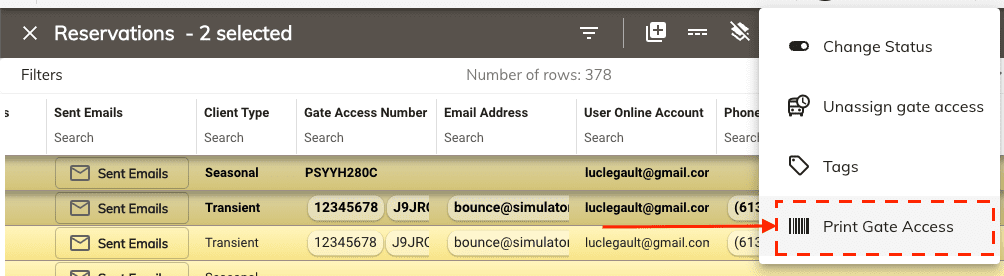
Now that you have the reservations selected in the grid containing the gate access numbers you would like to print onto a Dymo label, select the Bulk Menu.

This will open up a menu where you will need to select the Print Gate Access menu.
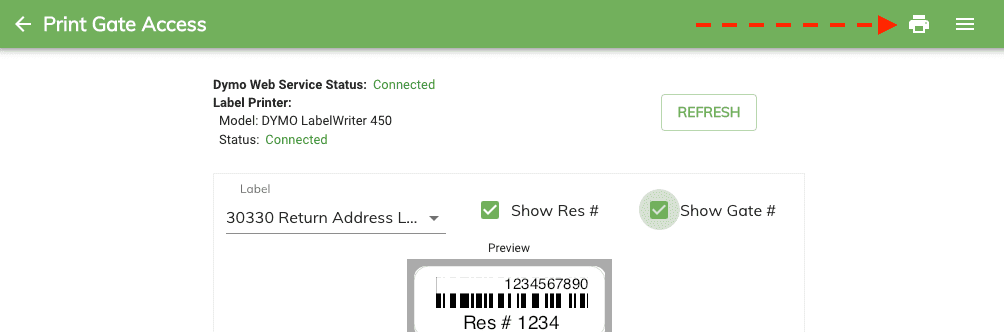
At the Print Gate Access panel you will be able to choose which gate numbers to print by checking or unchecking them.
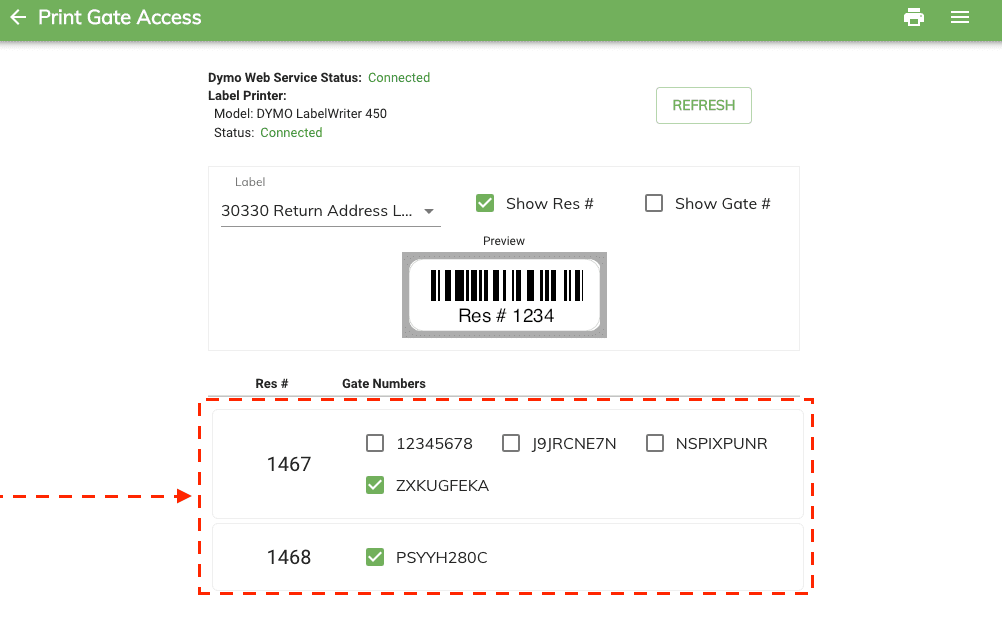
Once you have the labels that you would want to print selected choose the type of label to print on.
Currently there are two types of label to choose from.
-
30330 Return Label ¾ x 2
-
30250 White Address Labels 1 ⅛ x 3 ½
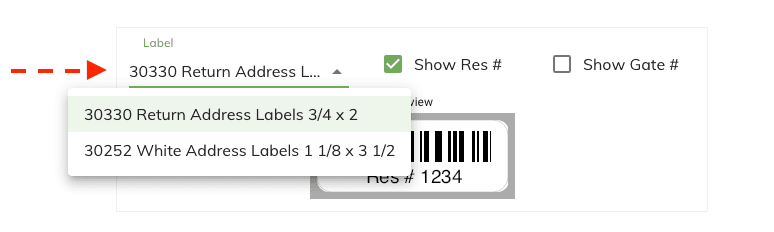
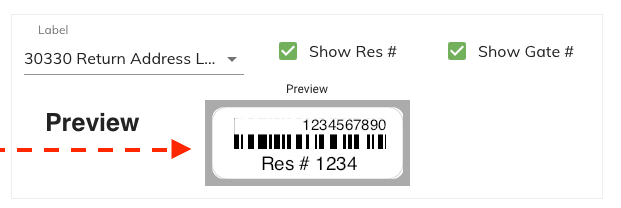
Once a label is selected the preview area will update with your changes and you’ll be able to select if you would like to Show the Reservation and or Gate Number on the label.
When ready to print, select the print button from the menu.
Selecting your Dymo Label Printer
The first time you try printing to the Dymo label printer you’ll need to select a printer that is installed on your computer. To select an installed label printer you can click on the link near the Label Printer. Or Open up the Hamburg menu and select “Label Printer Settings”.
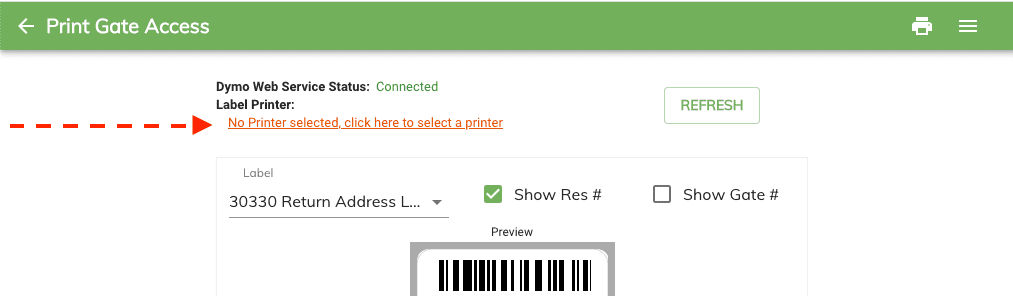
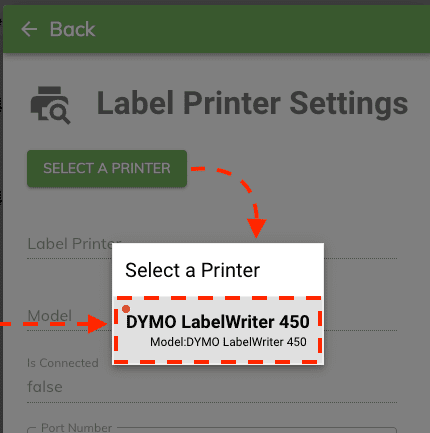
This will open up a new popup where you will be able to Select a Printer.
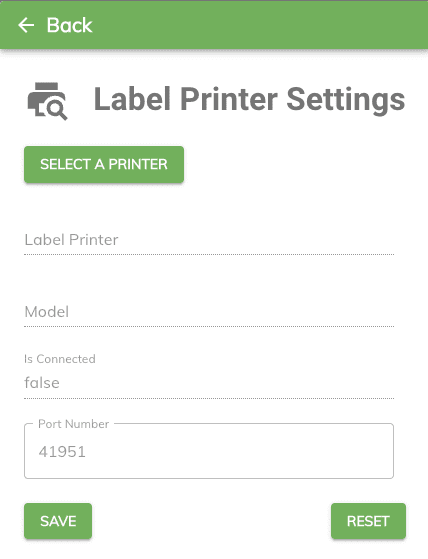
Then once the printer selection panel oppens simply select the installed label printer you wish to use and save your changes.
Troubleshooting the Dymo Label Printer
Unable to Connect to the Dymo Web Service
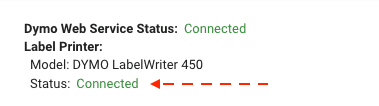
The Dymo label printer service can sometimes be down, preventing PitchCamp from connecting to the Dymo Web Service.
At the Print Gate Access panel if you see the Dymo Web Service Status Not Connected.

Then you need to ensure two things.
-
The Dymo Web Service is properly installed by following the installation steps: Installing the Dymo Label Printer
-
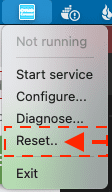
Try restarting the Dymo Web Service by clicking on the Dymo icon on the taskbar and selecting Reset.
Then once the Dymo Web Service is restarted click on the refresh button to retry the connection.

Once the Dymo Web Service Status indicates Connected we are ready to print.
Unable to Connect to the Label Printer
Sometimes you might have difficulties connecting to the label printer. If PitchCamp can’t connect to the label printer you will see a status of Not Connected.

-
Try reconnecting the label printer to the PC.
-
Try powering off and then back on the label printer
-
Then Click on the Refresh button to see if PitchCamp can now see the label printer.
Once the label printer is connected and ready to be used by PitchCamp you will see the status change to Connected.