Admin Panel Overview
 ADMIN
ADMIN
Click the down arrow on the Admin icon at the left of the screen, this opens seven options.
-
Campground Settings
-
Rates
-
Extra People
-
Add-ons
-
Fees
-
Taxes
-
Date Brownouts
CAMPGROUND
SETTINGS
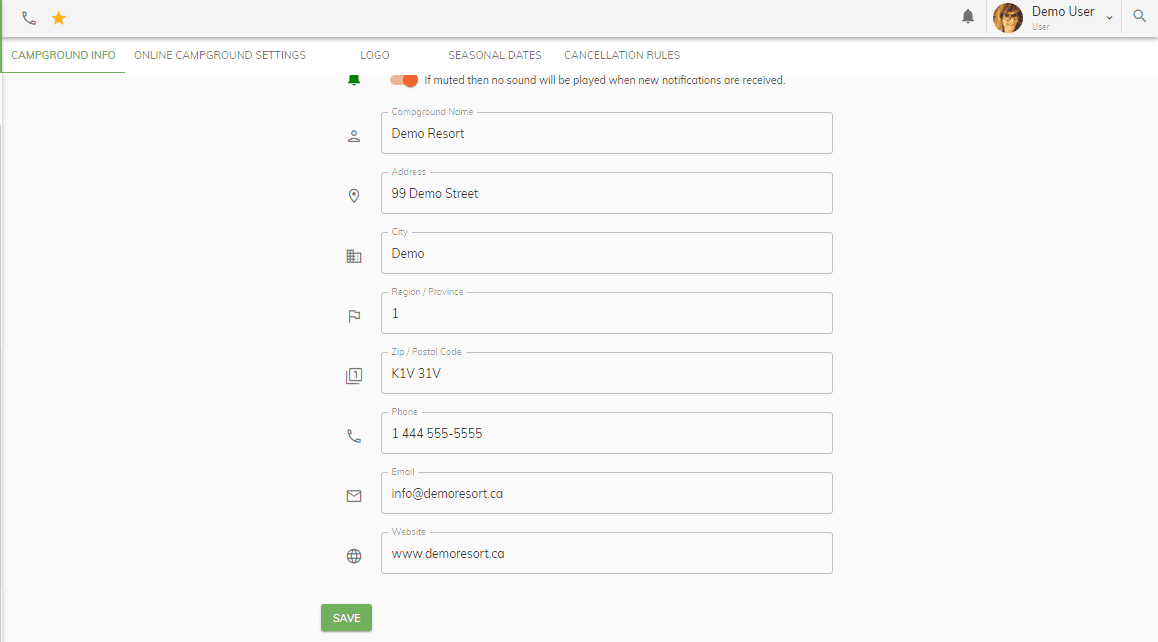
Click on Campground Icon on the left and it opens the campground dialog screen. This is where you enter the Campground’s information that will show on reservation contracts.
There is an option to have the bell ON or MUTED to receive notifications.
ONLINE CAMPGROUND SETTINGS

For online reservations, the control button is to be at the ON position.
Youtube Video: You can include a Youtube video that will appear at the top of your online reservation page.
Campground Slogan: You can include a campground slogan which will appear on your online reservation page.
General message: You can display a general message that will appear in the blue box on the online reservations. This can make reference to waivers, which sites are not available for rent online, etc.
Warning message: This message will appear in the pink box on the online reservation. This could be a message that the site is down for maintenance, or no days visitors allowed, etc.
Campground cancellation policy: In this field, type in this field the campground cancellation policy that will appear on the online reservation receipt.
Campground refund policy: In this field, type in the campground refund policy that will appear on the online reservation receipt.
Click Save at bottom of page
Before you put reservation system online, click on the icon
 at
the end of online client meta link box.
at
the end of online client meta link box.
If all is good, click control button to “ON”.
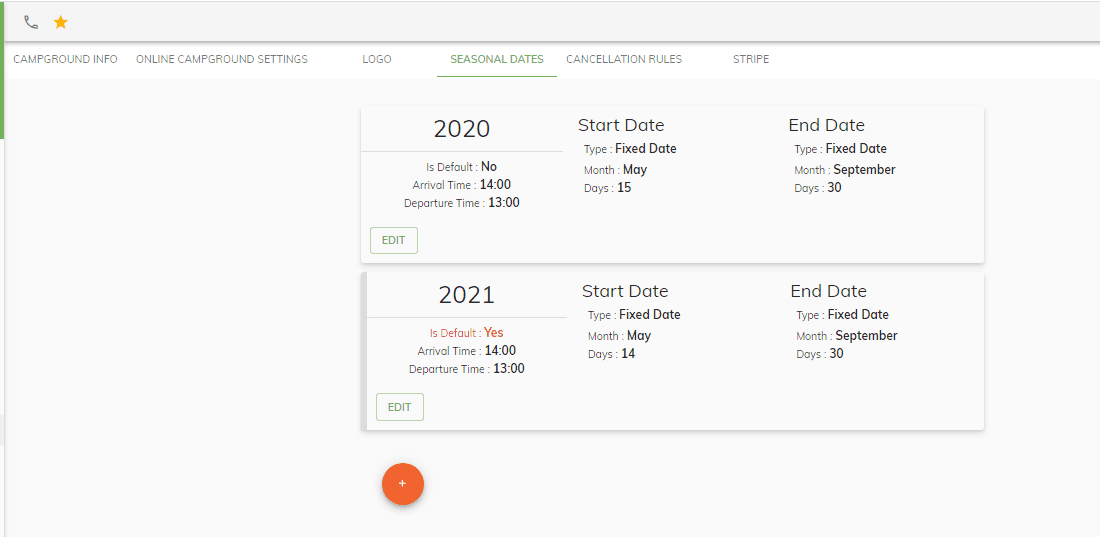
SEASONAL DATES
You can edit the seasonal dates, arrival time, departure time on this screen. To add a new season, click on the + icon.
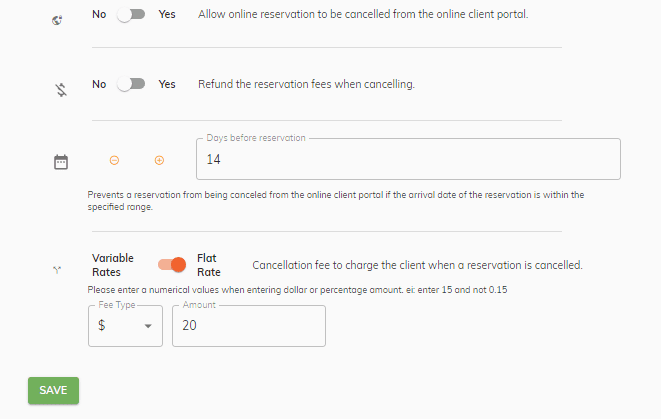
CANCELLATION RULES
This screen allows you to do the following features:
-
Allow online reservation to be cancelled from online portal – Yes or No
-
Refund reservation fees when cancelling – Yes or No
-
Prevent a reservation from being canceled from the online client portal if the arrival date of the reservation is within the specified range.
-
Cancellation fee charge – Fixed in $ or variable in %
STRIPE
Stripe account information – managed by programmer.
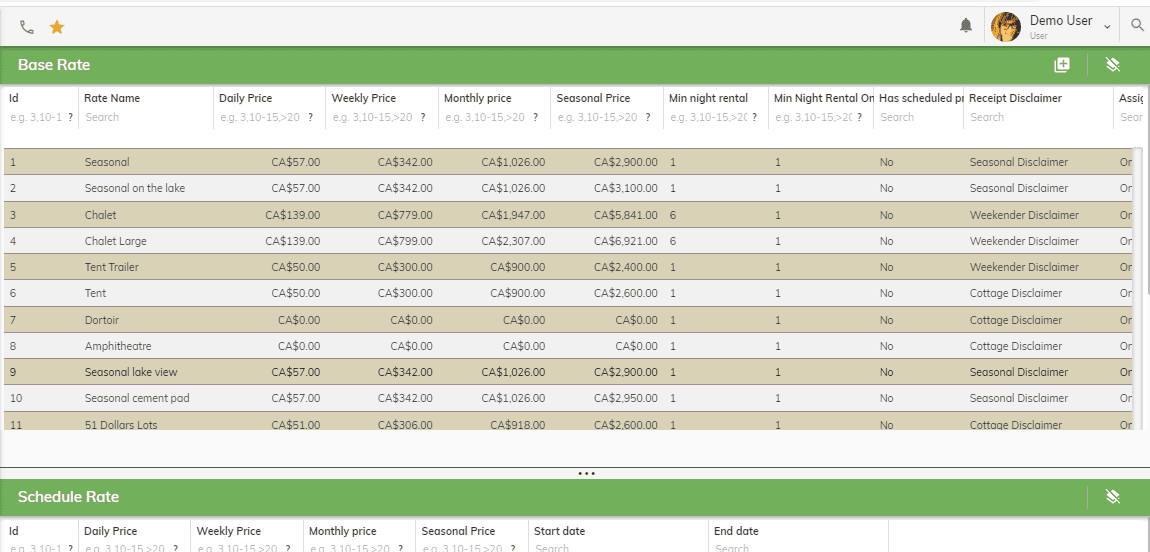
Rates
Click on Rates Icon on the left and it opens the Rates dialog screen.
Sort: any field by clicking the column title.
Search: click the search field under the column title and type what you are searching for.
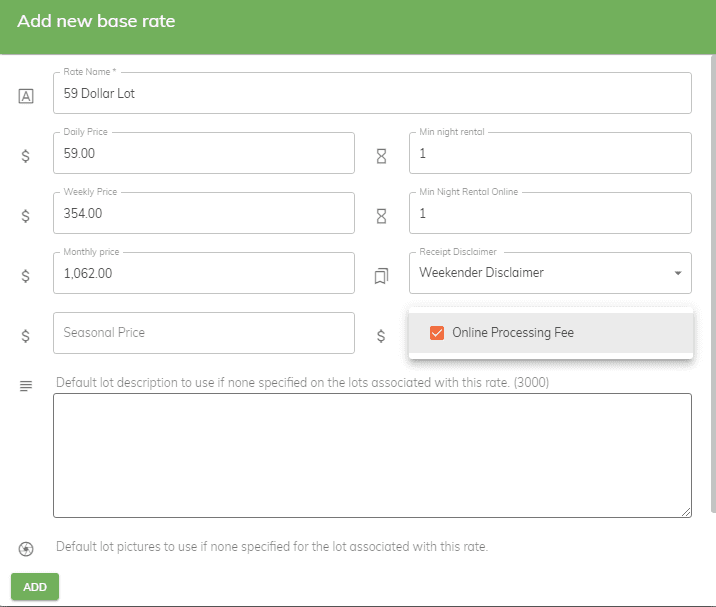
ADDING A NEW RATE
Click the
 at top right of your screen. This opens a new Rate dialog box. Enter all
information in the boxes and once done, click ADD.
at top right of your screen. This opens a new Rate dialog box. Enter all
information in the boxes and once done, click ADD.
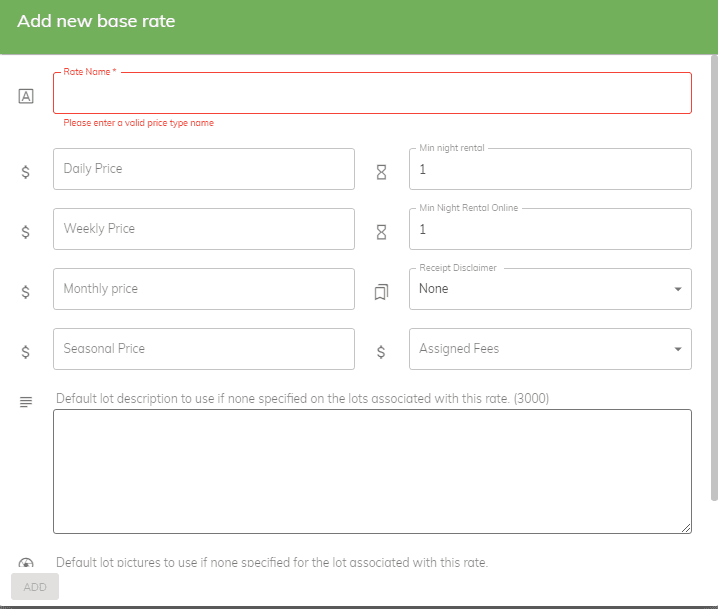
Modifications:
-
Double click on the line to be modified.
-
Opens a Edit Rate Screen
-
Make all applicable changes
-
Click Save
EXTRA
PEOPLE
Click on Extra People Icon on the left and it opens the Extra People screen. You can sort any field by clicking the column title. The Extra People Table has already been designed in the system.
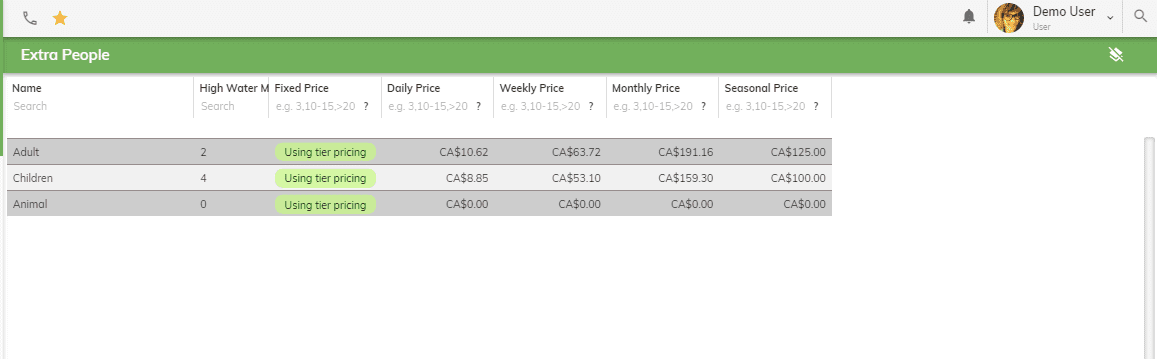
Modifications:
-
Double click on the line to be modified.
-
Opens a Edit Extra People Screen
-
Make all applicable changes
-
Click Save
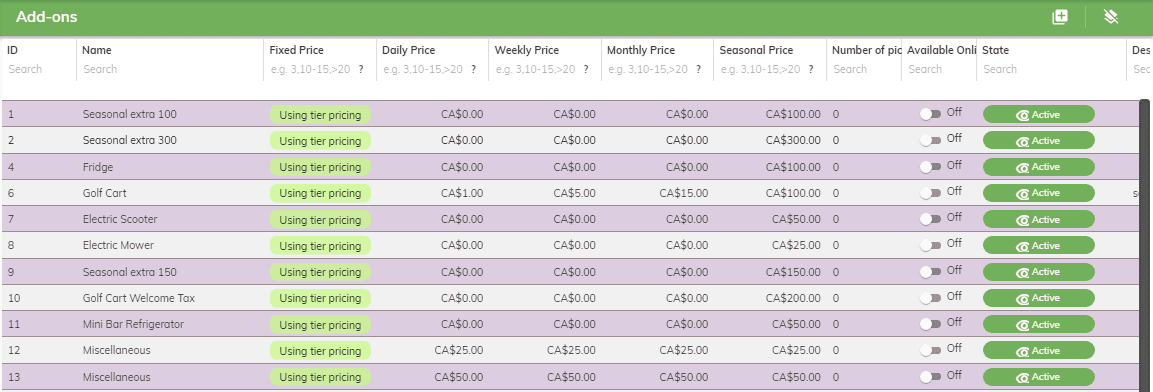
ADD-ONS
Click on Add-ons Icon on the left and it opens the Rates screen.
Sort: any field by clicking the column title.
Search: click the search field under the column title and type what you are searching for.
ADDING a new Add-on
Click the
at top right of your screen. New Add-On Box pops open. Enter all
information in the boxes and once done, click ADD.
Pricing: click the down arrow to select Fixed Pricing or Tier Pricing
-
Fixed Pricing - Add the rate in the Fixed Price box
-
Tier Pricing – add the rate in the daily, weekly, monthly and > seasonal price box
EDITING Add-on:
When you need to update a rate or description:
-
Double click on the line to be modified.
-
Opens a Edit Add-on Screen
-
Make all applicable changes
-
Click Save
FEES
Click on Add-ons Icon on the left and it opens the Rates screen.
Sort: any field by clicking the column title.
Search: click the search field under the column title and type what you are searching for.

ADDING a new Fee
Click the
at top right of your screen. New Fee Box pops open. Enter all
information in the boxes and once done, click ADD.
EDITING Fee:
When you need to update a fee or description:
-
Double click on the line to be modified.
-
Opens a Edit Fee Screen
-
Make all applicable changes
-
Click Save
TAXES

Click on Taxes Icon on the left and it opens the Tax screen.
Sort: any field by clicking the column title.
Search: click the search field under the column title and type what you are searching for.
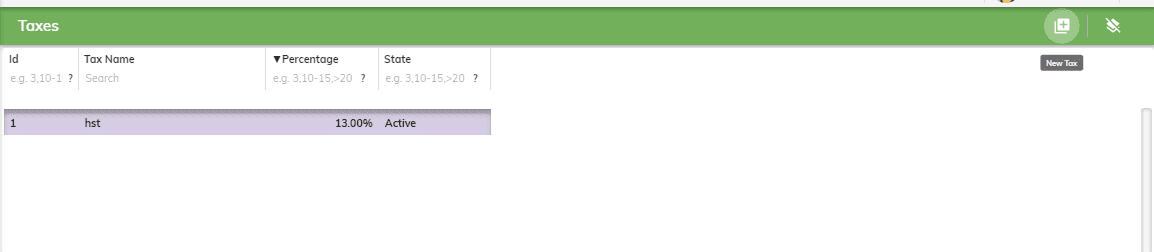
ADDING a new Tax
Click the
at top right of your screen. New Tax dialog box pops open. Enter all
information in the boxes and once done, click ADD.
New Tax Name: Keep the tax name simple: ex: HST, PST, VAT
Percentage: Add the percentage (ex: 13, 15, 7.5)
Tax State Click active (this will be used in the final calculation)
EDITING Taxes: you can edit but not recommended as it will affect all existing reservations. Create a New Tax instead.
When you need to edit a tax percentage or description:
-
Double click on the line to be modified.
-
Edit Tax dialog box pops open
-
Change tax state to Inactive
-
Click Save
Brownout
Dates
Brownout dates are used to block out online calendar dates from being selected by clients when searching for available lots. Example: long weekends
Click on Taxes Icon on the left and it opens the Tax screen.
Sort: any field by clicking the column title.
Search: click the search field under the column title and type what you are searching for.

ADDING a Brownout Date
Click the
at top right of your screen. New Brownout Date dialog box pops open.
Enter all information in the boxes and once done, click ADD.
Select the Start and End dates to block off
Make the brownout date state Active
Click Save
EDITING a Brownout Date
-
Double click on the line to be modified.
-
Edit Tax dialog box pops open
-
Make all applicable changes
-
Click Save
DELETING a Brownout Date
-
Double click on the line to be modified
-
Select the delete icon at the bottom right corner of dialog box