Configuration Panels Overview
CONFIG
Click on the Config icon at left of screen and it opens a lot information window. Click the down arrow and this opens three options.
-
Waivers
-
Emails
-
Receipt Disclaimer
-
Map Editor
WAIVERS
Click on Waivers and it opens a Waiver screen.

Waiver Icons
 New Waiver
 Reset Filters
SEARCH
You can search any document, add the name of the document in the search field under the Name field.
SORT
You can sort any column, click on the title and it will sort upwards or downwards.
New Waiver
To add a New Waiver, click on the + sign and it opens a New Waiver window.
Name Field - Place curser in the Name field and type in the Title of the Waiver / Document.

State – click on the down arrow and select Active / Not Active for the Waiver / Document.

Enter your waiver / document text here – click on the field and enter the waiver / document information. There are two options:
-
Place curser in the Enter our waiver/text here field and type or > copy the entire contents; or
-
Enter a sentence stating what you expect them to do. You can choose > some of the key words in yellow in your text message.
Age required for signature
Click the – or + button to select the age required for signature.

Ask for signature – click to activate the Ask for signature if the customer signature is required on a document.

Show attachments – click to activate Show attachments attaching one or more documents.

Place curser in the
 attachment
field. You can attach up to 6 documents in this field.
attachment
field. You can attach up to 6 documents in this field.
Any important information or acknowledgement to be typed in the Text that appears beside the agree check mark at the bottom of the form*

Once all information is entered, click the Add button.
EMAILS
Automatic emails have been set-up to be sent through Client or Admin Portals.
A Trigger is in place to send emails to clients who book online (Client Portal) or when a manual reservation is done at the office (Admin portal).
An automatic email is sent as follows:
-
Confirm a reservation
-
Confirm a payment
-
Confirm a cancellation
-
Confirm a refund
-
A English waiver is sent when a new reservation is done throught the > Client Portal (online).
RECEIPT DISCLAIMER
Click on Receipt Disclaimer and it opens the Receipt Disclaimer screen.
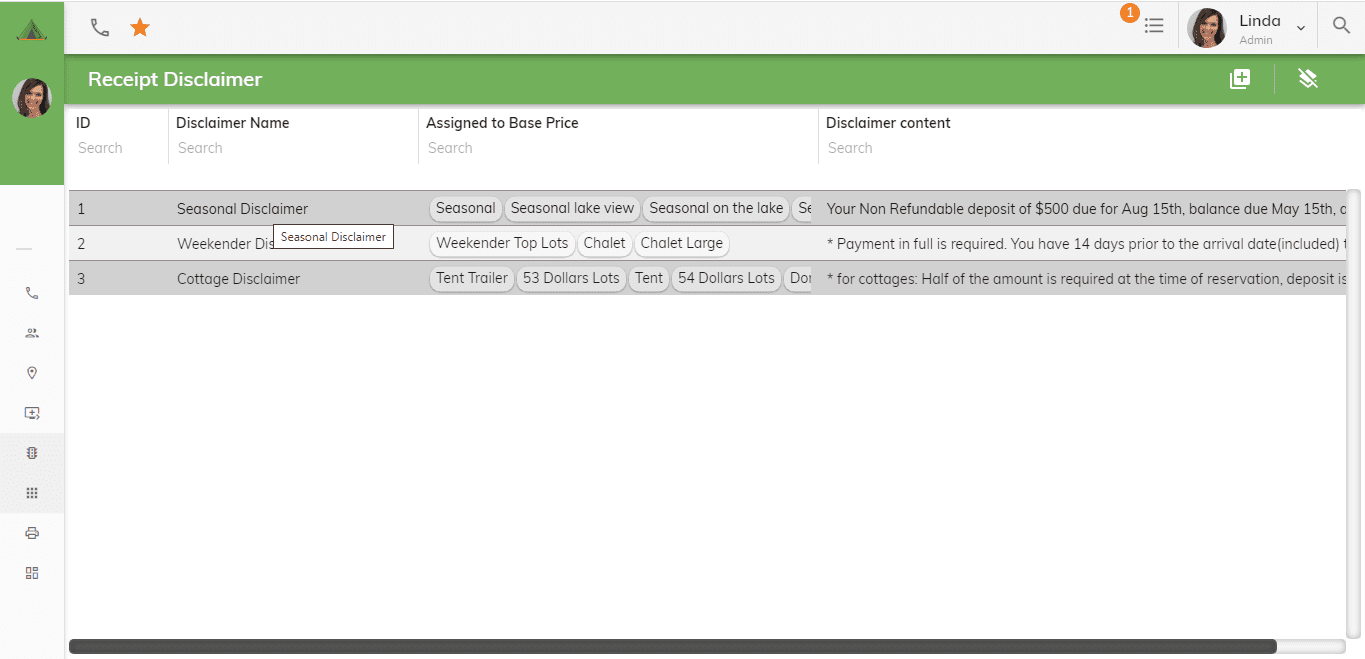
Receipt Disclaimer Icons
New Receipt Disclaimer
Reset Filters
SEARCH
You can search any document, add the name of the document in the search field under the Disclaimer Name field.
SORT
You can sort any column, click on the title and it will sort upwards or downwards.
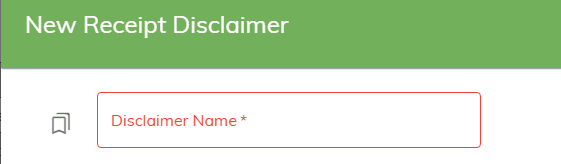
New Receipt Disclaimer
To add a New Receipt Disclaimer, click on the + sign and it opens a New Receipt Disclaimer window.
Disclaimer Name Field – click on the field and enter the Disclaimer Name.
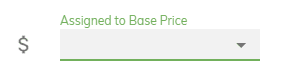
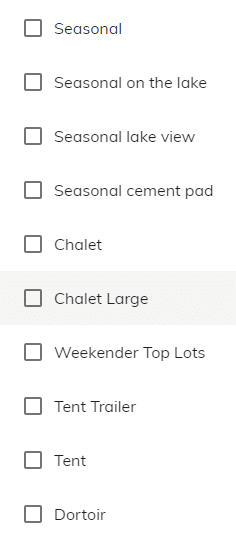
Assigned to Base Rate - Click on the down arrow and a small window pops open with the different types of sites.
Click the box of sites applicable that applies to the Receipt Disclaimer Information.
Type all information that you want to show on the receipt in the text box below.

Once all information has been entered, click ADD
Map Editor
New Lot
Reset Filters
SEARCH
You can search Lot information, add the name of the document in the search field under the Disclaimer Name field.
SORT
You can sort any column, click on the title and it will sort upwards or downwards.
New Lot
To add a new lot, click on
 sign. This opens a new screen. Scroll down the curser on right side of
screen to fill-in all fields.
sign. This opens a new screen. Scroll down the curser on right side of
screen to fill-in all fields.
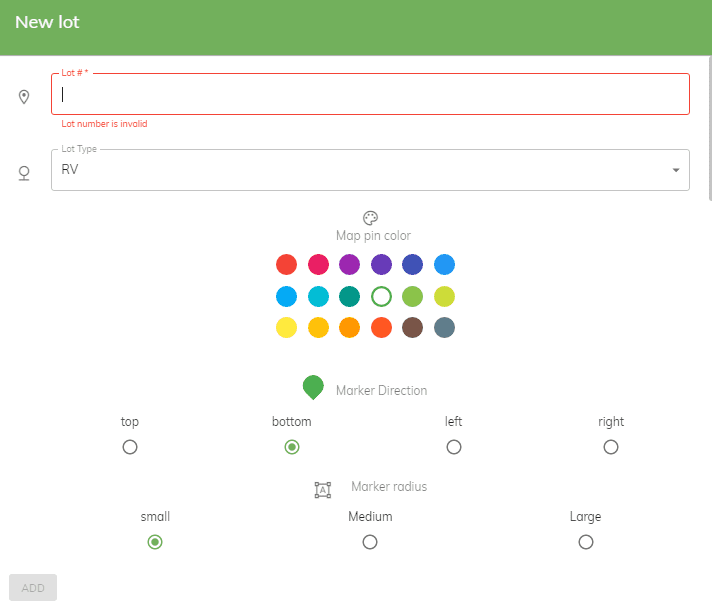
Add the lot #
Select the Lot Type (RV, Tent, Cottage, Glamping)
Select the Map Pin Color
Select Marker Direction (Top, Bottom, Left, Right)
Select Marker Radius (Small, Medium, Large)
Place the cursor in the Marker Font Size field and scroll up/down arrows to select the font size

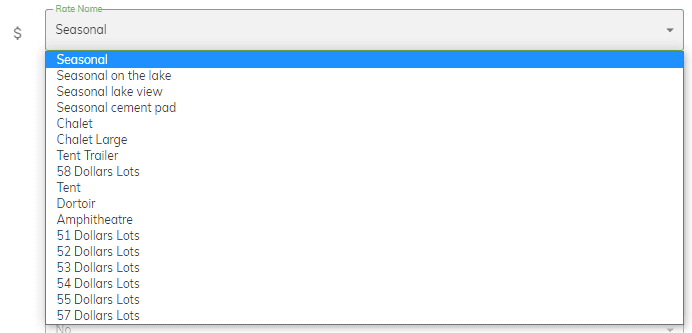
Place curser in the Rate Name field and scroll down arrows to select the name for this lot.
Place the cursor in the Width Size field and scroll up/down arrows to select the width of the lot.

Place the cursor in the Depth Size field and scroll up/down arrows to select the depth of the lot.

Place the cursor in the Water field and scroll down arrow to select the whether the lot has water or not (Yes / No)

Place the cursor in the Sewer field and scroll down arrow to select the whether the lot has sewers (Yes / No)

Place the cursor in the Electricity field and scroll down arrow to select the whether the lot has electricity (Yes / No)

Place the cursor in the Available Online field and scroll down arrow to select Yes or No.

Place the cursor in the Max Occupants field and scroll up/down arrow to select the amount of occupants for the site.

Place the cursor in the Bedrooms field and scroll up/down arrow to select the amount of bedrooms for the site.

Place the cursor in the Beds field and scroll up/down arrow to select the amount of beds for the site.

Place the cursor in the Bathrooms field and scroll up/down arrow to select the amount of bathrooms for the site.

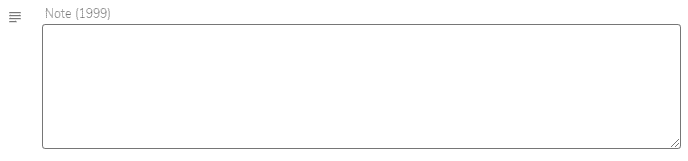
Place the cursor in the Notes field and add any notes for the site.
You can add an image for the site. Click the upload icon
 to load the image.

Once all information has been entered, click the Add button.
EDIT LOT INFORMATION
Click the row you need to edit. As you can see, if you are editing the marker color for a site, you can see it on the map.
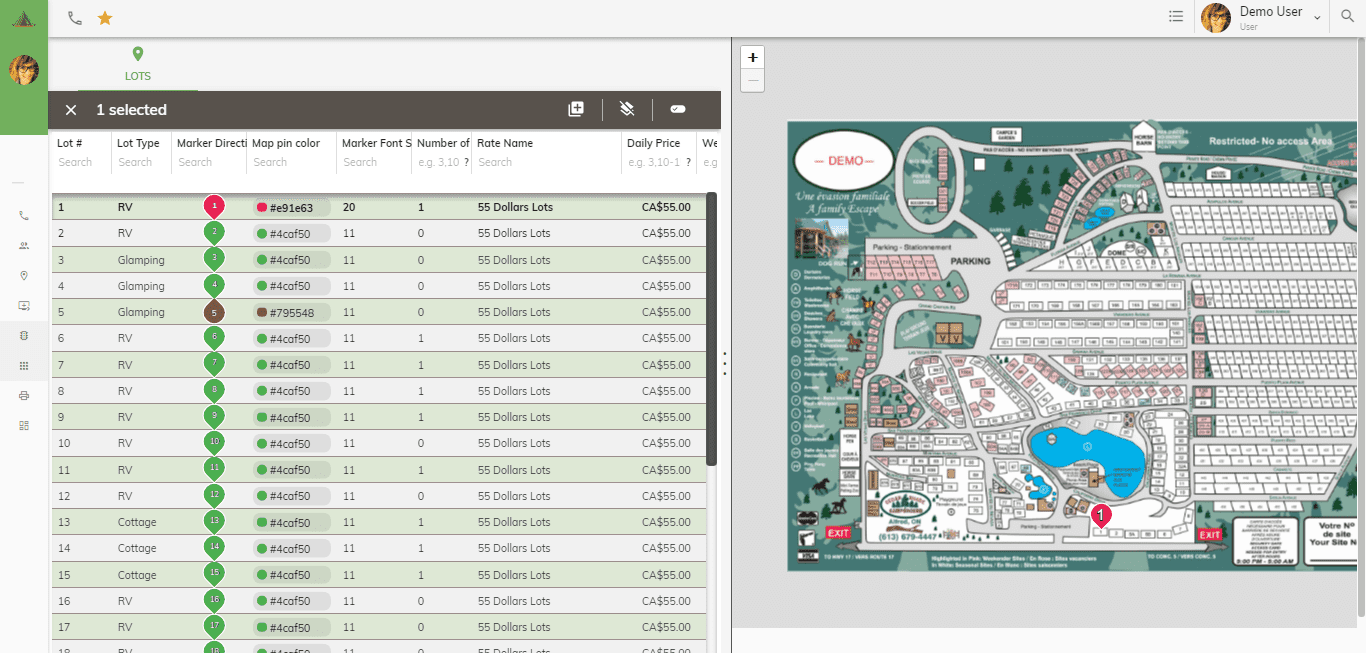
Fields that can be edited:
Lot Type
Map Pin Color
Marker Direction
Marker Radius
Marker Font Size
Rate Name - $
Width
Depth
Water
Sewer
Electricity
Available Online
Max Occupants
Bedrooms
Beds
Bathrooms
Images
Once you have edited the information, click on SAVE.